Difference between revisions of "Login Page"
| Line 1: | Line 1: | ||
=Overview= | =Overview= | ||
| + | After a [[User]] has been added to the system or they have [[Signup Page|signed up]], they will then be able to login to the system through a customizable login page. Generally, the [[username]] and [[password]] are embedded in the website. | ||
| − | + | * '''Note''': Language-specific login pages can be created and can be accessed using a drop-down when a person tries to login. | |
| − | * '''Note''': Language-specific login pages can be created and can be accessed using a drop-down when a person tries to login. | ||
:: [[File:Example of login page.png|800px|border]] | :: [[File:Example of login page.png|800px|border]] | ||
| + | In this above example, the login page consists of numerous components: an actual login section for username and password, a [[Signup Page|registration button]], a [[Configuring Privacy, Confidentiality and Other Policies|privacy and security policies hyperlink]], language options, and [[Branding]] that customizes the background, logo, and description. | ||
| − | + | =Configuration - Essentials= | |
| + | ==Branding== | ||
| + | You are able to brand your login page so that it reflects the design-based and enterprise-facing needs of your company. | ||
| + | 1. Click the 9-square menu icon on the top right of your page. | ||
| + | :: {{Icon-Menu}} | ||
| + | 2. Under the heading '''Configuration''', select '''[[Global Settings]]'''. | ||
| + | 3. Select the second tab, labelled '''Branding.''' | ||
| + | 4. Click on the hyperlink for '''Login Pages'''. | ||
| + | :: [[File:Finding login pages branding.png|800px|border]] | ||
| + | 5. The list of login pages available in your system will be listed. If no login page has been created yet, this page will be displayed as blank. | ||
| + | :: [[File:List of login pages.png|900px|border]] | ||
==See Also== | ==See Also== | ||
Revision as of 10:02, 25 June 2019
Overview
After a User has been added to the system or they have signed up, they will then be able to login to the system through a customizable login page. Generally, the username and password are embedded in the website.
- Note: Language-specific login pages can be created and can be accessed using a drop-down when a person tries to login.
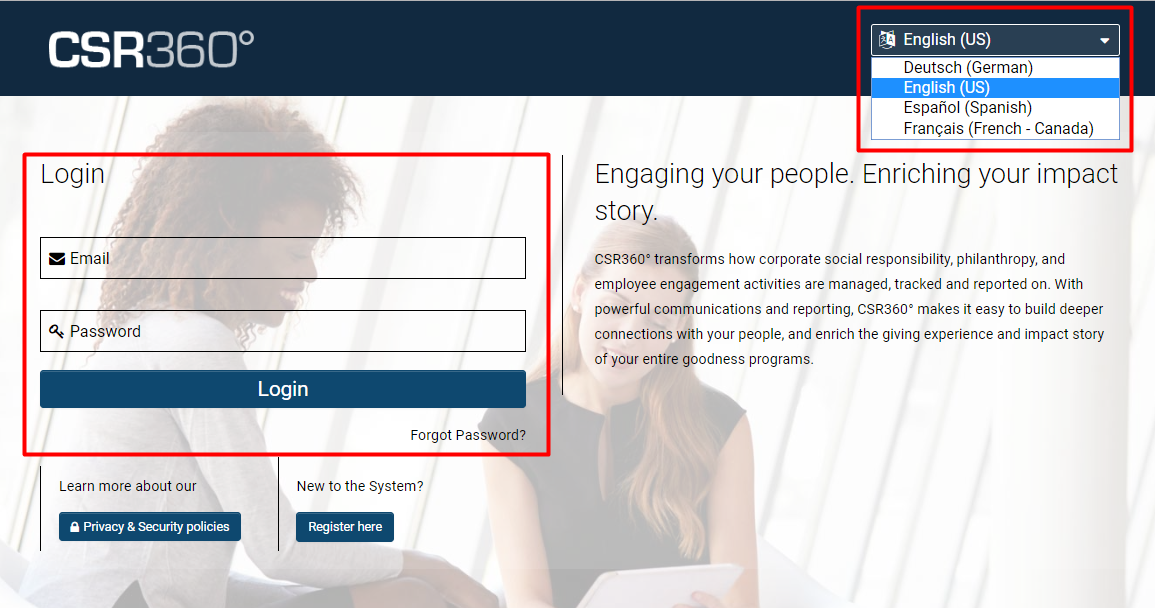
In this above example, the login page consists of numerous components: an actual login section for username and password, a registration button, a privacy and security policies hyperlink, language options, and Branding that customizes the background, logo, and description.
Configuration - Essentials
Branding
You are able to brand your login page so that it reflects the design-based and enterprise-facing needs of your company. 1. Click the 9-square menu icon on the top right of your page.
2. Under the heading Configuration, select Global Settings. 3. Select the second tab, labelled Branding. 4. Click on the hyperlink for Login Pages.
5. The list of login pages available in your system will be listed. If no login page has been created yet, this page will be displayed as blank.


