Difference between revisions of "Field Revision Annotations"
| Line 40: | Line 40: | ||
* Edit the related Status setting to allow the annotations feature to be available for records in this status. | * Edit the related Status setting to allow the annotations feature to be available for records in this status. | ||
| − | * From the related UTA, click on the ''' | + | * From the related UTA, click on the '''Settings''' icon. |
* Navigate to Level 1, 2, or 3 tab, and click on the '''Statuses''' hyperlink. | * Navigate to Level 1, 2, or 3 tab, and click on the '''Statuses''' hyperlink. | ||
* Create a new status (click on the '''+ New Status''' icon) or edit an existing status (click on the edit status icon). | * Create a new status (click on the '''+ New Status''' icon) or edit an existing status (click on the edit status icon). | ||
| − | * | + | * Go to Permissions & Availability section . |
| − | |||
| − | |||
| − | |||
The following fields from the '''Edit Status''' form are related to Revision Annotations. | The following fields from the '''Edit Status''' form are related to Revision Annotations. | ||
* '''Lock On Status''' - | * '''Lock On Status''' - | ||
Revision as of 15:59, 24 August 2016
Feature Overview
Revision Annotations is feature that allows you to add annotations at the field level and allow edits to be made to specific fields while keeping the rest of the record locked.
Flexible Status based security allows you to configure role-based permissions to allow different users the ability to add annotations to fields while others the ability to edit the field value.
Illustrated
![]()
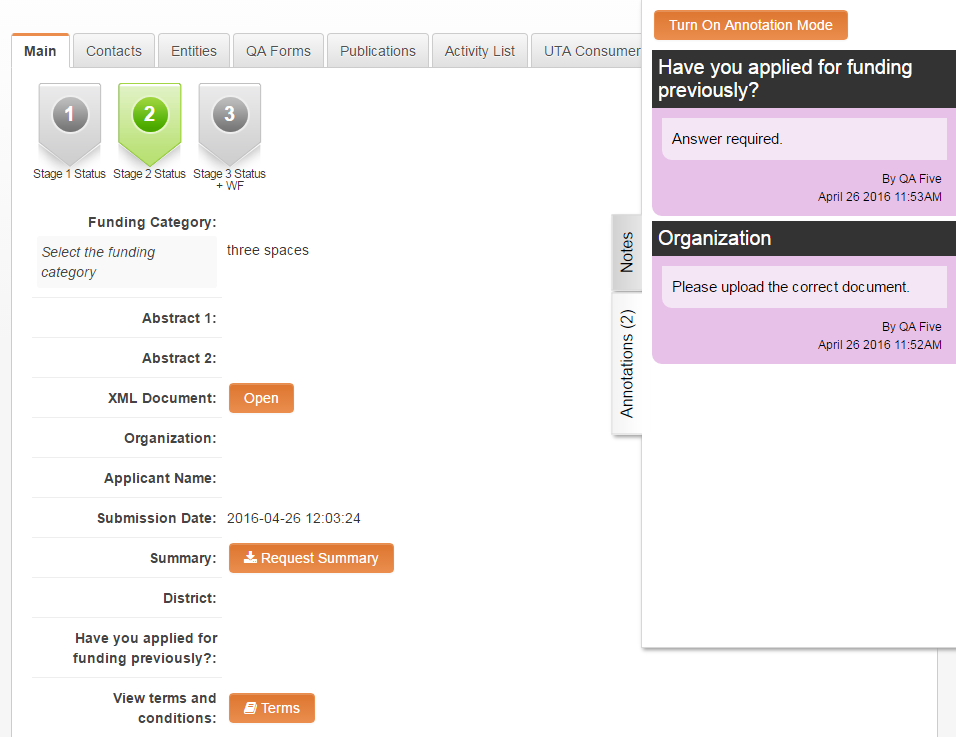
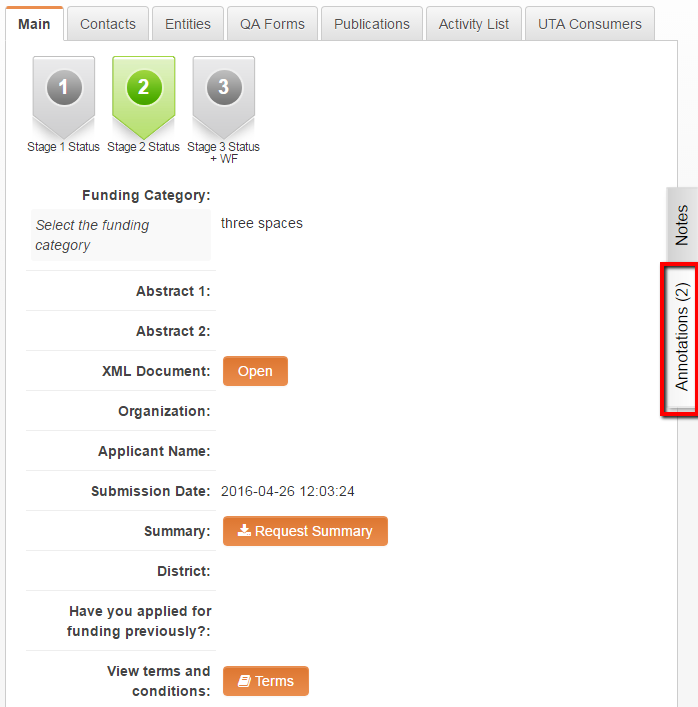
Image 1. the Annotation Tab illustrated (above).
Image 2. Example annotations displayed on the Annotation Tab (above)
Configuring Field Revision Annotations
The first step in configuring the Field Revision Annotation is to create an Annotation Type and permission it based on Roles.
You can then go to a UTA and configure Role based permissions against individual UTA Statuses to control who can view and edit the annotations, and who can modify fields in annotation mode.
Creating an Annotation Type
To use the Field Revision Annotation feature, an Annotation Type needs to be created. The Annotation Type also allows users to define role based permissions.
- Click on the Configuration menu, then select the Roles & Permissions option.<>
- The Annotation Type page is displayed.
- To edit an existing Annotation Type click on the Annotation Type line on the left panel.
- To create a new Annotation Type complete the field options listed under the New Annotation Type section. . .
- View & Create: define those roles that can both view and create this Annotation type
- View only: define those roles that are only able to view this Annotation type
- Click Save.
Configure Role based permissions against individual UTA Statuses
- Edit the related Status setting to allow the annotations feature to be available for records in this status.
- From the related UTA, click on the Settings icon.
- Navigate to Level 1, 2, or 3 tab, and click on the Statuses hyperlink.
- Create a new status (click on the + New Status icon) or edit an existing status (click on the edit status icon).
- Go to Permissions & Availability section .
The following fields from the Edit Status form are related to Revision Annotations.
- Lock On Status -
- View Annotation Role -
- View and Create Annotation Roles -
- Edit Field in Annotation Mode Roles -
Notes
- Notes Options - options are delimited by semi-colon.