Field Permission Matrix
The Field Permission Matrix allows a System Administrator to define a set of rules governing view and edit permissions. These rules are based on a combination of user role and record status. This set of rules, known as the Permission Matrix, can then be applied to multiple fields.
The Field Permission Matrix exists for two reasons:
- in order to make it easier for System Administrators to apply visibility conditions to a set of fields; and
- to increase server efficiency (rather than validating potentially hundreds of visibility conditions, when the Field Permission Matrix is used, validation takes place once and is then applied to all affected fields).
Examples of situations in which a System Administrator may want to utilize the Field Permission Matrix are:
- when there are a series of fields that should be visible to a given group of roles in one status and to another group of roles in another;
- when there are a series of fields that should be editable in a certain status and not in others; or
- any combination of the above.
Configuration
The Field Permission Matrix is configured on the main Settings page of a UTA:
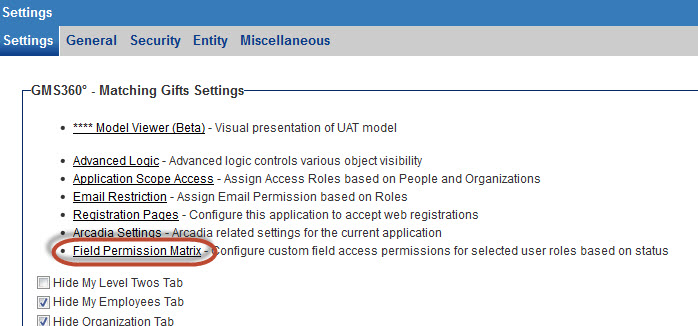
- After clicking on the "Field Permission Matrix" hyperlink on the main Settings page, the following blank page is displayed.
- Click on the "New" button to create a new Matrix.
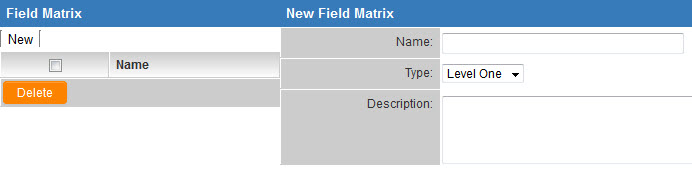
- Type in a name for your new Field Permission Matrix
- Select a "Type" (whether the Matrix will be used on Level 1, Level 2 or Level 3 custom fields.)
- The Description field is optional.
- Hit Save.
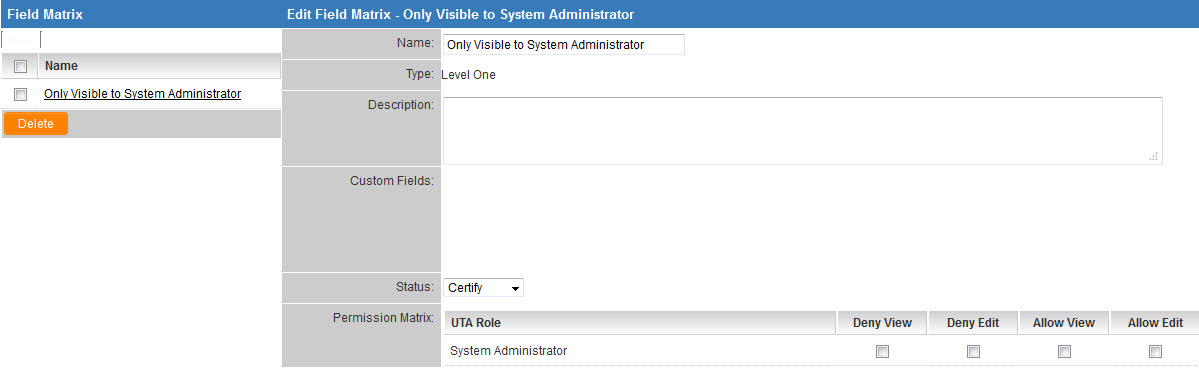
- Note that the full set of options is now visible: The Custom Fields, Status and Permission Matrix sections have appeared on the page.
- The Custom Fields section will populate when you have applied your Field Permission Matrix to your custom fields. (This happens later on, you can disregard the Custom Fields section for now.)
- The Status dropdown will display a list of the statuses available in your UTA.
- The Permission Matrix section is where you will define your rules for the currently-selected Status.
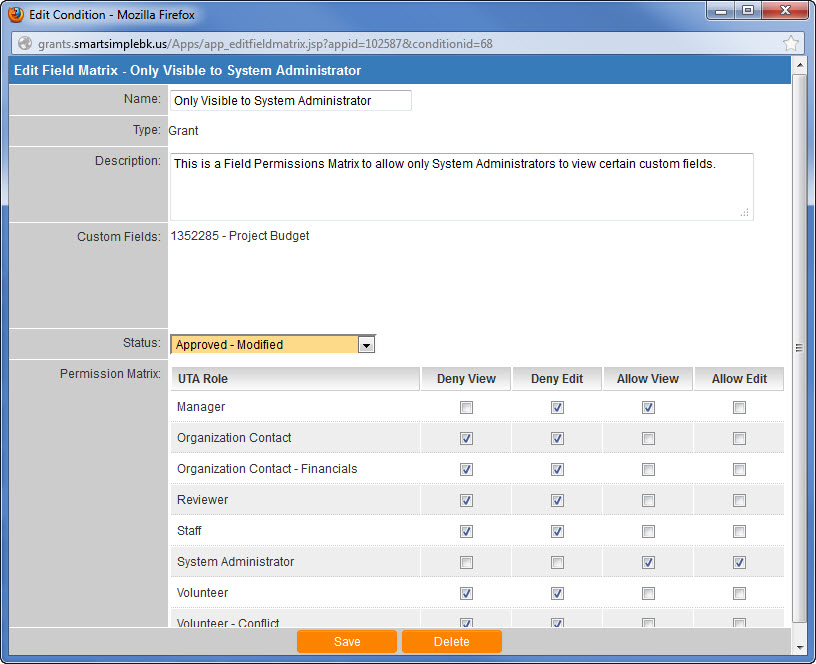
- An example is below:
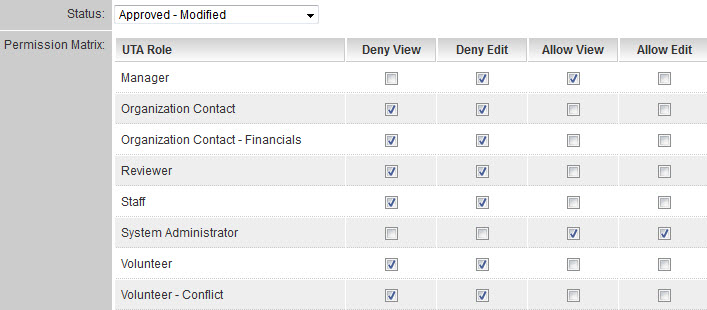
- In this example, for the "Approved - Modified" status:
- Users possessing the "Manager" role will be able to view, but not edit the fields to which this Permission Matrix is applied;
- Only users possessing the "System Administrator" role can edit and view the fields to which this Permission Matrix is applied; and
- All other roles cannot view or edit the fields to which this Permission Matrix is applied.
- Now the System Administrator will choose another status from the Status dropdown and set the rules for that status.
- The process is repeated until rules have been set for all applicable statuses.
Application to Custom Fields
Now that the Field Permission Matrix has been defined, edit a custom field for which you want the Field Permission Matrix to apply.
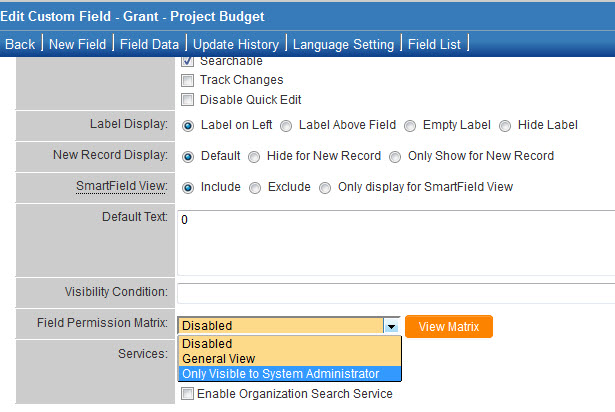
In the settings for that custom field, select your newly-created Permission Matrix from the "Field Permission Matrix" dropdown. Then save the changes to your custom field settings.
You can view the rules that have been defined for the Field Permission Matrix currently applied to the custom field by clicking the "View Matrix" button. Note that the custom field ID and name for the custom field to which the Field Permission Matrix has been applied now displays in the Custom Fields section.
System Administrators can use the Batch Update functionality to apply a Field Permission Matrix to a series of custom fields.
See Also
Visibility of Custom Fields can also be controlled using:
- Role Field Permissions
- Status Field Permissions
- Type Field Permissions
- Field Permission Matrix
- Show/Hide Header