Difference between revisions of "Creating a Contact Sign Up Page"
Paul Dimerin (talk | contribs) |
|||
| Line 1: | Line 1: | ||
| + | {| class="wikitable" | ||
| + | |- | ||
| + | |[[Image:How.png|50px|link=]] | ||
| + | |This article will explain '''how''' you can implement this feature for use on your SmartSimple system. | ||
| + | |} | ||
| + | |||
1. Click the '''Sign Up Organisation''' link. | 1. Click the '''Sign Up Organisation''' link. | ||
| Line 74: | Line 80: | ||
* [[Contact Sign Up Page Settings]] | * [[Contact Sign Up Page Settings]] | ||
| + | {| class="wikitable" | ||
| + | |- | ||
| + | |[[Image:Why.jpeg|50px|link=]] | ||
| + | |Click [http://wiki.smartsimple.com/wiki/Multiple_Sign-Up_Pages_per_Company_-_Why%3F here] to learn why this feature is a benefit to your organization. | ||
| + | |} | ||
[[Category:System Management]][[Category:Sign-Up Features]][[Category:Contacts]] | [[Category:System Management]][[Category:Sign-Up Features]][[Category:Contacts]] | ||
Revision as of 11:53, 14 January 2015

|
This article will explain how you can implement this feature for use on your SmartSimple system. |
1. Click the Sign Up Organisation link.
2. Click the Settings menu.
The menu now indicates that a company sign up exists.
3. Click the Contact Signup – No menu.
The Contact sign up page for this organisation is displayed.
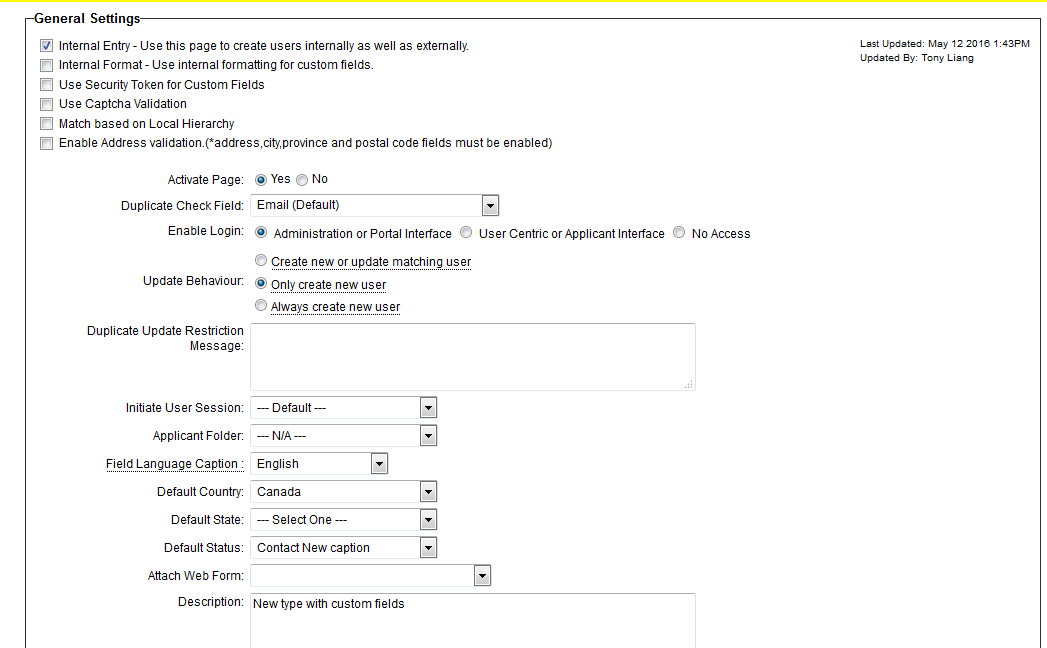
1. Set the Activate Page to Yes.
2. Set the following Mandatory and Optional fields.
3. Set the Role to Contact.
This would include any fields associated with all external contacts.
4. Click the Sample Template link for the Signup page Template.
5. Click the Sample Template link for the Confirmation page Template.
6. Click any Save button.
Previewing the Sign up Page
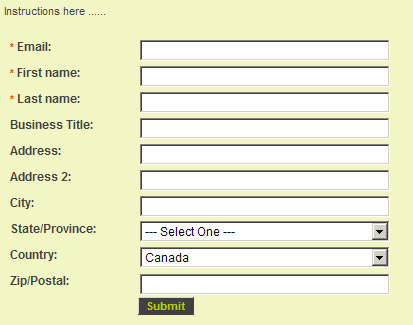
Before you activate the sign up page, you should preview and ensure that the fields and formatting are suitable.
1. Click the Preview button.
The sign up page is displayed in a separate browser window.
2. Close the Preview window.
Testing a Contact Sign up Page
You can test the sign up page by copying the sign up page URL into a new browser window and completing the form.
1. Select the address in the sign up page URL text box.
2. Press Control + C or choose the Edit Copy menu.
3. Launch a copy of your Browser.
4. Select the Address line in the Browser.
5. Press Control + V or choose the Edit Paste menu.
6. Press the Enter key.
The contact sign up page is displayed.
7. Complete the appropriate details.
8. Click the Submit button.
The Confirmation page is displayed.
9. Close this browser window.
10. Click on the Organisation, External Contacts link.
The contact is listed under the sign up organisation.
See Also

|
Click here to learn why this feature is a benefit to your organization. |


