Activating an Instance
If your instance is designated as a partner instance you have the ability to create and manage free standing instances "under" your own.
- Instances created in this manner are completely independent of your own and each can be configured as required.
- There is no commonality of users, contacts, UTAs, roles, fields, etc.
- The only way of moving data between instances is by configuring Object Synchronisation or UTA Exchange.
- You can, however, see the names of people logging into these instances through Usage Statistics reports, but for anything else you would have to log into the instance.
Contents
New Activation
Use the following steps to activate an instance:
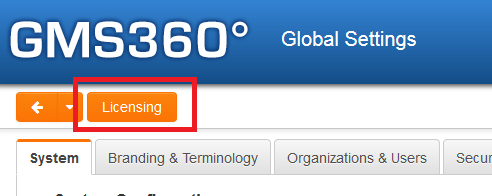
1. Choose the Configuration, Global Settings menu.
2. Click the Licensing tab.
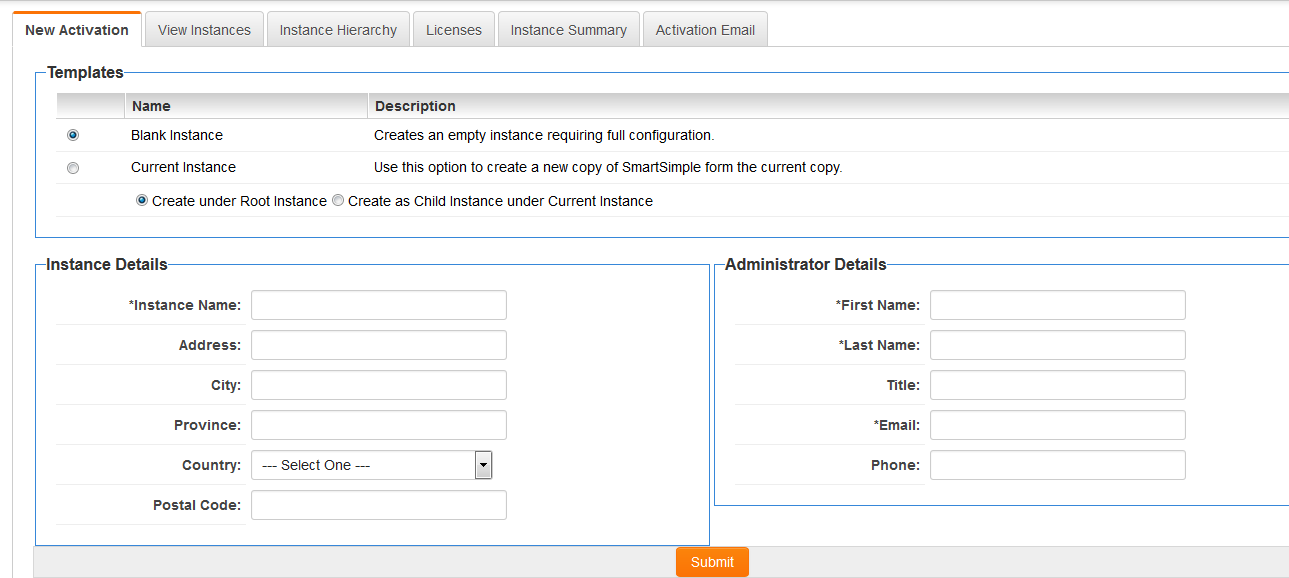
3. Click the New Activation tab.
The cloning options include:
- Blank Instance - Just an empty instance.
- Current Instance - Create a new copy using the current instance. Most structures will be cloned (some items such as list views in the UTA will not get cloned).
If a user has appropriate permissions then they will also have options to determine where the new Instance should reside:
- Create under Root instance: the new instance will be created under the Root instance, if different from the current instance.
- Create as Child Instance under Current instance: the new instance will be created under the current instance, if different from the root instance.
If a user does not have appropriate permissions then the new instance will be created under the current instance.
4. Set the Instance Name and Address details for the new instance.
5. Set the details of the Administrator (the email will be sent to the email address designated).
6. Click the Submit button.
- New instance details are displayed Client, Alias (temporary numeric), number of licenses.
- The email will be sent through the Email Agent (Gort - Email Agent status) so this process needs to be running.
- When the email arrives, note the link - this is the temporary numeric alias and the default domain (domain is not applicable).
- The system generated password will also be in the email.
- To access the new instance you can use the URL provided.
If you clone the blank template, the first thing to do when you log in is set the colour settings as there is no initial formatting. You can use Global Settings, Colours and Fonts, Reset Visual Settings to apply the "standard" SmartSimple colours.
Activation Email
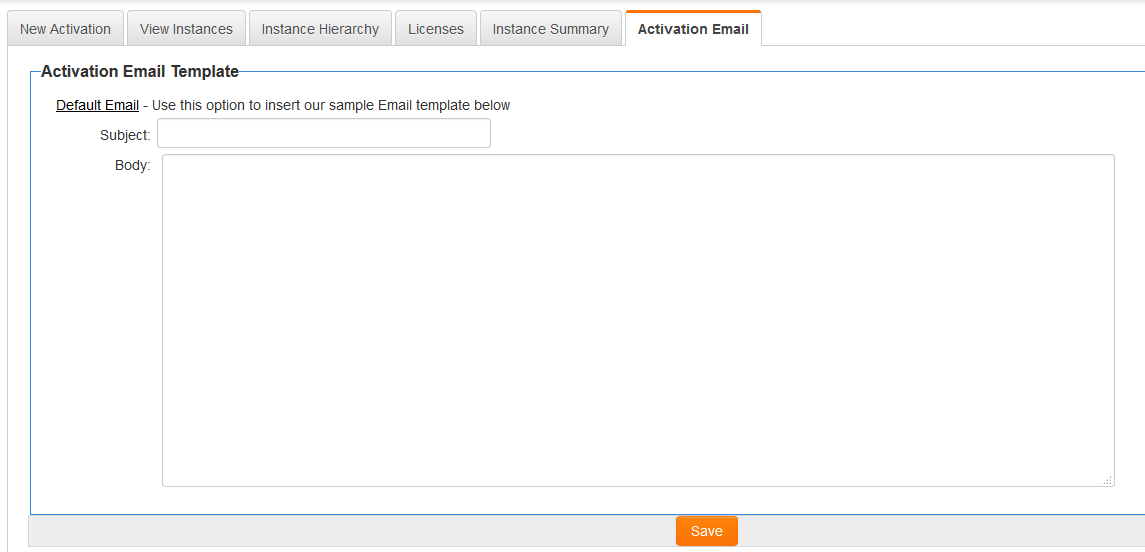
When an instance is activated an email will be sent to the email address found within the Administrator details section.
The content of this email can be configured using the Activation Email tab.
Users can click on the Default Email link if they wish to use the standard message, or can customize the Subject and Body as they wish.
Once complete then they click Save at the bottom of the page.
View Instances
Lists all instances cloned from the current instance.
Instance Hierarchy
Displays all instances related to current instance in hierarchical form.
If the current instance is cloned from another instance then these will appear before the current instance in the hierarchy.
Any instances cloned from the Current instace will appear after the current instance in the hierarchy.
Licenses
Displays details about the licensed users on the system.
Instance Summary
Lists details about the licenses and costs associated with the current instances, and any instances that sit under it.


