Work with +AI
Contents
Overview
This article is about the Work with +AI feature (also known as “Interactive Mode”) and how to use it. This feature can be helpful for a number of things such as:
- Interfacing with the AI on the record level in a conversational manner using natural language
- Providing pre-made templates and prompt libraries for end-users to standardize and expedite the processing of record data for common repetitive tasks.
In this article, you will learn how to configure and use Work with +AI. We will also explain some basic use cases that can illustrate how Work with +AI can improve your system process.
Note: You will need an OpenAI license to use AI features on SmartSimple. You must be a Global Administrator to enable this feature. Contact your account manager or sales@smartsimple.com for further information on billing and implementation.
For a general overview of the Work with +AI feature, watch this video.
To watch this video in full screen, please click on the full screen button on the bottom right.
Quick Reference
In order to reference values on a record, Work with +AI requires the use of variables. For a full list of variables that can be referenced in the system, see our Variable List page.
Configuration
Work with +AI can be enabled on any record in your SmartSimple Cloud system, including organization profiles, user profiles, and UTA records. This mode of operation occurs on a single object (such as agrant application or review). In this scenario, the user can interact with the AI using a conversational call-and-response model. The user might ask the AI to help them rewrite content, translate content into another language, or make content more concise. The user can ask questions (prompts) and follow up with more related questions. The user can also be presented with optional predefined templates to streamline common tasks and provide a layer of security.
In this example, we can configure interactive mode on a UTA to streamline the application process.
Configuring Interactive Mode
As an example, we will configure the AI on a particular UTA by the following steps:
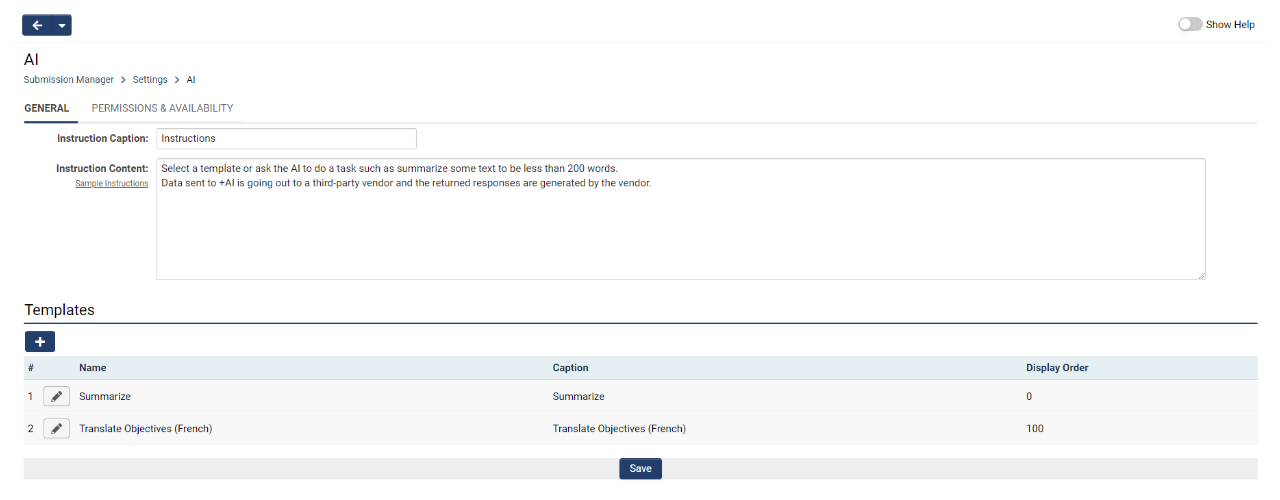
- Go to UTA > Configuration Settings > Level 1/2/3 tab > Work with +AI. On this page, custom instructions and templates can be set up.
- On the Permissions & Availability tab, set access to the feature by role, record type, or record status.
- Click Save.
Using Interactive Mode
- Navigate to the desired UTA record and select Tools > Work with +AI in the top action bar.
- This will open a modal window into which you can enter your prompts and adjust the Temperature setting.
Setting up Templates
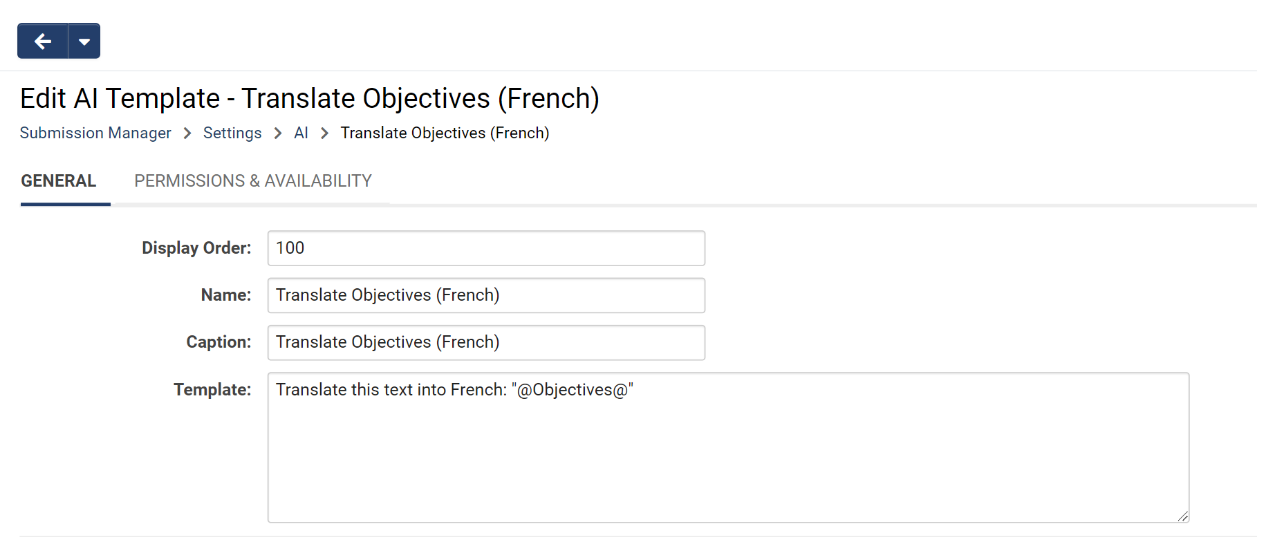
Templates can be created to streamline common processes and essentially function as a prompt library. As an example, let's set up a template that will automatically translate the objectives of a record into another language. We will use a variable to achieve this goal.
Creating a Template
- Go to UTA > Configuration Settings > Level 1/2/3 tab > AI > Click the New Template button.
- Under the General tab, give the template a Name and a Caption. The Caption is what will be surfaced to users during template selection.
- Enter the template contents in the Template field. When referencing specific record fields, be sure to use the Field Name rather than the Caption. In our example, we can ask the AI to translate the content of a specific field into French by referencing the field name in quotations.
- Set who has access to use this template under the Permissions & Availability tab.
- Click Save.
Selecting a Template Prompt
- Go to the desired UTA record > Tools > Work with +AI.
- Select the desired template prompt from the list
- Set the desired Temperature. This setting controls the level of randomness desired from the AI's response. A lower number correlates to a more consistent and repeatable response.
- Click the Send button. After a moment, the AI will respond to the request.
Best Practices for Template Prompts
When deciding which prompts to use in a template, it can be helpful to test the variables by going to any UTA record and clicking Tools > Configuration Mode > Variable Syntax Helper. Here, you can test your expressions and see if your variables resolve correctly.
Some best practices for prompt engineering according to OpenAI are:
- Put the instructions at the start of the prompt and use double quotation marks ( " " ) to separate the instructions from the context
- Be specific and descriptive about the desired outcome, including details about context, length, format, style, etc
- Provide an example or desired format in the prompt if necessary
Accessing AI Chat Log
After logging a few sessions with the AI, you may want to access a previous chat log. To do this, go to the record in question and click Logs > AI Chat History in the top action bar. This will show you a list of the previous chat sections ordered by date and time. Click the View button on any chat session you want to read in detail.


