Create and Direct Users to Language Specific Login Pages

|
This article will explain how you can implement this feature for use on your SmartSimple system. |
Overview
Based on the language parameter entered users can be directed to a language specific login page.
Global Administrator privileges will be required to setup this feature.
How to implement it?
1. Under the configuration tab, click on Global Settings.
2. In the Branding & Visual Settings section, click on the Login Screen Content hyperlink.
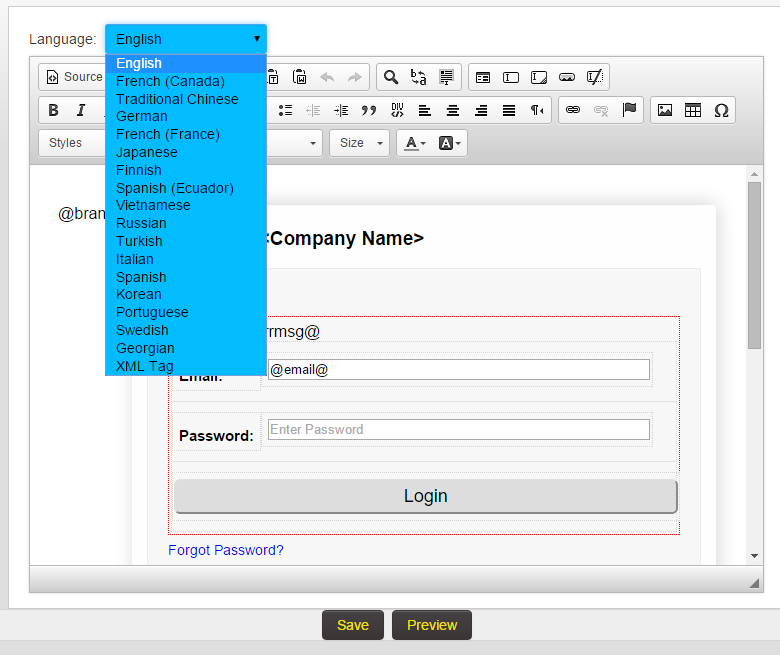
3. At the top of the Login Screen Content page you will see the Language drop down option.
4. Selecting the appropriate language from the list will generate a new login page builder for the selected language.
5. Configure the Login Screen Content to your requirements (including text in the specified language)
6. Click on the Preview button at the bottom of the page to review the content, and click Save when finished to save the Login Screen Content.
Notes
- When linking to a language specific login page, add the appropriate language parameter to the login page url to direct the user to the appropriate page.
- If no parameter is added the user will be directed to the English version.
- Example using lang=14: https://neworg.smartsimple.com/s_Login.jsp?lang=14&prole=0
Language IDs
| English | 1 |
| French (Canada) | 2 |
| Traditional Chinese | 3 |
| German | 4 |
| French (France) | 6 |
| Japanese | 7 |
| Finnish | 8 |
| Spanish (Ecuador) | 9 |
| Vietnamese | 10 |
| Russian | 11 |
| Turkish | 12 |
| Italian | 13 |
| Spanish | 14 |
| Korean | 15 |
| Portuguese | 16 |
| Swedish | 17 |
| Grorgian | 18 |
| XML Tag | 99 |
