Enabling the People Search Features in the UCI
If you wish to use the UCI to create a community of people you can enable the Network tab – Tab 3 and provide the user with the ability to subscribe to different interest groups and locate other users in those groups.
This feature takes advantage of the Applicant Tracking Application within the SmartSimple framework. The applicant folders within that application are used to store the user’s group affiliations.
Contents
Activating the Applicant Tracking Application to enable User Groups
In this section you will activate the Applicant Tracking Application, solely for the purpose of access to the folders feature. Two steps are required:
- Activating the application.
- Setting the manager permission.
1. Click Organisation, Internal Users.
2. Click the Root Company.
3. Click the Settings, Applications menu.
4. Check the Applicant Tracking application check box.
5. Click the Subscribe applications to this company and all related sub companies option button.
6. Click the Save button.
7. Choose the Configuration, Roles & Permission menu.
8. Click Manager Permissions.
9. Click the permission Applicant Tracking Manager.
10. Set the Manager role to a role that is in your profile.
11. Click the Save button.
You can now return to the User Centric Interface and set up the groups required.
Creating Folders
1. Click the Configuration, User Centric Interface menu.
2. Click the Folders link.
No folders currently exist.
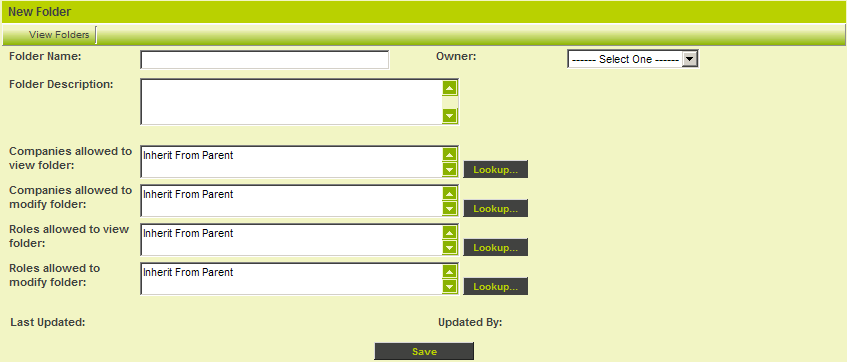
3. Click the New Folder link.
The New Folder window is displayed.
4. Set the Folder Name to Project Management.
5. Set the owner to your own name.
6. Set the Roles to view and Roles to modify to the Everyone role.
7. Click the Save button.
8. Repeat this process to create a folder named Process Improvement.
9. Review the Folder list.
You will now return to the UCI and enable Tab 3 the networking tab.
Setting up Tab 3 to access Folders
1. Choose the Configuration, User Centric Interface menu.
2. Select the Employee Centric Interface.
3. Scroll to the Navigation Terminology section.
4. Set the Tab 3 name to Network.
5. Click the Save button.
The Network Settings section is displayed.
6. Click the Search Configuration link.
The Search Configuration page is displayed.
Search Configuration Page Sections
This page consists of five sections.
People Folders
- Select the folders that you wish users of the interface to be able to subscribe to.
Search Field Mapping
- Choose the field that you wish the user to be able to search for other users and set the label for each field.
- You can specify standard, custom and transaction based fields for searching.
Field List
- Provides a list of fields that can be used in the Search People feature to populate the People List template and the People Details template.
People List Template
- The fields and HTML formatting used to define the look of the list of people retrieved by a user search.
People Details Template
- The fields and HTML formatting used to define the look of individual user details displayed when the users click on a link in the People List.
1. Select both People Folders.
2. Set the search fields as shown below.
3. Set the People List Template as shown below.
4. Set the People Details Template as shown below.
5. Click the Save button.
Reviewing the Searching Feature
1. Switch to the UCI Interface.
2. Refresh the browser window.
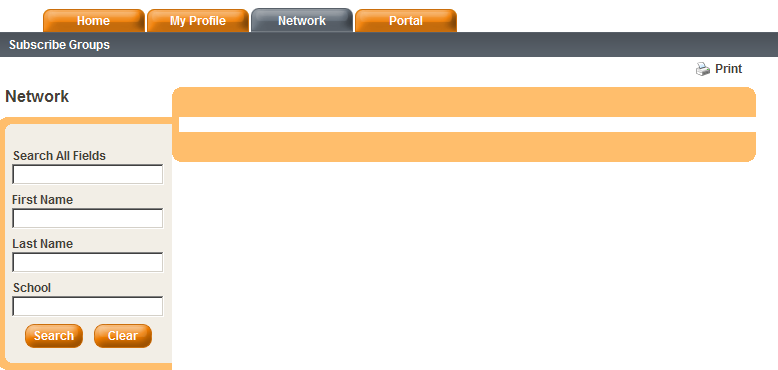
The Network tab is displayed.
3. Click the Network tab.
- The Search options consists of the Search All Fields option – to search any field the user is permissioned to see plus the fields that you selected for searching, first name, last name and school.
The wildcard used for these searches is an asterisk – “*”.
- The Introduction page is blank as you have not set any text for this page.
- The Subscribe Groups link will display the group folders that you established.
- You will only be able to locate people in groups that you have joined.
4. Click the Subscribe Groups link.
5. Select both groups.
6. Click the Save button.
7. Click the Network tab.
As you are currently the only person in either group as there are no other records to find.
8. Set the First Name field to *.
9. Click the Search button.
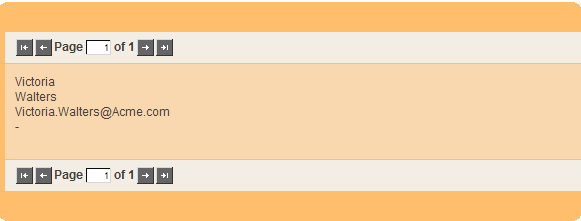
The records (one) meeting the criteria are displayed in the People List Template.
The link field to display the People Details Template is set to the last name field.
10. Click the Last Name field.
The record is displayed in the People Details template.
11. Click the Logout button.
Other Features of the UCIF
In addition to the features discussed in this article the UCI can be used in conjunction with the Universal Tracking Application to status and update projects. This work is performed through:
- Tab 4 provides access to the UTA level 1 items.
- The user’s Personal Transaction – if it is appropriate to link these types of transactions to UTA level 1 items.


