Submit & Save Buttons
There is now the ability to define multiple submit buttons against individual statuses within a UTA.
The buttons can also be configured so that they are presented to subsets of users, perform certain checks and can push the event to a specific status.
Creating a Submit Button
To access the Submit Button feature:
1) Click the Settings tab within the UTA, then on the Statuses link in either the Level 1 settings section, or Level 2 settings section.
2) The Submit Button tab is displayed next to the Status Trigger tab.
3) Click on the Submit button tab or scroll down to the Submit Buttons section. Then click on the New tab to begin the process of adding a new Submit button.
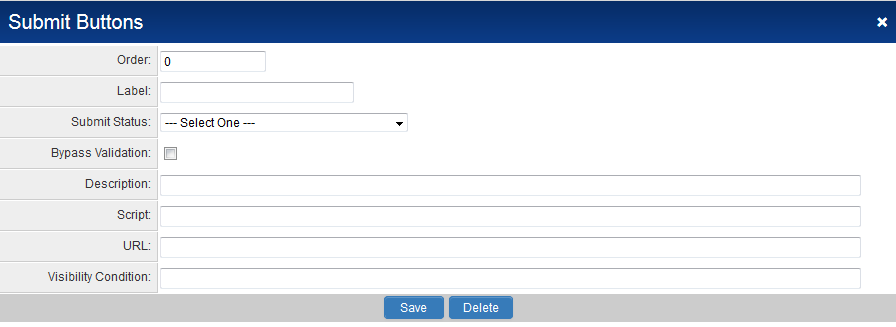
4) You will be presented with a new window in which to configure the submit button.
This window includes the following settings:
- Order - the order in which the button will appear on the screen, with lower numbers appearing further to the left of the screen.
- Label - the text that will appear on the button when exposed to end users.
- Submit Status - the status that the entity should be updated to after clicking on the button.
- Bypass validation - flag to indicate that the status should change without the system performing all field validations.
- Description - descriptive text.
- Script - call to any scripts that should be run in conjunction with this button.
- URL -
- Visibility Condition - any conditions used to control when the button is exposed.
5) Click Save once you have configured the Submit button.
6) The Submit button should be listed in the Submit Buttons section.


