The Message Center and Message Templates
Contents
Overview
The Message center is used to display pre-defined message templates in order to simplify the creation of an email message and to streamline the emailing process.
Accessing the Message Center
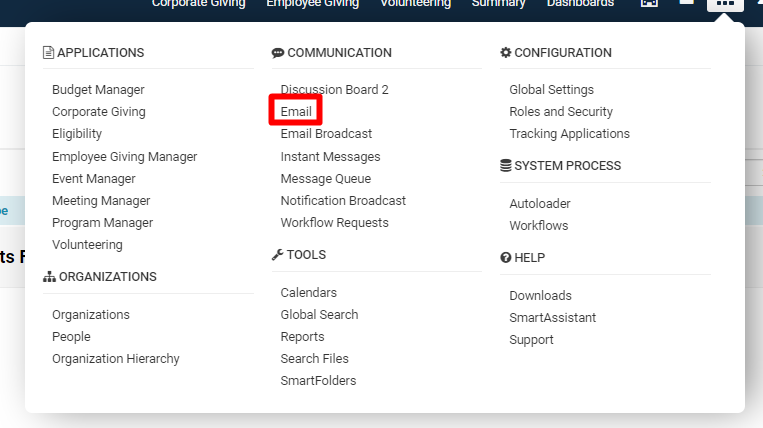
1. Click the 9-square menu icon on the top right of your page.
2. Under the heading Communications, select Email.
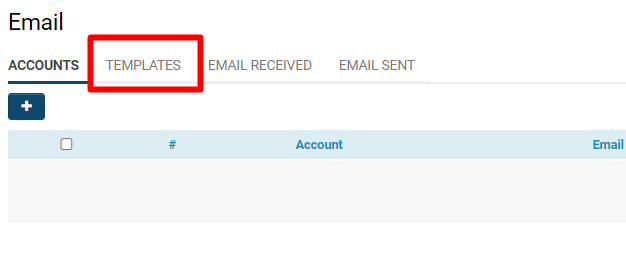
3. Click into the second tab labelled Templates.
Any templates that are already available to the system will be listed. Click the pencil icon on the left of the name of the template if you would like to edit that specific template.
Creating a New Message Template
When you have opened into the list of message templates, you are able to create a new message template.
1. Click the + icon on the top left, above the list of templates.
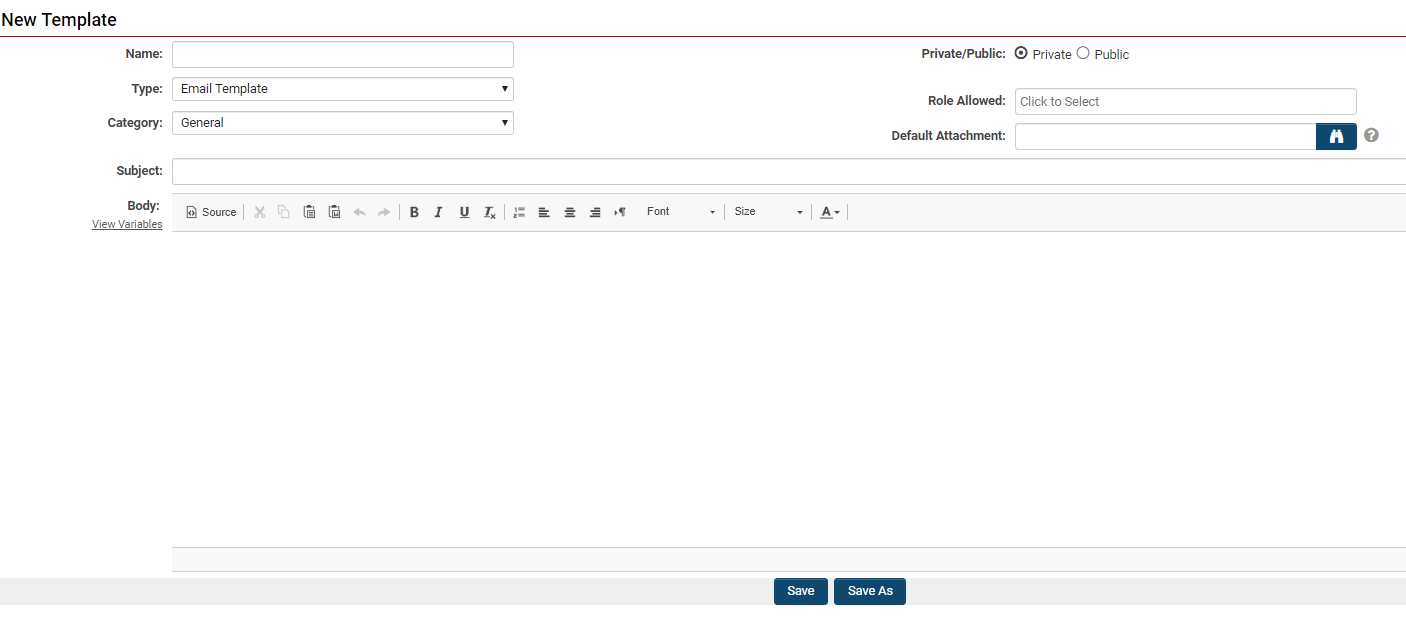
2. Fill out the form fields to create a new email template.
| Name | |
| Type | |
| Category | |
| Private/Public | |
| Role Allowed | |
| Subject | |
| Default Attachment | |
| Body |
View Variables - Font/Content Modification - |
The following options are available:
- Name - Template name as it will appear in the template list
- Type - Two types are available: Email Template and Email Signature. Each user can have an Email signature that will be automatically appended to the bottom of each message that they create.
- Category - You can select one of the following options:
- General – Email Template will be available in all contexts
- UTA Level 1 – Email Template will only be available when sending an email from a UTA Level 1
- UTA Level 2 & 3 – Email Template will only be available when sending an email from a UTA Level 2 or Level 3
- Contact – Email Template will only be available when sending an email from a contact record
- Private/Public - If you are in a role with manager permission to create global templates, then you can use this option to create a template that can be used by everyone in the organisation. This option is not visible to people that do not have this manager permission.
- Role Allowed - Lookup to select the roles allowed to use this Email Template.
- Default Attachment - A file contained in a SmartFolder can be selected as a default attachment to emails of a particular email template.
- Subject - The subject line of the template.
- Body - The body of the message. All types of formatting are supported. You can copy and paste information from other programs (including images) into the body window.
Creating a Signature
A signature template is used to add your signature to the bottom of the email message.
1. Click the New Template tab.
2. Change the Template type to Email Signature.
3. Set the Name to My Signature.
4. Add the Signature to the body.
5. Click the Save button.


