Association Settings
Introduction
The Association feature provides the ability to link a single contact to multiple organizations. This feature is required to match real-word situations such as:
- A contract is the Executive Director of one organization but a board member at several other organizations.
- A contact is a professor at a university and a consultant at a hospital as well as the CEO of a start-up company.
- A contact is an individual artist but a collaborator in multiple arts collectives.
The relationship between the contact and the associated organization is control by Role. So when you view a contact you will see all the organizations they are associated with as well as the role at each organization.
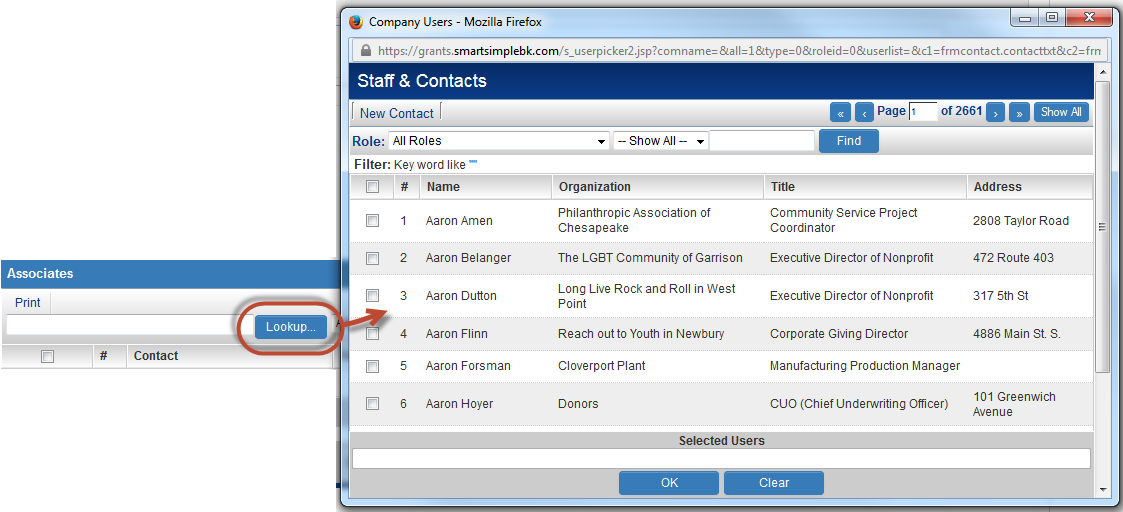
An Associations tab can be displayed on a company record to show associated people and on a contact record to display the companies that they are associated with.
Contents
Configuring Associations
The steps for configuring are as follows:
- Enable Association feature
- Create List Views
- Configure Associations tab on Org Profile, including Lookup and Assignment Roles
- Configure Associations tab on User Profile, including Lookup Categories
- Enable Date Range for Associations (optional)
- Enable Switch Organization feature (optional)
Enable Association feature
The feature is accessed through the Global Settings - Organizations & Users tab.
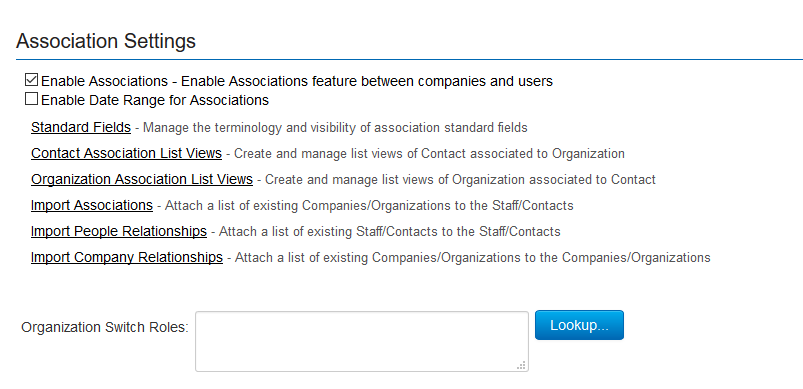
- Check the box beside the Enable Associations setting.
- Additional Association settings are exposed.
- Click Save at the bottom of the page.
Create List Views
The List View settings on this page allow System Administrators to define the list views for Associated records on different profiles.
The Contact Association List View settings will control how the list of Associated Contacts will appear when viewed from inside an Organization profile.
The Organization Association List View settings will control how the list of Associated Companies will appear when viewed from inside a User profile.
See Configuring List Views for instructions.
Configure Associations tab on Org Profile, including Lookup and Assignment Roles
The Association tab appears on the Company Profile once the corresponding standard field is enabled.
The steps for enabling the Association tab are as follows:
- Go to Global Settings - Organizations & Users tab
- Go to Company & Organization Settings and click on Standard Fields
- Click on the Edit option for the Associations Standard field
- Click Save. The Associations tab is now enabled.
The Standard field also controls the Lookup Roles and Assignment Roles used within the Associations tab.
Lookup Roles
Lookup roles allows System Administrators to delimit the roles that are returned when Associations are selected. Only those users in the roles selected in Lookup Roles will be selectable from the contacts lookup.

The steps for configuring the Lookup Roles are as follows:
- Use the Lookup Scope radio buttons to specify whether the list of users are restricted to internal users, external users or both.
- Click on the Lookup button to the right of the Lookup Roles field.
- The Roles pop-up should appear. Populate checkbox for those roles to be returned when associated users are selected.
- Click OK to close Roles pop-up. The selected roles should appear in the Lookup Roles field.
- Click Save at the bottom of the page.
Assignment Roles
Assignment Roles allows System Administrators to delimit the roles with which contacts can be associated with an organization. Only those roles selected in Assignment Roles will be able to be selected from the Role dropdown when associating a contact to an organization.
The steps for configuring the Assignment Roles are as follows:
- Click on the Lookup button to the right of the Assignment Roles field.
- The Roles pop-up should appear. Populate checkbox for those roles used when associating contacts with an organization.
- Click OK to close Roles pop-up. The selected roles should appear in the Assignment Roles field.
- Click Save at the bottom of the page.
Configure Associations tab on User Profile, including Lookup Categories
The Associations tab appears on the Contact Profile once the corresponding standard field is enabled.
The steps for enabling the Associations tab are as follows:
- Go to Global Settings - Organizations & Users tab
- Go to Staff & Contact Settings and click on Standard Fields
- Click on the Edit option for the Associations Standard field
- Click Save. The Associations tab is now enabled.
The Standard field also controls the Lookup Categories used within the Associations tab.
Lookup Categories
Lookup categories allows System Administrators to delimit the categories that are returned when associated organizations are selected. Only those organization in the categories selected in Lookup Categories will be selectable from the organization lookup.
The steps for configuring the Lookup Categories are as follows:
- Use the Lookup Scope radio buttons to specify whether the list of organizations are restricted to internal organizations, external organizations or both.
- Click on the Lookup button to the right of the Lookup Categories field.
- The Categories pop-up should appear. Populate checkbox for those categories to be returned when Associated companies are selected.
- Click OK to close Categories pop-up. The selected categories should appear in the Lookup Categories field.
- Click Save at the bottom of the page.
Enable Date Range for Associations (optional)
When you configure Associations you have the option to enable a date range. This will allow a start and end date to be entered when creating Associations.
A daily automated process checks the company-user associations and if it finds any with end dates that have passed and where the status isn't Expired then it will expire them.
The steps for configuring the date ranges are as follows:
- Check the box beside the Enable Date Range setting.
- Click Save at the bottom of the page.
- Click on the Standard Fields, access the Start or End Date standard fields.
- Click Save. The Date standard fields is now enabled.


