Custom Field Import Wizard
System Administrators are able to import custom fields and associated settings within any Custom Field Settings page.
Each Custom Field settings page, whether UTA, contact or company specific, will have the Text Import tab.
Contents
Overview of how to use Custom Field Import Wizard
The import process consists of the following steps:
1. Enter information into the Import Wizard.
2. Map the fields in the pasted data to custom field settings.
3. Validate the information mapping before uploading.
4. Upload the data to SmartSimple.
Enter information into the Custom Field Import Wizard
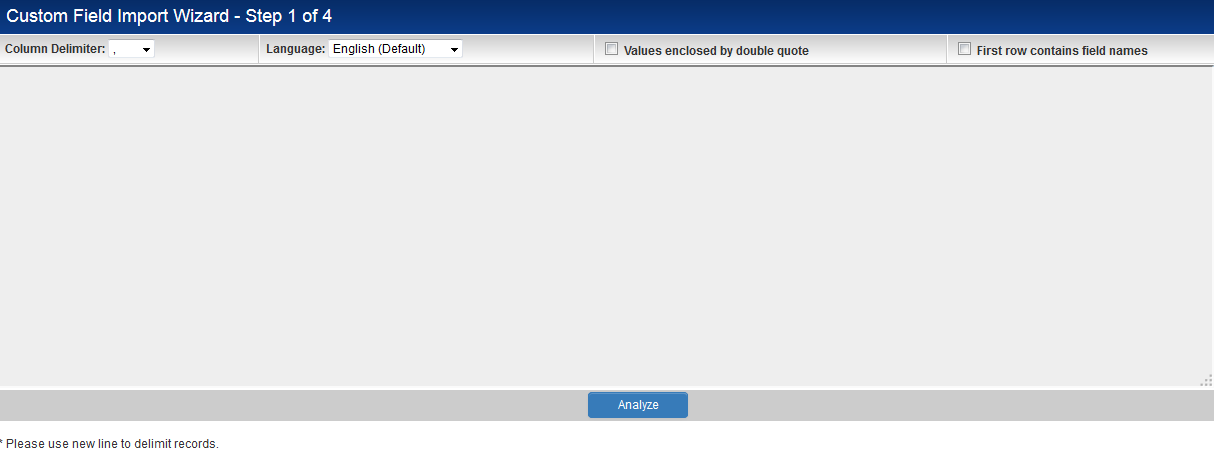
- Click on the the Text Import tab within the relevant Custom Field settings page, whether UTA, contact or company specific, to access the Import Wizard screen. Step 1 of the Import Wizard is displayed.
- If you wish to paste text into this field then click the mouse in the import text box, and then select the Edit Paste menu or press Control + V. Alternatively you can type directly into the field.
- As a minimum requirement you should enter a Display Order value, a Field Type and a Field Name value.
NOTE: Some of the Custom Field settings can only be imported using IDs rather than the displayed values. These are discussed further in the Custom Field Settings section below.
- Once all the relevant field data is enter then you set the Column delimiter as required.
- Click the First row contains field names check box if the first row is column headers rather than real data.
- Click the Values enclosed by double quote check box if the first row is the values being imported include any that are enclosed in double quotes.
- Click the Analyze button.
Map the fields in the pasted data to custom field settings
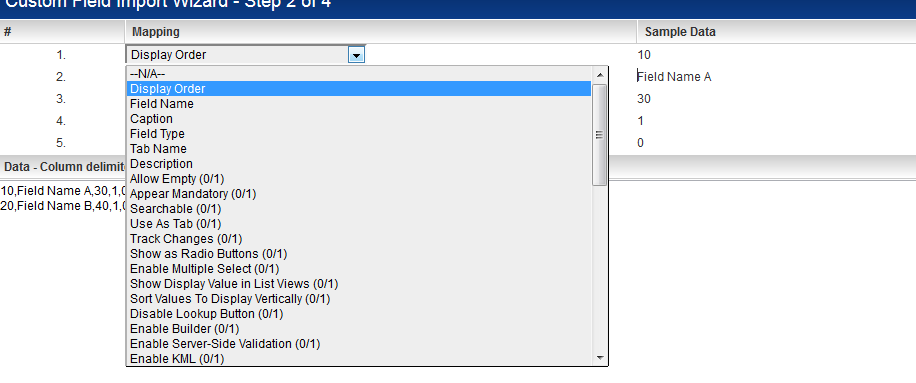
- Step 2 of the Import Wizard should now be displayed.
- The top of the screen includes an option to map each column in the entered data with a corresponding custom field settings.
NOTE: Only the first row of data is used to define the mappings, but the settings are applied to all rows of data.
- Define the mappings between the entered data and the custom field settings as appropriate.
- Click Parse Data button at the bottom of the screen.
Validate the information mapping before uploading
- Step 3 of the Import Wizard should now be displayed.
Custom Field Settings
Custom Field Type Numeric Values
The following IDs should be used when trying to create a custom field for that type.
| Custom Field Type Name | Custom Field Type ID |
|---|---|
| Creation - Date | 55 |
| Display Only - External Entity Details | 96 |
| Display Only - Image | 34 |
| Display Only - Tabbed Web Page View | 112 |
| Display Only - Text or System Object | 36 |
| Display Only - Web Page View | 110 |
| Dynamic Data - Data Grid | 88 |
| Dynamic Data - Dynamic Control Field | 87 |
| Link - Email | 37 |
| Link - Multiple Files | 80 |
| Link - Single File | 33 |
| Link - SmartFolder | 32 |
| Link - Website | 35 |
| Lookup - Address Validation | 78 |
| Lookup - Ajax Options | 73 |
| Lookup - Entity and People | 76 |
| Lookup - External Entity | 95 |
| Lookup - External People | 75 |
| Lookup - ICD Codes | 74 |
| Lookup - NAIC Codes | 77 |
| Read Only - System Variables | 109 |
| Read Only - Text | 39 |
| Select Many - Check Boxes | 20 |
| Select Many - List Box | 22 |
| Select Many - Scrolling Check Boxes | 21 |
| Select One - Combo Box | 10 |
| Select One - Internal Entity | 90 |
| Select One - Internal People | 70 |
| Select One - Ledger Code | 72 |
| Select One - Multi-level Combo Box | 127 |
| Select One - User Group | 15 |
| Special - Auto Number | 50 |
| Special - Barcode | 45 |
| Special - Browser Script | 103 |
| Special - Calculated Value | 60 |
| Special - Color Code | 126 |
| Special - ePad Signature | 100 |
| Special - Hand Drawing | 99 |
| Special - Hidden Value | 38 |
| Special - MSWord Merge | 113 |
| Special - Timer | 31 |
| Special - UTA Peers Combo | 12 |
| Special - XML Data | 125 |
| Store Value - System Variables | 111 |
| Text - Password Protected | 44 |
| Text Box - Multiple Lines | 40 |
| Text Box - Rich Text | 42 |
| Text Box - Single Line | 30 |
| Title Bar - Multiple Columns | 5 |


