Advanced Logic
Advanced Logic gives System Administrators a higher level of control over the entire interface.
This feature allows control of the visibility and/or access to interface elements such as buttons or tabs based on administrator defined conditions.
Location
This feature is available in 3 places:
- Advanced Logic link on the Global Settings page (In the Business & System Configuration section) - to establish system-wide rules.
- Advanced Logic link on the Settings Page within each Universal Tracking Application - for rules specific the each UTA.
- In the Transaction Types section on Global Settings - for both People and Company Transaction Types
Advanced Logic on Transaction Types only has one control:
It allows you to show/hide the Links button for individual Transaction Types.
The Links button allows a Transaction to be linked to UTAs when viewing the Transaction.
Overview
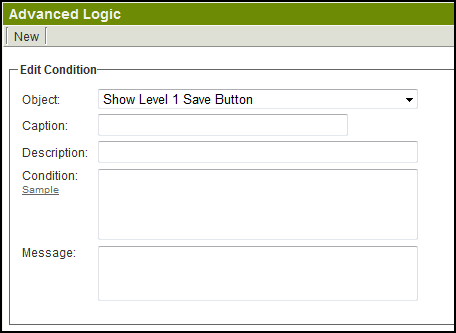
Object: The object that is being controlled. Condition: A logical statement that when true will make the object statement true, and when false will make the object statement false.
- If the Object says "Show Level 1 Save Button", if the statement in the Condition field is true the Save button will be shown.
- If the Object says "Hide Top Invoice Tab", if the statement in the Condition field is true the Invoice Tab will be hidden.
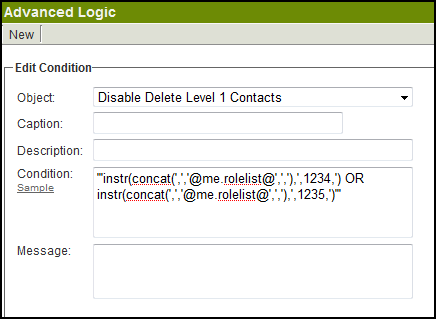
- If the Object says "Disable Delete Level 1 Contacts", if the statement in the Condition field is true, deleting Level 1 contacts will be disabled (meaning deletion won't be possible).
For example, you can disable the Delete button when viewing Contacts at Level 1 for Users in a specific role by using the Advanced Logic setting on the Global Settings page.
In the above example, users in role ID 1234 or role ID 1235 will be prevented from deleting contacts at Level 1.
Sample Conditional Statements
- Not true for the Level 1 template with typeid 12345
'@opportunity.typeid@'<>'12345'
            or
'@opportunity.typeid@'Not In('12345')
- True if the Level 1 status is 'Draft':
'@opportunity.status@'='Draft'
            or
'@opportunity.status@' In ('Draft')
- True unless the Level 1 status is 'Draft' or 'Open':
'@opportunity.status@' Not In ('Draft','Open')
- True if the Level 1 statusid is 765 or 766
'@opportunity.statusid@' In ('765','766')
- True if the Level 1 statusid is NOT 765 or 766
'@opportunity.statusid@' Not In ('765','766')
- True for role IDs 1234 and 1235:
instr('@me.rolelist@'),'1234') OR instr('@me.rolelist@','1235')
- For a advanced logic based the startdate or enddate standard fields:
- Use '@fullstartdate@' rather than '@startdate@' and '@fullenddate@' rather than '@enddate@'.
- This will format the stored date as yyyy-mm-dd so it can be compared using < and >.
'@fullstartdate@' >= '2009-05-01'
- True if today's date is after the Start Date:
now()>'@fullstartdate@'
- Never True
1=0
- Always True
1=1
IMPORTANT
The syntax used will vary depending on which Object is being controlled.
For example, consider the Show Level 3 New Button. This button is shown when you are viewing a Level 2 record.
- If you want to control the visibility of the Level 3 New button based on the status of the Level 2 item you would use:
'@statusid@' In ('765','766')
- If you want to control the visibility of the Level 3 New button based on the status of the Level 1 item you would use:
'@opportunity.statusid@' In ('765','766')
See Also
For help constructing logical statements for Advanced Logic:
- Determining the typeid
- Determining the statusid
- Determining the roleid
- Visibility Condition (for more examples)

