Publication Service
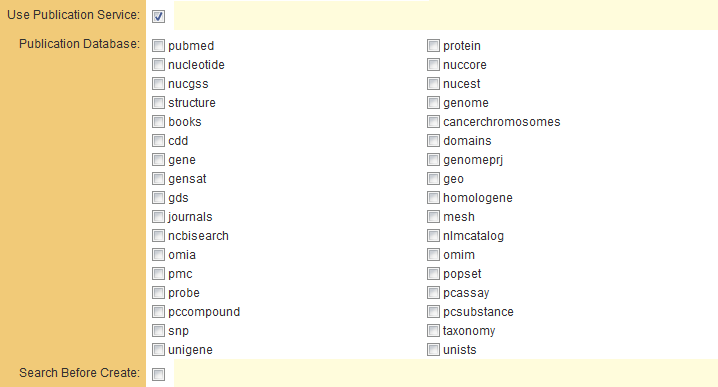
Enabling Publication Service on a Transaction Type enables the transaction details to be automatically populated from information found on a web service such as PUBMED. Enabling this option will display a service lookup link in the User Centric Interface when the user adds a transaction of this type.
Please contact SmartSimple for an up-to-date list of Publication Databases currently supported.
If the Search Before Create check box is populated then this forces the user to perform a search as soon as they click new. Then, after they have performed a search and haven't found what they were looking for, they can click a button to enter the data manually.
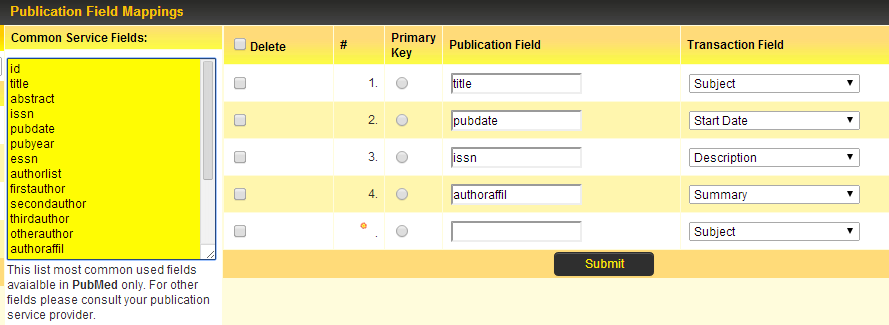
Once you have enabled the Publication Service and selected the database(s) to be queried you must indicate which Custom Field each piece of information provided by the web service should be stored against on your transaction. This is done by clicking on the Field Mappings tab at the top of the Transaction configuration page.
The subsequent page provides the user with fields for specifying the mappings from the database values to the transaction fields.
- Delete - check box to allow the field mapping to be deleted. Should only be checked when user wishes to delete the mapping.
- Publication Field - free text field for manual entry of the publication database field.
- Transaction Field - drop-down to select the Transaction field that the value in the publication database field should be mapped to.
Once these values are populated appropriately then click Submit.
This will remove the field if the Delete check box is populated, while also allowing other mappings to be entered.
Publication Service in User Centric Interface
When the Publication Service is enabled against a particular Role then individuals within that Role will be able to use a service look-up link when adding a transaction of this type.
- Access the User profile or UTA (if enabled) and click on the appropriate transaction tab.


