Difference between revisions of "Languages"
Mark Bridger (talk | contribs) |
Mark Bridger (talk | contribs) |
||
| Line 33: | Line 33: | ||
Alternately you may be able to go to the '''User Menu''' > '''Personal Settings''' > '''Regional''' tab and change your language setting then click save. | Alternately you may be able to go to the '''User Menu''' > '''Personal Settings''' > '''Regional''' tab and change your language setting then click save. | ||
| − | [[Category:Interface | + | [[Category:Interface]][[Category:Translation]] |
Latest revision as of 10:48, 25 September 2023
Contents
Overview
People collaborate using SmartSimple Cloud in many languages. For example your applicants, reviewers and program managers may work together in over 180 different languages.
For your Global Administrators who configure the system, we have included translations for English in Español (Spanish), Français (French - Canada), Dansk (Danish), 日本語 (Japanese), Català (Catalan), Português (Portuguese) and Gaeilge (Irish).
Note: the Español (Spanish) translations are using Castilian Spanish.
This article will give you an overview of the user interface options around user language selection.
You will need Global Administrator access if you intend to configure available languages or add translations. To learn more about configuring your system for multiple languages see the category Translation.
Essentials
Once the languages you want to support have been configured by a Global Administrator your users will be able select their preferred language. The methods for selecting a preferred language are via the login page or via the header post login. Global Administrators can add languages by going to Menu Icon > Global Settings > User tab > Portals > edit the Common portal > edit the User Menu link of the Type called Language > select the desired language options and save.
Selecting language on login page
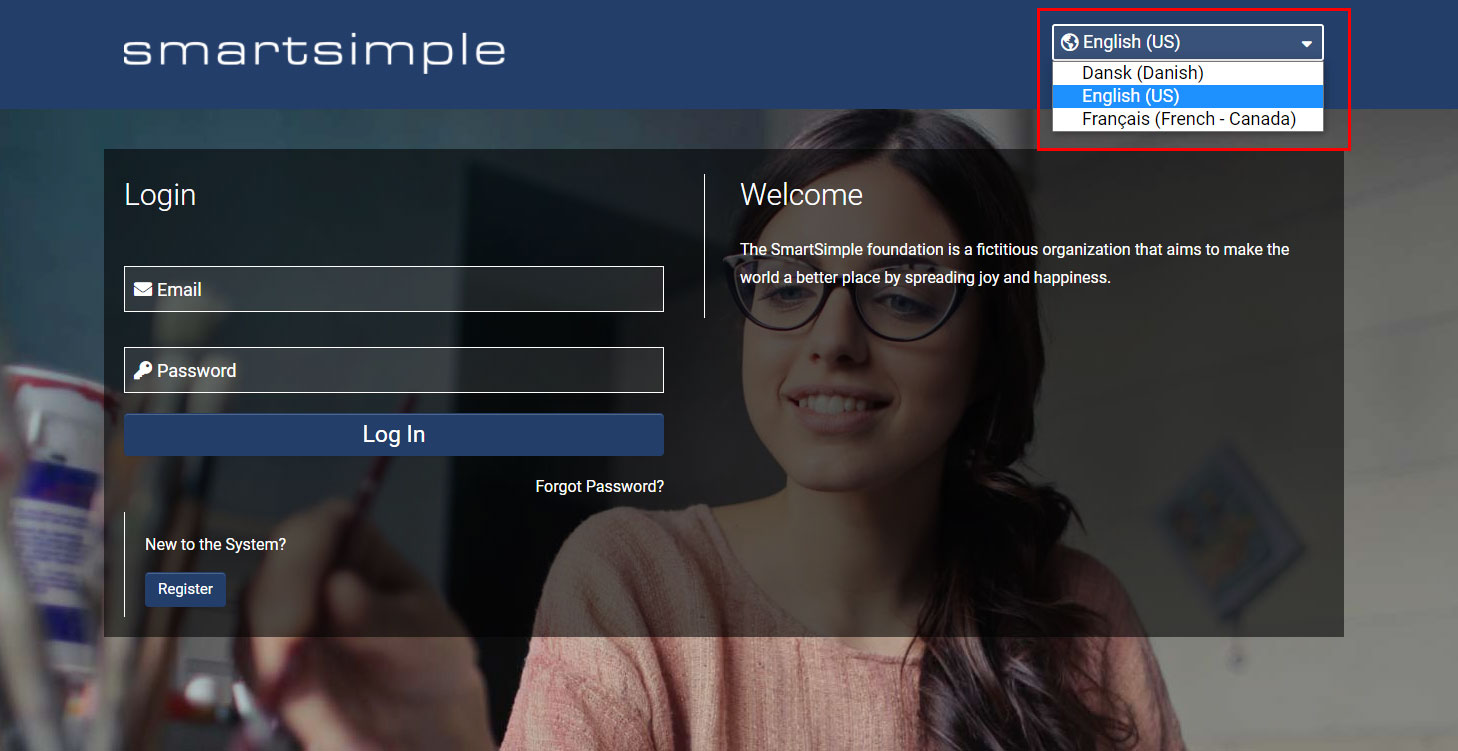
The login page is the first thing your users will see before they enter your system. The language selector is located at the top right of the page in the header.
When a user selects their desired language on the login page, that user will be redirected to the desired login page. The new login page will load, and the language ID in the URL may change (Example &lang=23). The language ID tells the system which language to display to the user, in this case 23 is Danish.
Once the user logs in through the desired login page, they will see the system in the language of the login page they came through. Example: if you entered your system via the Danish login page, you will see the rest of the interface displayed in Danish after the login screen.
Note: If the user does not select a language on the default login page (either leaving the language dropdown set to Select Language or if they went to a URL ending in "&lang="), the user will see the language set in their personal settings upon login. If no language is set in a user's personal settings, the language will default to English.
Switching languages while logged in
Once you have logged into your system you can change the language at any time by clicking on the Change Language option in the header which looks like a globe icon.
The browser will reload to display the chosen language so make sure to save your work before switching languages.
Alternately you may be able to go to the User Menu > Personal Settings > Regional tab and change your language setting then click save.

