Difference between revisions of "Workflow Task Type: Create Consumer/Provider Link"
| Line 3: | Line 3: | ||
==Overview== | ==Overview== | ||
| − | SmartSimple's UTA '''[[Configuring UTA Provider/Receiver (Consumer) Relationships|Provider/Consumer Relationships]]''' allows for the sharing of data between different [[UTA|UTAs]].The UTA providing the data (the source UTA) is referred to as the '''Provider''' while the UTA receiving the data is referred to as the '''Consumer'''. | + | SmartSimple's UTA '''[[Configuring UTA Provider/Receiver (Consumer) Relationships|Provider/Consumer Relationships]]''' allows for the sharing of data between different [[UTA|UTAs]].The UTA providing the data (the source UTA) is referred to as the '''Provider''' while the UTA receiving the data is referred to as the '''Consumer'''.The feature discussed in this article allows a Consumer / Provider relationship to be created using the [[Workflows - Overview|Workflow]] subsystem, and without the use of custom scripting. |
==Creating a Consumer / Provider Workflow== | ==Creating a Consumer / Provider Workflow== | ||
Start by creating a single step workflow. Detailed instructions on creating a single step Workflow can be found '''[[Creating a Single Step Workflow|here]]'''. | Start by creating a single step workflow. Detailed instructions on creating a single step Workflow can be found '''[[Creating a Single Step Workflow|here]]'''. | ||
| − | |||
# Under the '''Configuration''' menu, click on '''Workflows''' | # Under the '''Configuration''' menu, click on '''Workflows''' | ||
Revision as of 15:46, 8 December 2015
Contents
Overview
SmartSimple's UTA Provider/Consumer Relationships allows for the sharing of data between different UTAs.The UTA providing the data (the source UTA) is referred to as the Provider while the UTA receiving the data is referred to as the Consumer.The feature discussed in this article allows a Consumer / Provider relationship to be created using the Workflow subsystem, and without the use of custom scripting.
Creating a Consumer / Provider Workflow
Start by creating a single step workflow. Detailed instructions on creating a single step Workflow can be found here.
- Under the Configuration menu, click on Workflows
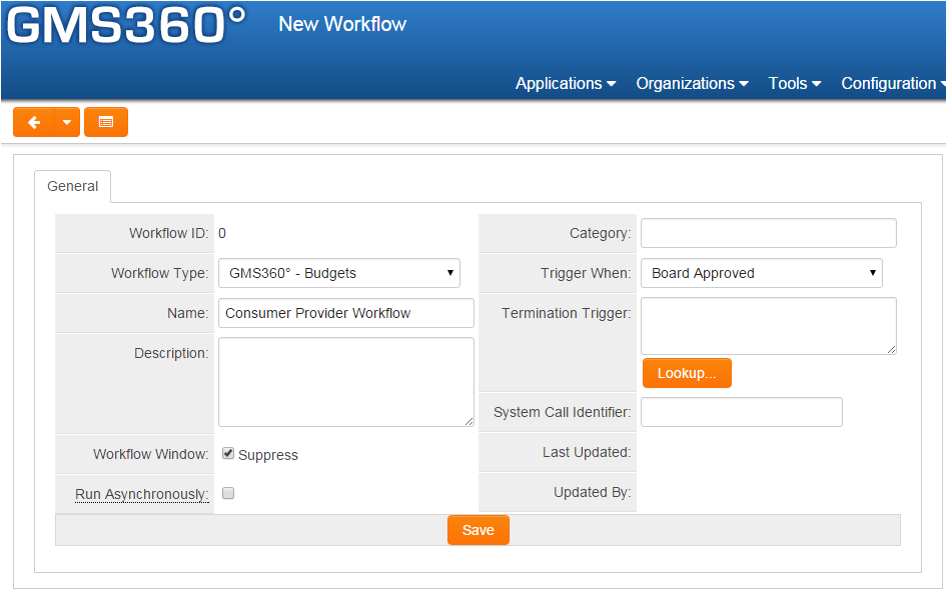
- Press the "+" New Workflow icon
- Select the Workflow Type, give the workflow a Name, select the Trigger When action, and complete any other relevant fields.
- Click Save
Creating a New Task
For details on creating a new Workflow task click here.
- Press the + New Task icon to add a new Workflow task.
- Give the task a Name.
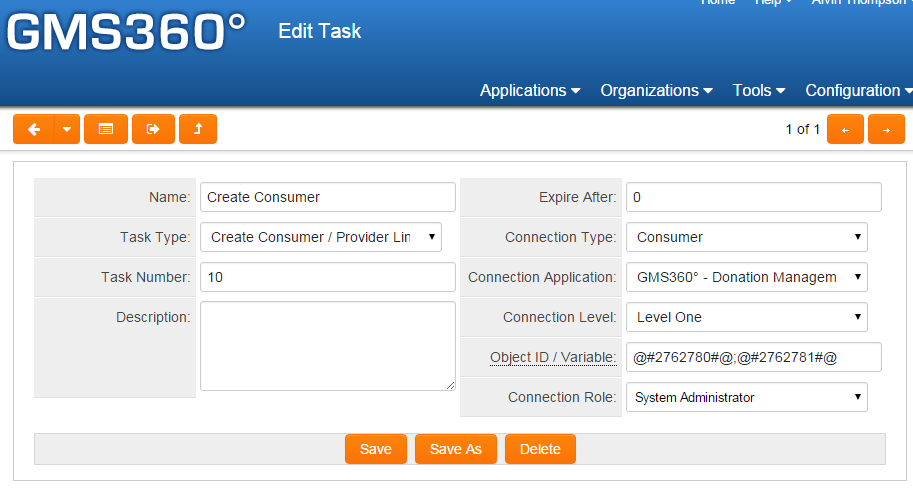
- Select Create Consumer / Provider link from the Task Type drop-down list.
- Enter a Description, Connection type (specify Consumer or Provider), Connection Application, Connection Level, Object ID / Variable, and Connection Role.
- Click Save
| Field Name | Description |
|---|---|
| Connection Type | Select whether this connection is either a Consumer or Provider type. |
| Connection Application | Specify the source UTA |
| Connection Level | Specify the Level One entity, or Level 2 or 3 activity |
| Object ID / Variable | Enter the record id or a variable to obtain the record id of the object to connect to. Multiple records should be semi-colon delimited (eg. For example: @#2762780#@;@#2762781#@). |
| Connection Role | Select the UTA role |

The example above is adding consumer L1 from Budgets UTA with ID from the listed two custom fields using the linked budget role to the record that's triggering the workflow.
Add Connectors
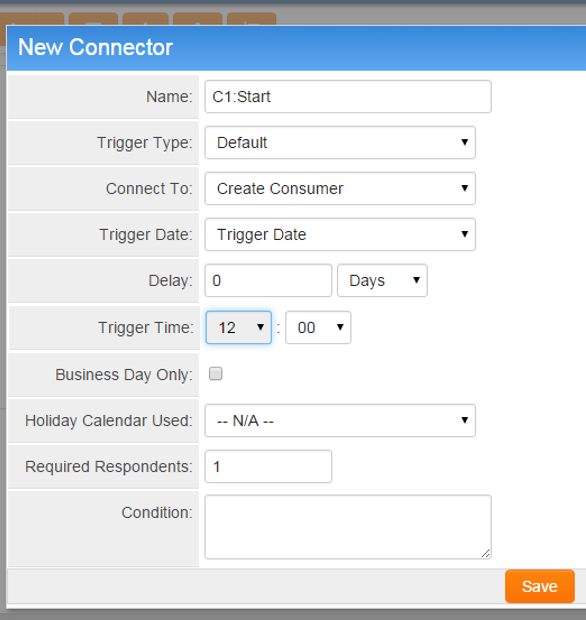
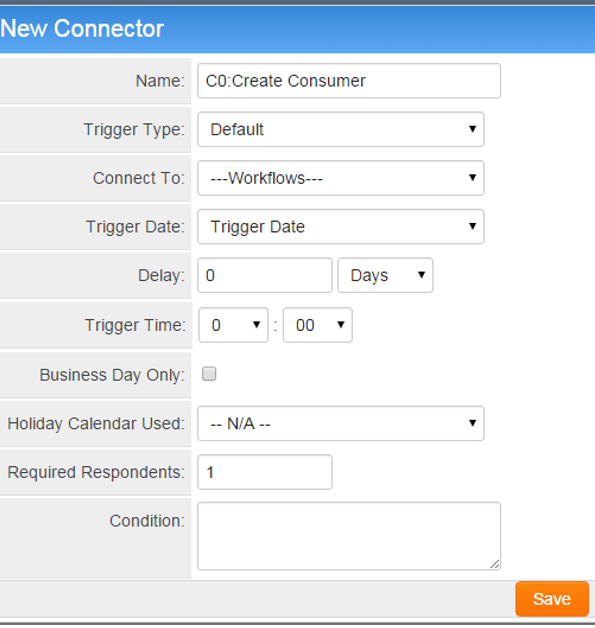
For details on adding Workflow connectors click here.
The Completed WorkFlow Tasks with connectors
Notes
This feature is only available to level 1 and level 2 workflows.
Separate Object ID / Variables by semicolon (For example: @#2762780#@;@#2762781#@).


