Difference between revisions of "Completing a Request for Approval Workflow"
Julia Decker (talk | contribs) |
|||
| Line 23: | Line 23: | ||
The branching logic is displayed. Clicking on the task name will display the task details. Clicking on the connector trigger number or name will display the connector details. | The branching logic is displayed. Clicking on the task name will display the task details. Clicking on the connector trigger number or name will display the connector details. | ||
| − | + | [[Category:Workflows]][[Category:SmartFolders]] | |
Revision as of 14:53, 15 May 2009
Now that we have created connectors for the New File Alert task, we must now create connectors for each of the message tasks. In our example, once the message is sent no other task or workflow will be triggered, therefore each message task should be connected to the Complete event.
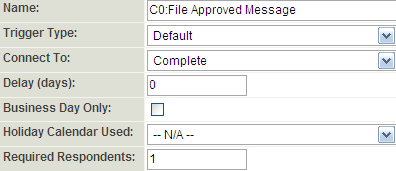
1. Click on the New Connector button for the File Approved message.
2. In the Connect To combo box, select Complete and click Save.
3. Create similar connectors for the File Rejected Message and File Revision Message tasks.
4. The Task List should now show connectors for all tasks in the workflow.
Viewing a Workflow Diagram
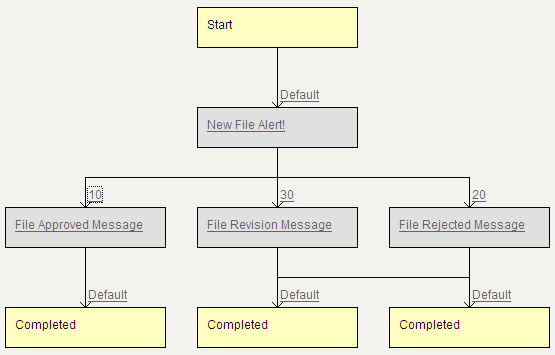
You can now view the workflow diagram.
1. Click the Diagram button.
The branching logic is displayed. Clicking on the task name will display the task details. Clicking on the connector trigger number or name will display the connector details.


