Difference between revisions of "Group Email"
From SmartWiki
(→Enabling Group Email) |
(→Using Group Email) |
||
| Line 22: | Line 22: | ||
[[Image:GroupEmail4a.png]] | [[Image:GroupEmail4a.png]] | ||
| − | ==Using Group Email== | + | ==Using Group Email from within individual UTA record== |
* Navigate into the record and scroll down to the Contacts section. | * Navigate into the record and scroll down to the Contacts section. | ||
Revision as of 13:23, 10 February 2014
SmartSimple provides Group Email functionality within all levels of the UTA to permit the mailing of multiple individuals associated with an entity.
Enabling Group Email
- Click on the Settings tab on the Menu Bar to access the configuration pages for the UTA.
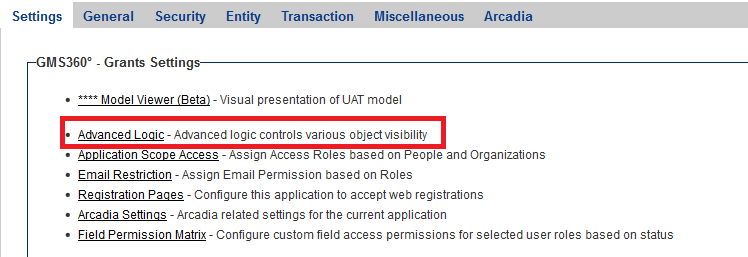
- Click on the Advanced Logic hyperlink in the Settings tab.
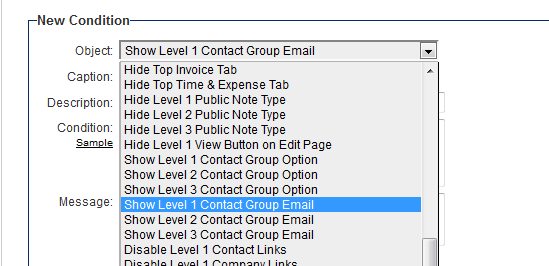
- Click on the Object drop-down list. Scroll down and select one of the following options depending on where in the UTA the Group Email feature should reside.
- Show Level 1 Contact Group Email
- Show Level 2 Contact Group Email
- Show Level 3 Contact Group Email
- In the Condition field enter an appropriate conditional statement for when the Group Email button should be displayed.
- Click Save.
- The Group Email button should now appear in the appropriate level of the UTA based on the conditional statement entered.
Using Group Email from within individual UTA record
- Navigate into the record and scroll down to the Contacts section.
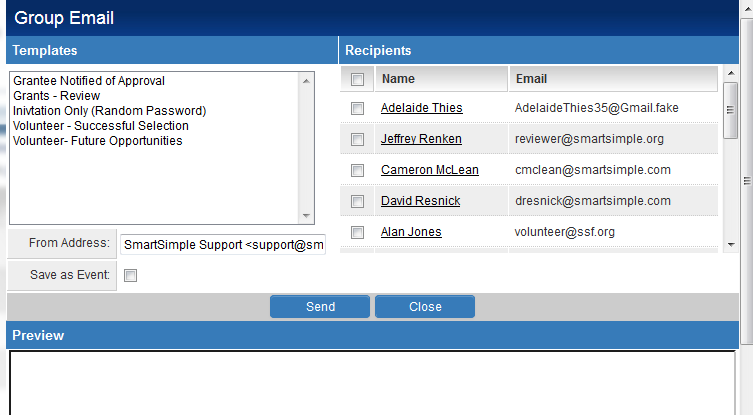
- Click on the Group Email button to launch the Group Email window.
- The window is comprised of the following elements:
- Templates - All public email templates which are appropriate for the UTA level you are sending the email from within. You can select any of the available options.
- Recipients - List of potential recipients of this email. This is based on the individuals in the Contacts section, plus the owner and person. Each user has a check box adjacent to their name to allow them to be selected as a recipient.
- From Address - The email address of the sender.
- Save As Event - Stores the email as an activity.
- Send button - Sends the email to the selected recipients.
- Preview - Is blank until a Template is selected. Once the Template is selected then the Preview section will show the contents of the selected Template.


