Difference between revisions of "Searching for Applicants Using SmartSearch"
Julia Decker (talk | contribs) |
|||
| Line 68: | Line 68: | ||
[[Image:Apl298.png]] | [[Image:Apl298.png]] | ||
| − | + | [[Category:Applicant Tracking]] | |
Latest revision as of 09:54, 11 August 2009
Though you can search for applicants from the applicant page, you cannot assign an applicant to a job unless you are using the assignment page associated with the job.
When you are using this page you can:
- Use any of the searching techniques that you saw in module 8, including applying filters to filter applicants.
- Use SmartSearch to compare the applicant skill profile to the job skill profile, and rank and assign applicants based on score.
As you have previously used standard searching, this section will concentrate on the use of the SmartSearch Feature.
How the Smart Search Feature Works
The following is a brief description of the SmartSearch feature:
If you use the SmartSearch feature without having skills in use, you will always get a zero score.
The SmartSearch algorithm has been designed for very fast searching, and up to two millions applicants can be compared to a job in less than five seconds.
The following steps are used in the process:
1. When a job skill is indicated as a mandatory skill and an applicant has not indicated this skill, they are excluded for any additional comparison and always scored 0.
2. For applicants that possess the mandatory skills, each of their skills in common with a job skill is measured.
3. If the skill measure is greater than or equal to job skill, their score is incremented.
This example with the current demonstration will not yield any useful results, but will illustrate the technique.
1. Click the Add Applicant tab.
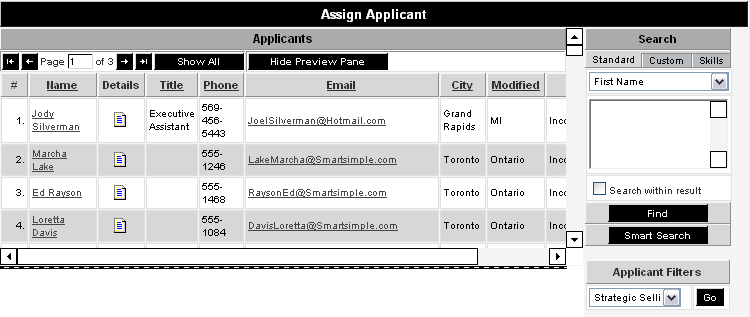
The Add Applicant window is displayed.
This window is similar to the applicant search window, with the exception of the SmartSearch button.
2. Click the SmartSearch button.
All applicants are listed, ordered by score. You can now review each applicant and assign as appropriate.
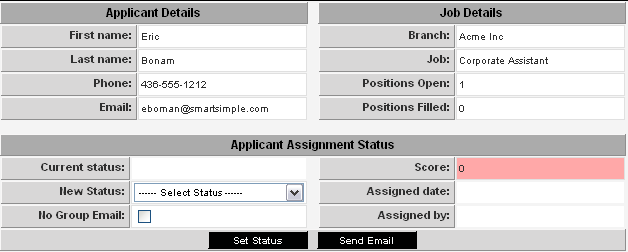
3. Click the Assign button.
The Assignment details are displayed.
4. Set the Status to Approved by HR.
No Group Email
If you did not wish this applicant to receive group email you can click the No Group Email button.
1. Click the Set Status button.
The applicant is added to the job assignment list.


