Difference between revisions of "Creating a workflow with scheduled reminders"
Ann Vincent (talk | contribs) m |
Ann Vincent (talk | contribs) m (→See Also) |
||
| Line 201: | Line 201: | ||
* You will be able to see the email sitting in the queue and you can open the body of the email by clicking the envelope icon. | * You will be able to see the email sitting in the queue and you can open the body of the email by clicking the envelope icon. | ||
| − | + | =See Also= | |
* [[Workflows - Overview|Workflows Overview]] | * [[Workflows - Overview|Workflows Overview]] | ||
Revision as of 13:45, 17 May 2022
Contents
Overview
Issuing notifications about upcoming task deadlines is a common requirement in grants administration. These reminders are particularly important when it comes to the completion of progress reports once a grant has been awarded. Automating these reminders reduces the administrative burden on internal staff members. This can also be helpful in the case of multi-year grants or grants with multiple reporting requirements, which can be time consuming to follow up on manually
For example, an application gets approved by a grants administrator. A report schedule is created with due dates set at 3 month intervals between the start and the end date of the grant. Automated notifications can be scheduled to remind the individual responsible to complete the task in a timely manner.
This article will show you how to set up scheduled notification reminders from workflows.
Configuration - Essentials
Creating a New Workflow
The following steps outline how to set up a new workflow:
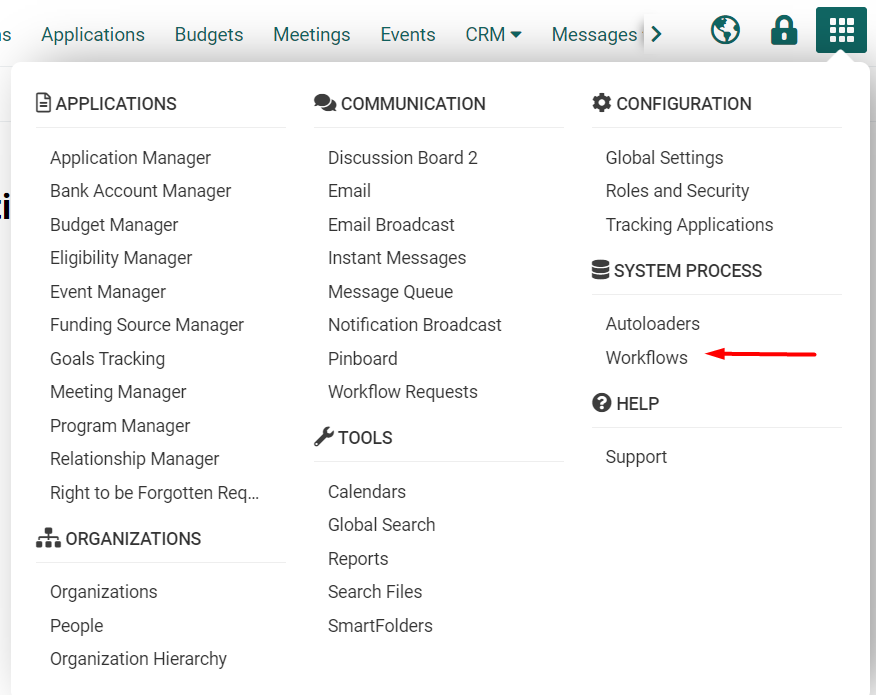
- Click the Menu Icon and select Workflows link under System Process. You can also access this by going into the Global Settings > System tab > Workflows.
- On the Workflows page, click on the plus button to create a new workflow.
- Select the Workflow Type. The type will dictate what options will be available when creating Tasks and where the actions will occur. For this workflow, we’re going to be selecting Tracking Activities. We are selecting Tracking Activities for this workflow because we are looking at level 2 records which in this case are the reports.
- Give the workflow a Name, add the workflow to a Category, and add a brief Description to summarize the tasks within it, including any branching conditions for ease of review later. It is also recommended to keep track of any changes made to the task by adding some notes. Categories are created by your organization. We suggest creating categories based on the UTA and record level. The following naming convention is recommended to avoid confusion: Activity Level (1/2/3) - Goal/Status/Reminders.
- Set the Trigger on to determine what automated tasks are going to be triggered in this workflow. This will define when your workflow is triggered. Depending on the Workflow Type, you will be selecting from a list of statuses. In our example, the activities will have been created in the 'Scheduled' status. This is what we will set the trigger to as a result.
- A Termination Trigger should be set for any workflow that is scheduling tasks for the future. This will cancel any pending tasks if it is no longer required. In this example, if the applicant submits their reports ahead of the due date, the report status will change to 'Submitted', which can be set as a termination trigger on the workflow and prevent unnecessary reminders.
- Click the Save button. The workflow is saved and the Workflow ID is now populated
Now you will see additional options relating to this workflow. You can add notes, view the list of tasks, workflow connections, pending queue for upcoming workflow tasks, and a history of when this workflow was triggered.
Note: The field names, activity types, and status names referenced in this example are specific to the SmartSimple Grants Demo System. If you are trying to replicate this workflow in your own system, check that you are using the correct field names, activity types and statuses specific to your system. You can build your workflow on your production system first and test it on your backup the next day. Make sure to set the Trigger On to Deactivate so the workflow won’t run. Once your workflow appears in your backup, you can set the Trigger On to the correct status and test your workflow without worrying about impacting your production environment.
Configuration - Advanced
Creating Workflow Tasks
*Best Practice* → Create all of your workflow tasks before connecting the tasks.
Navigate to the Tasks bar on the left-hand menu. A workflow will always have a starting point and a completion point where it can terminate. In between, you can have as many different tasks in the workflow.
To create a new task, click on the plus button. Again, you would have to give the task a Name, select a Task type, and add a brief Description of the task. The task types mainly used in this workflow are either an Acknowledgement or a change in status. The options available will vary from task type to task type.
Creating the tasks
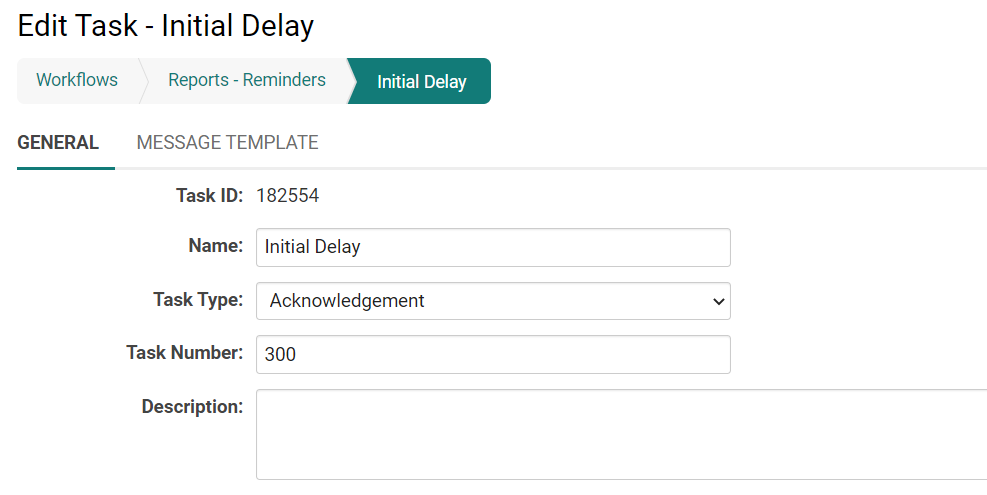
- Task 1: Initial Delay
- The first task is named Initial Delay since it has no function but will indicate that a workflow has started when looking through workflow histories and logs. It is a branching task without any additional function.
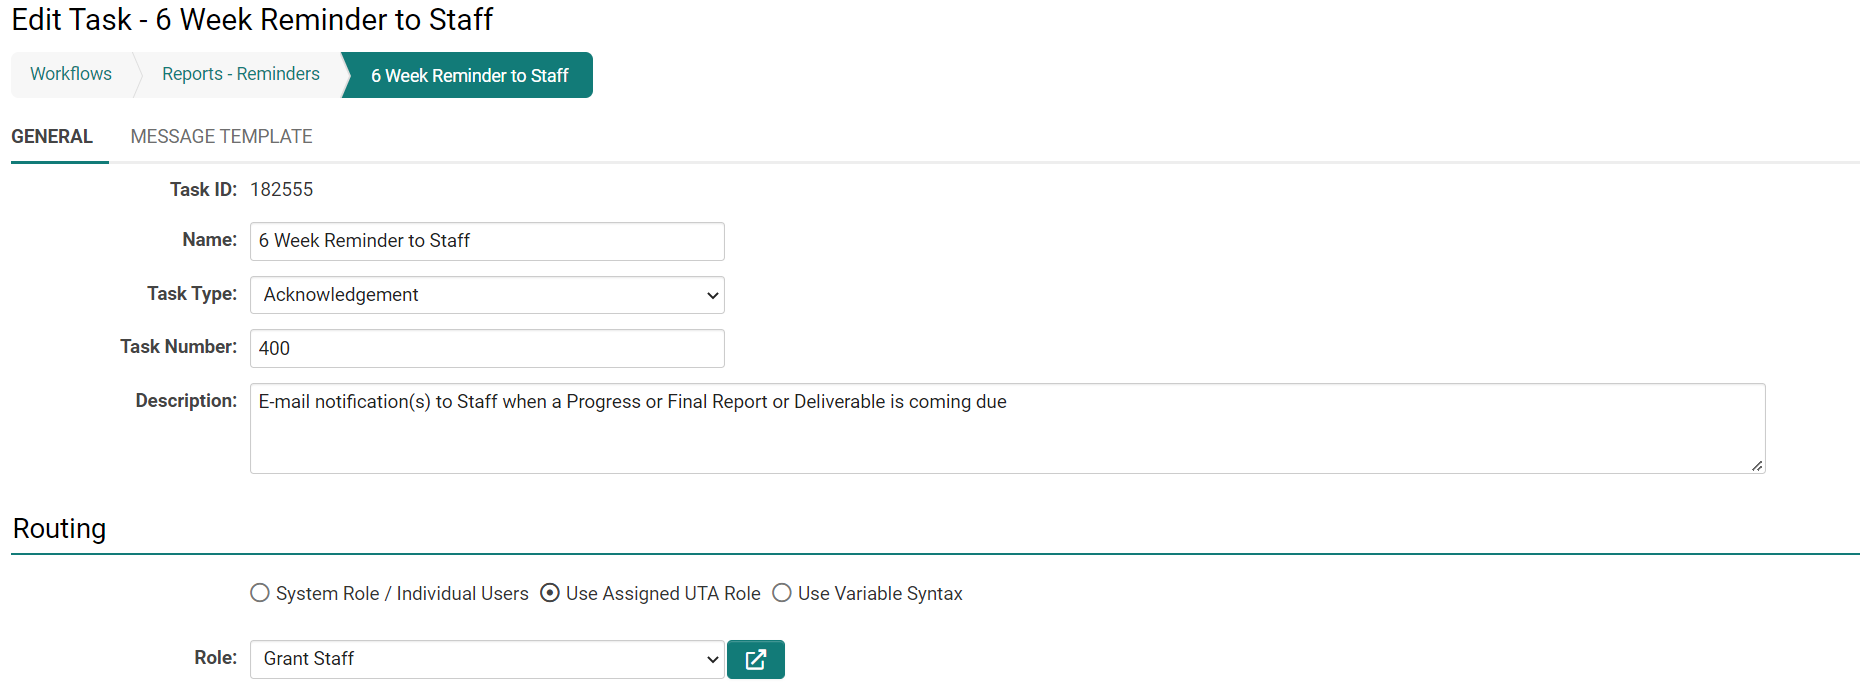
- Task 2: 6 Week Reminder to Staff
The next task will be used to send out the first email reminder to the Grant Staff about the upcoming report that is to be filled out
- Task Name → 6 Week Reminder to Staff
- Task Type → Acknowledgement
- Description → Add a brief description of what this task is performing
- Role → Add the role that should receive this reminder email. In this case, it is the Grant Staff user that has been assigned to record.
- You can Create a Default Task Connector to the previous task, but it is recommended to create all the tasks first and then create the connectors afterwards. In this case, the connector will need to be modified after it has been created to account for the scheduling.
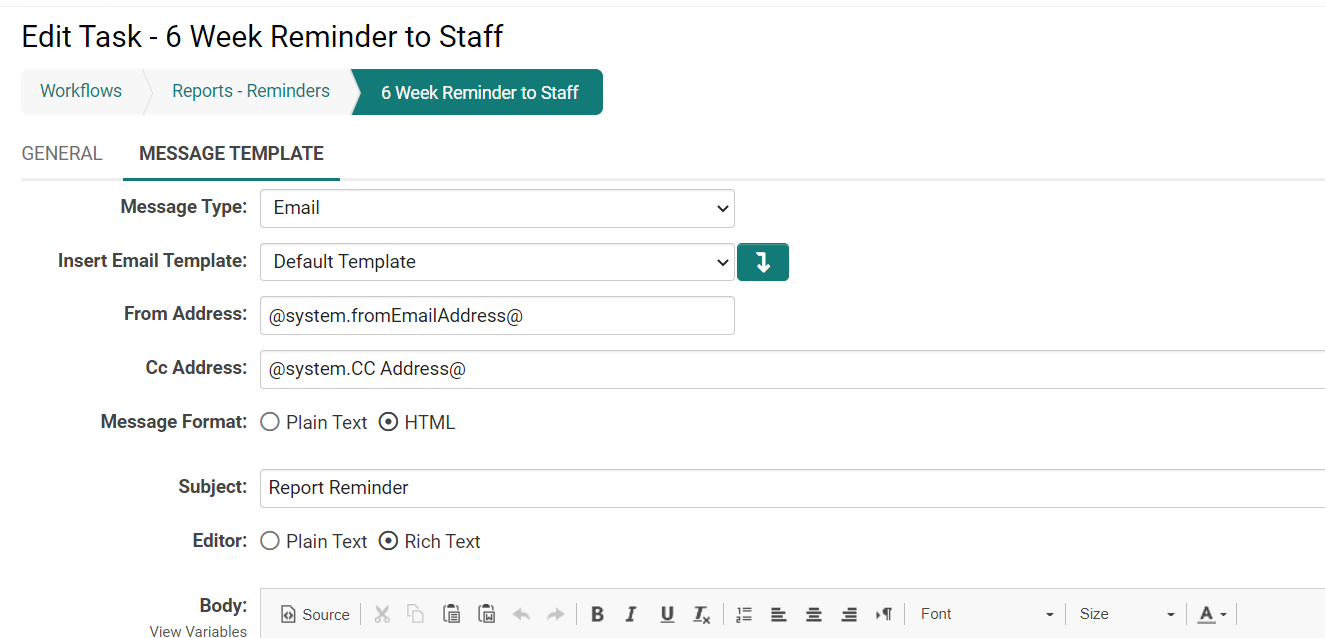
- Create the Message template which would include the Message Type, Email Template, From Address, any other Cc Address(es), Message Format, Message Subject, and the Body of the message. You can use variables to populate content relevant to the triggering record, such as a name or grant id.
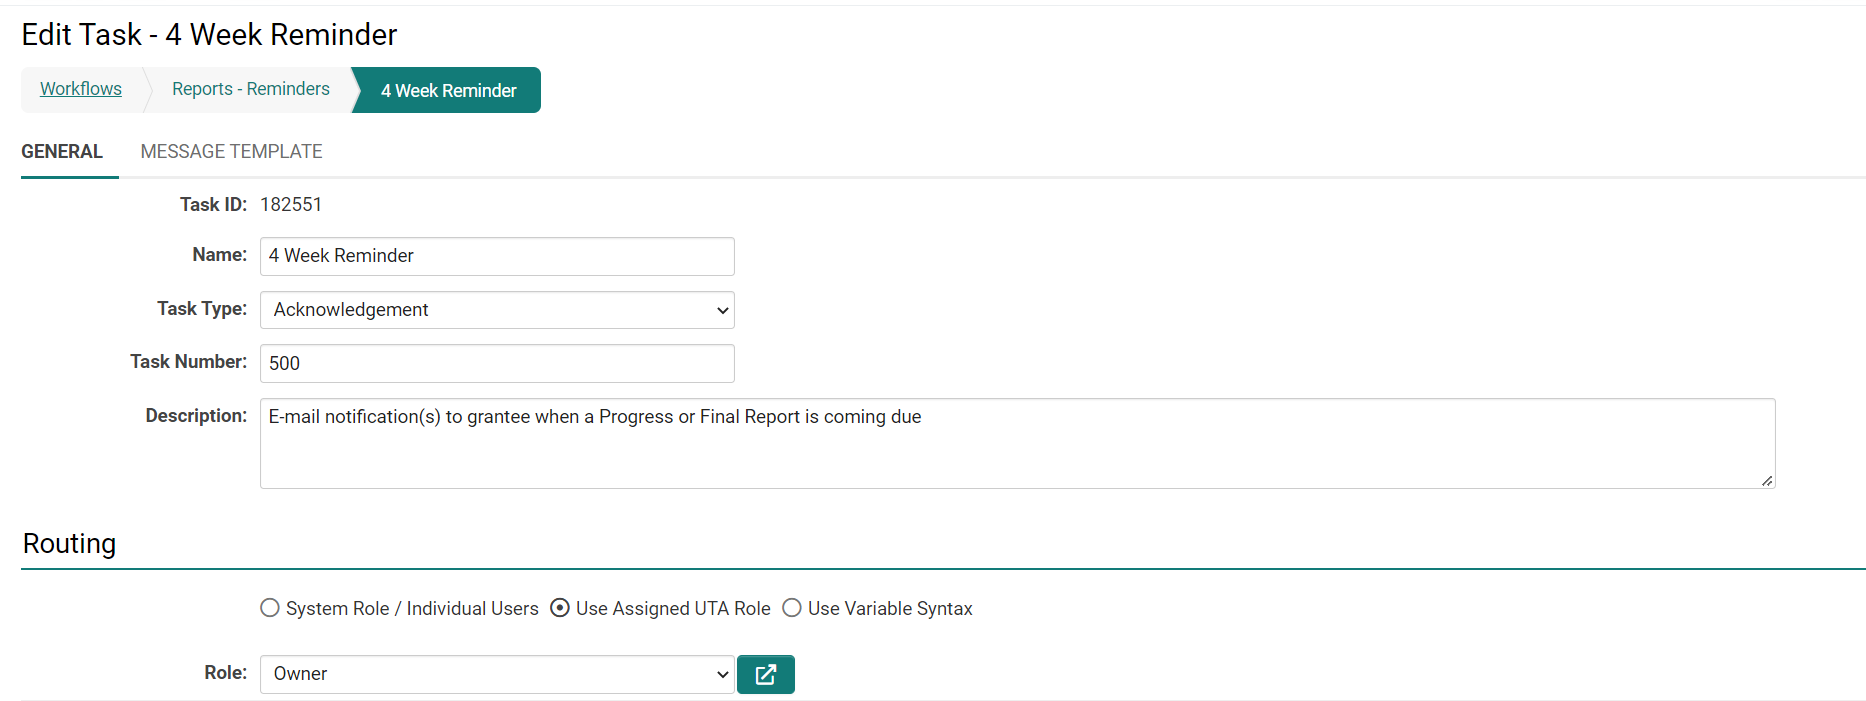
- Task 3: 4 Week Reminder to Grantee
This next task will be used to send out the first email reminder to Grantee about the same upcoming report that is to be filled out.
- Task Name → 4 Week Reminder
- Task Type → Acknowledgement
- Description → Add a description
- Role → Add the role that should receive this reminder email - Owner
- Create the Message template
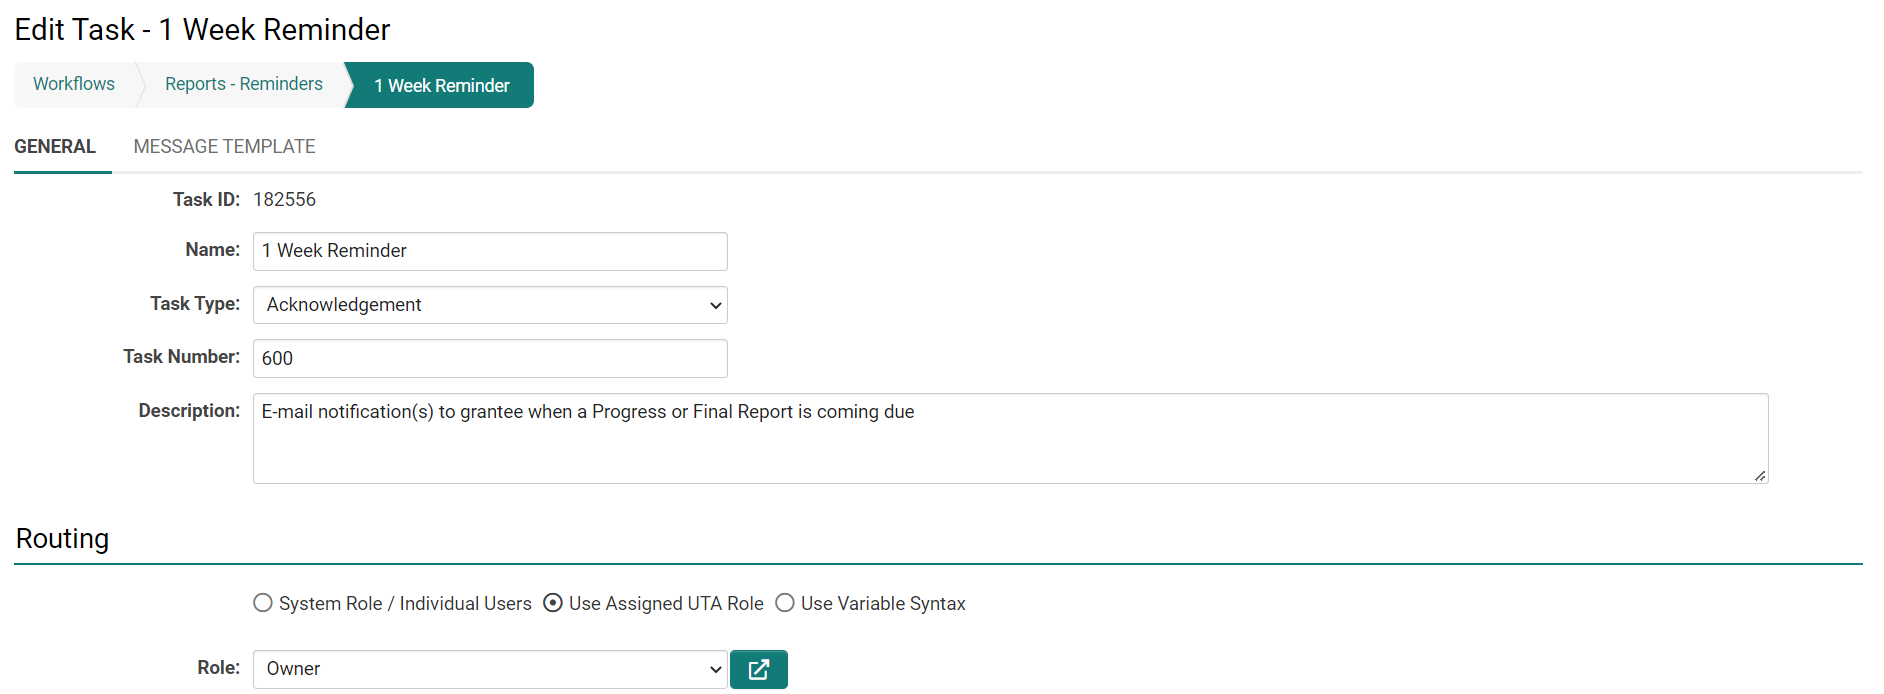
- Task 4: 1 Week Reminder
This next task will be used to send out a second email reminder to the Grantee about the same upcoming report that is to be filled out.
- Task Name → 1 Week Reminder
- Task Type → Acknowledgement
- Description → Add a description
- Role → Add the role that should receive this reminder email - Owner
- Create the Message template
- Task 5: On Due Date Reminder to Grantee
This next task will be used to send out a third email reminder to the Grantee about the same upcoming report that is to be filled out.
- Task Name → On Due Date Reminder to Grantee
- Task Type → Acknowledgement
- Description → Add a description
- Role → Add the role that should receive this reminder email - Owner
- Create the Message template
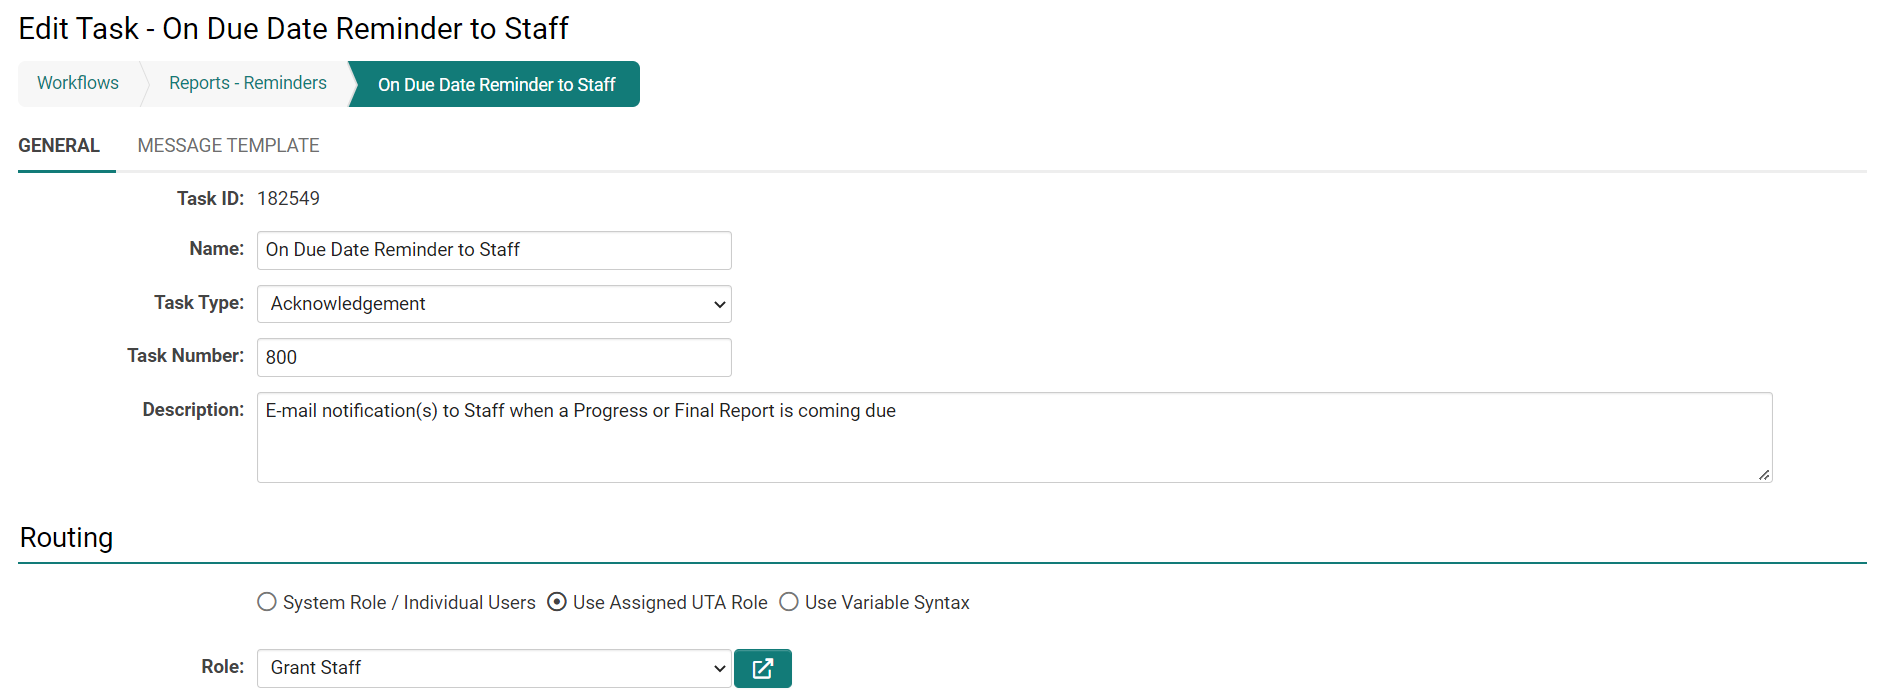
- Task 6: On Due Date Reminder to Grant Staff
This next task will be used to send out a third email reminder to the Grant Staff about the same upcoming report that is to be filled out.
- Task Name → On Due Date Reminder to Staff
- Task Type → Acknowledgement
- Description → Add a description
- Role → Add the role that should receive this reminder email - Grant Staff
- Create the Message template
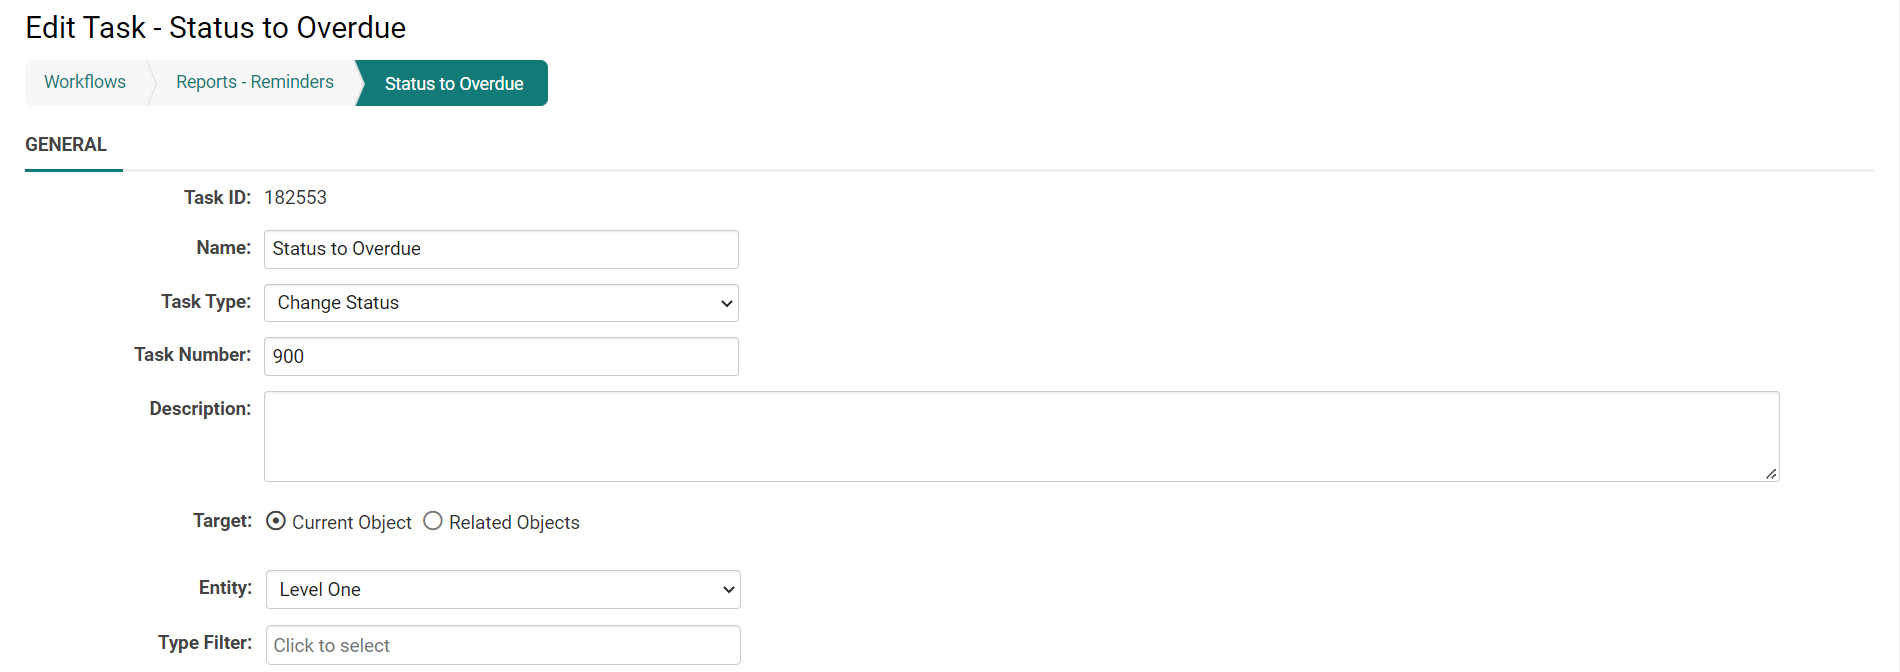
- Task 7: Status to Overdue
This task is created to change the status of the report to overdue. Note that if additional tasks need to be triggered by the overdue status, an additional workflow will need to be created and triggered.
- Task Name → Status to Overdue
- Task Type → Change Status
- Target → Current Object (report)
- Entity → Level One
- Change Status To→ Application Manager - Overdue
Creating Task Connectors
Now that you have created all of your workflow tasks, you will need to connect them. This can be done by creating Connectors. Workflows only run tasks if they have been connected together and have applicable conditions.
- Create a Starting connector to start your workflow.
- Click the New button on the first row of your workflow tasks.
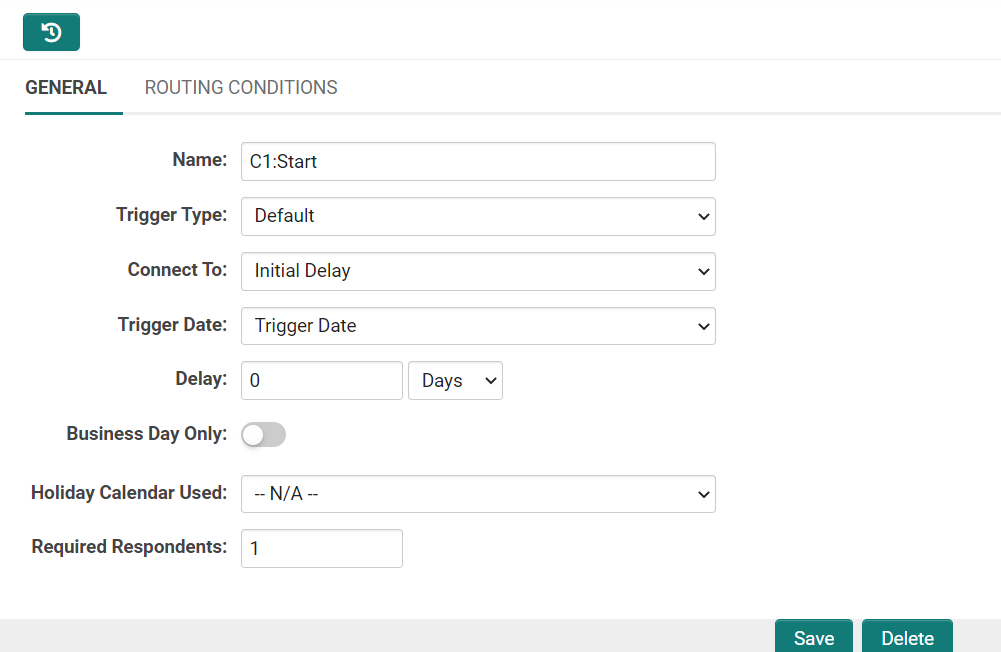
- The connector connects the starting point to the Initial Delay
- Leave the Name and Trigger Type as the default for your starting connector, or name it appropriately if required.
- For the Connect To option - select the task you want the workflow to start with - in this case it will be the Initial Delay task.
After creating the first connector, it should look like this;
You will need to create connectors for the remaining tasks. Make sure that you connect the current task in the workflow. The default option in the connector is Complete - which will end your workflow.
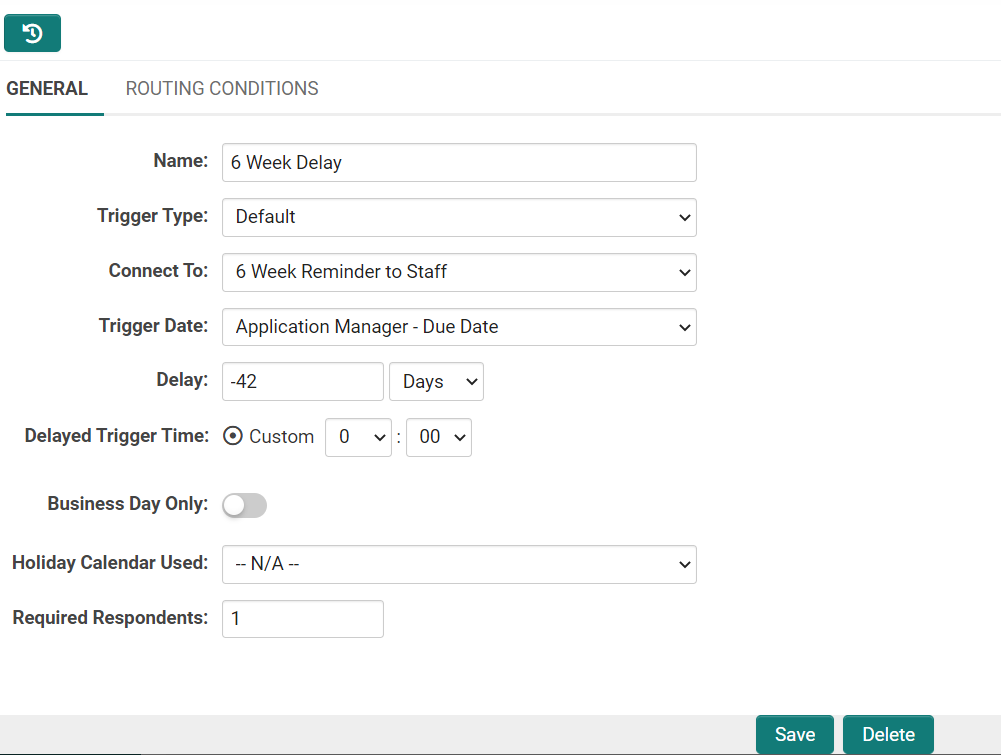
- The next connector connects the initial delay to 6 Week Reminder to Staff.
- We have given it a Name, left the trigger as default and selected the task that it is connecting to.
- The trigger date is set to the date that the report is due in the Application Manager
- There is a delay of -42 days because the email is to be sent out 6 weeks (42 days) before the report is due.
- You can select a time the email is scheduled to go out, if it is to only account for business days, and whether or not holidays are included.
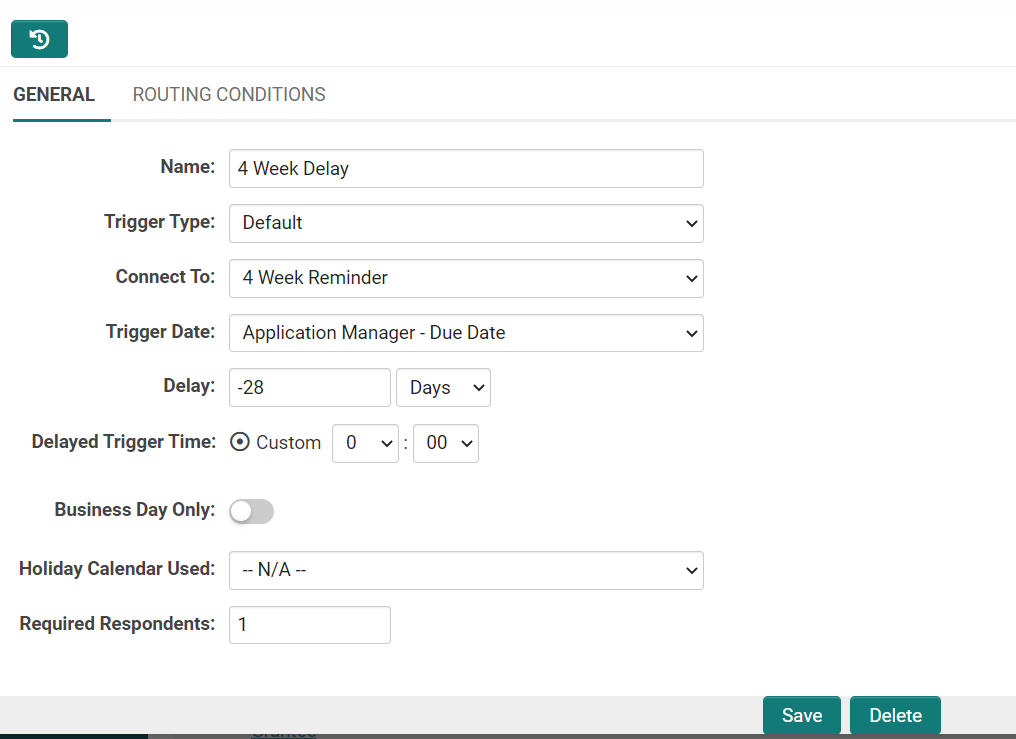
- The next connector connects 6 Week Reminder to Staff to the 4 Week Reminder to Grantee.
- We have also given it a Name, left the trigger as default and selected the task that it is connecting to.
- The trigger date is set to the date that the report is due in the Application Manager
- There is a delay of -28 days because the email is to be sent out 4 weeks (28 days) before the report is due.
- The next connector connects the 4 Week Reminder to Grantee to the 1 Week Reminder to Grantee.
- We have also given it a Name, left the trigger as default and selected the task that it is connecting to.
- The trigger date is set to the date that the report is due in the Application Manager
- There is a delay of -7 days because the email is to be sent out 1 week (7 days) before the report is due.
- The next 2 connectors connect 1 Week Reminder to Grantee to the On Due Date reminder to the Grantee, and then the On due date reminder to the Grant Staff respectively.
- The trigger date is set to the date that the report is due.
- There isn’t a delay required since it is supposed to be sent out the day the report is due.
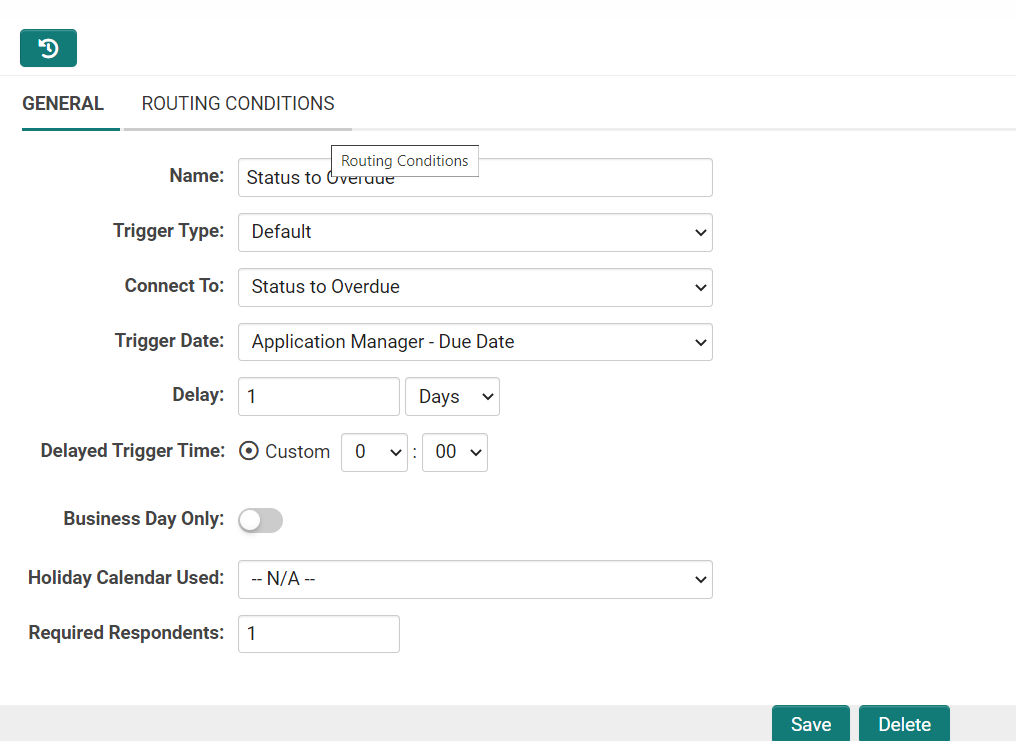
- The next connector connects On due date reminder to the Grant Staff to the Status to Overdue
- If, for some reason, the report does not get filled out on the due date, the Status to Overdue task changes the status of the report to overdue.
- The trigger date is set to the date that the report is due.
- There is a delay of 1 day but this time, it is sent 1 day after the due date.
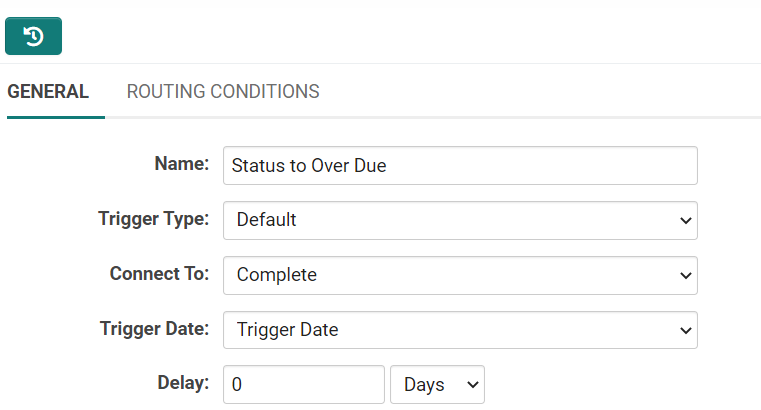
- The last connector connects Status to Overdue to the Complete.
- If the report gets filled out on the due date, the workflow is completed. You should then connect this task to the Complete to confirm there are no more outstanding tasks and for the workflow log display.
- The trigger date is set to the date that the report is due.
- There is no delay and all other options are left as default.
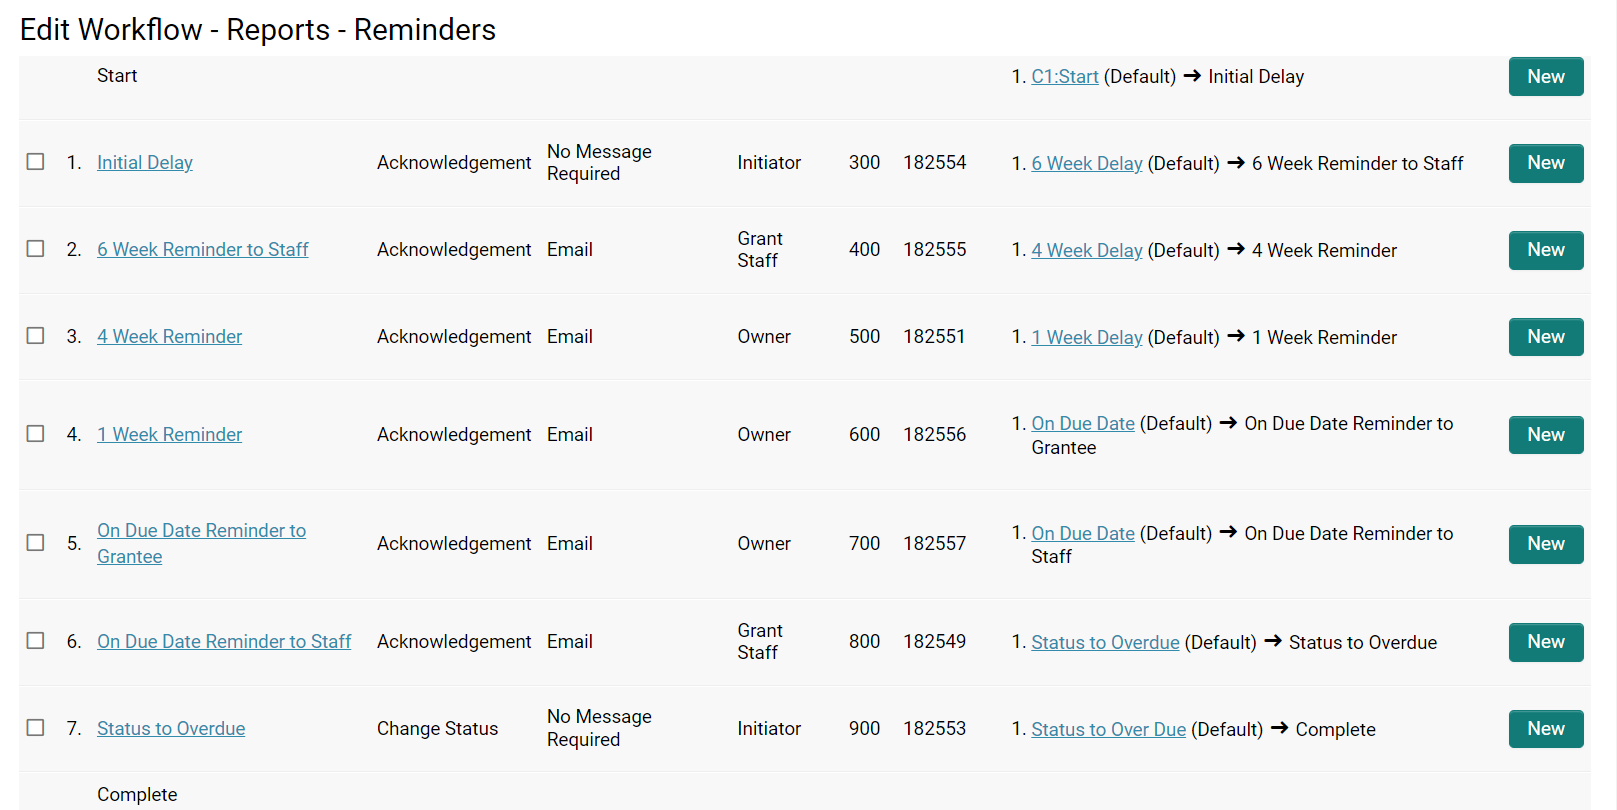
Once you are done creating connectors your workflow should look similar to this (below)
Testing the Workflow
Now that you have built the workflow, you want to make sure that it functions correctly. You can do so by setting a test record to the Approved status and checking the workflow history on the workflow. However, this particular workflow has been scheduled to send reports as far as 6 weeks in advance, the initial delay task will be listed, and the status will display as pending while it waits for the trigger date. You would need to go to the workflow history on one of the reports to see the pending email tasks.
Once the time comes for these emails to get sent out, here is how to check to see if the workflow is performing these tasks.
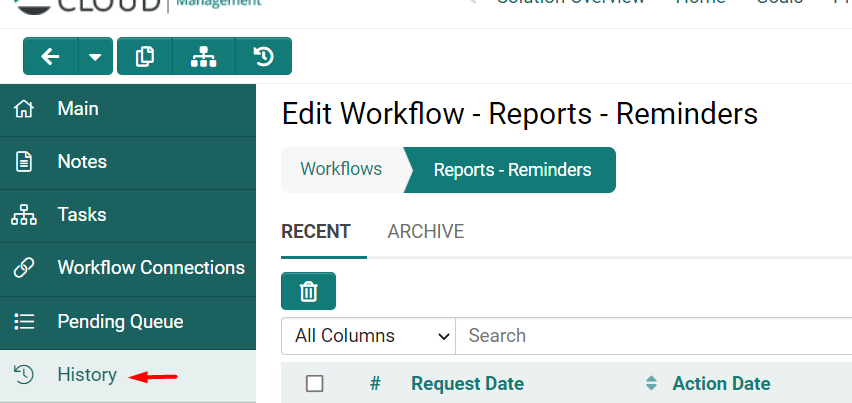
- Navigate to the Workflow page and then select the history tab;
- You will be able to see a list of completed workflow tasks from your workflow here. Make sure the task status is completed for each of your tasks i.e. the last connector is set to connect to Complete, for the benefit of workflow logs against a record.
- You can also confirm that your email was sent to the applicant by navigating to your Message Queue in the Menu. This can also be accessed by going to the Global Settings -> Communication
- Note: Not all of the options in the menu below will be visible in your menu.
- You will be able to see the email sitting in the queue and you can open the body of the email by clicking the envelope icon.
