Difference between revisions of "Template:July2021Upgrade"
Ann Vincent (talk | contribs) m (→New Ability to Import Custom Lookup Tables) |
Ann Vincent (talk | contribs) m (→New Ability to Import Custom Lookup Tables) |
||
| Line 133: | Line 133: | ||
====New Ability to Import Custom Lookup Tables==== | ====New Ability to Import Custom Lookup Tables==== | ||
| − | Added ability to easily import large data sets for use as options within a select-type custom field. This can be used to provide large selection sets for your users, such as item inventory codes, code dictionaries, or geographic lookups. You can also easily setup dynamic sub-filtering conditions across multiple fields. For example, you could set up parent and child fields for selecting the country, university, faculty, and courses where the available options for each subsequent field is dependent upon the value of a previous field. This new functionality is advantageous since you don't need any of the data to exist as records in your system (as with the current '''Enable Dynamic Content''' option within a custom field) and it will be easier to update the options by importing them rather than editing large amounts of text in the custom field '''Edit''' screen. | + | Added ability to easily import large data sets for use as options within a select-type custom field. This can be used to provide large selection sets for your users, such as item inventory codes, code dictionaries, or geographic lookups. You can also easily setup dynamic sub-filtering conditions across multiple fields. For example, you could set up parent and child fields for selecting the country, university, faculty, and courses where the available options for each subsequent field is dependent upon the value of a previous field. This new functionality is advantageous since you don't need any of the data to exist as records in your system (as with the current '''Enable Dynamic Content''' option within a custom field) and it will be easier to update the options by importing them rather than editing large amounts of text in the custom field '''Edit''' screen. To import a dataset, go to Global Settings > Custom Lookup Options. To configure, go to any custom field of the type '''Select One – Dropdown''', '''Select One - Radio button''', or '''Lookup - Autocomplete Options''' and toggle on '''Enable Dynamic Content'''. This should reveal a secondary toggle called '''Use Custom Lookup Options'''. |
| + | |||
| + | The '''Custom Lookup Options''' were introduced as an alternative to using an API, custom script, or storing large amounts of data in the UTA level 1/2/3, as the data for the custom lookup options is stored in a separate table. | ||
<!--124709 - Custom Lookup Options as Dynamic Content option--> | <!--124709 - Custom Lookup Options as Dynamic Content option--> | ||
Revision as of 09:45, 24 June 2021
Contents
- 1 General Details
- 2 Overview
- 3 Global System Upgrades
- 3.1 Major Updates
- 3.1.1 Updated the Address Field to Use Google Location API for Auto-Population of Standard Fields
- 3.1.2 New Setting to Control the Display of Portal Pages as Links in the Header
- 3.1.3 Updated Interface for Note Entry Mode
- 3.1.4 Enhanced List View Searching with New Search Options
- 3.1.5 Added Confirmation Dialog for List View Exports that Trigger Status Changes or Workflows
- 3.1.6 Added an E-signature Queue
- 3.2 Minor Updates
- 3.2.1 Added Role Sharing Permissions for SmartCards
- 3.2.2 Updated Registration Forms to Pre-Populate with Invitation Data
- 3.2.3 Added Custom Field Permission Data to System Design Summary Reports
- 3.2.4 Added Additional Fields to Third-Party IRS Verification
- 3.2.5 Improved Searchability of System Email Templates
- 3.2.6 Added User Group Option to Linked Record List
- 3.2.7 Added Transaction Counts to Level 1, Level 2, User, and Organization Records
- 3.2.8 Added a List View Selector to Contact and Organization Lookups
- 3.2.9 Enhanced Accessibility Styling for Keyboard Focus
- 3.2.10 Added Options to Portal Preview Configuration Mode
- 3.2.11 Enhanced Advanced Data Table Headings
- 3.2.12 Added Metadata to Email Templates
- 3.2.13 Enhanced Autoloader List View
- 3.2.14 Added Level 1 fields to Level 3 List Views
- 3.1 Major Updates
- 4 On-Demand System Upgrades
- 4.1 Major Updates
- 4.2 Minor Updates
- 4.2.1 Added Option to Auto-Open Records in Annotation Mode
- 4.2.2 Added Interface Options for List Views and Portals
- 4.2.3 Enhancement to Special Chart Custom Field to support Line Charts
- 4.2.4 Extended Custom Batch Update Buttons on Level 2 to allow modification of Provider roles
- 4.2.5 Enhanced Templates for Countdown Timer Custom Field
- 4.2.6 Added Option to Include Audit Report for Adobe Sign
- 4.2.7 Added Ability to Optionally Display a Different Logo for Each Language
- 4.2.8 Added Option to Disable File Serving
- 4.2.9 Added Option to Ignore Comment Lines
- 4.2.10 Added Support for Data Policies to Invitations
- 5 Beta Previews
- 6 Notes for Admins
General Details
Upgrade Dates
Public Cloud Production release date: July 8 2021
Public Cloud Backup release date: June 22 2021
Private Cloud Production (Managed Upgrades) release date: July 22 2021
Private Cloud Backup (Managed Upgrades) release date: July 8 2021
Overview
Watch this video to get a general overview of the new features in this release.
To watch this video in full screen, please click on the full screen button on the bottom right.
Global System Upgrades
The new features listed below are enhancements to the SmartSimple system and will be immediately available to SmartSimple users upon the application of the upgrade to their server:
Major Updates
Updated the Address Field to Use Google Location API for Auto-Population of Standard Fields
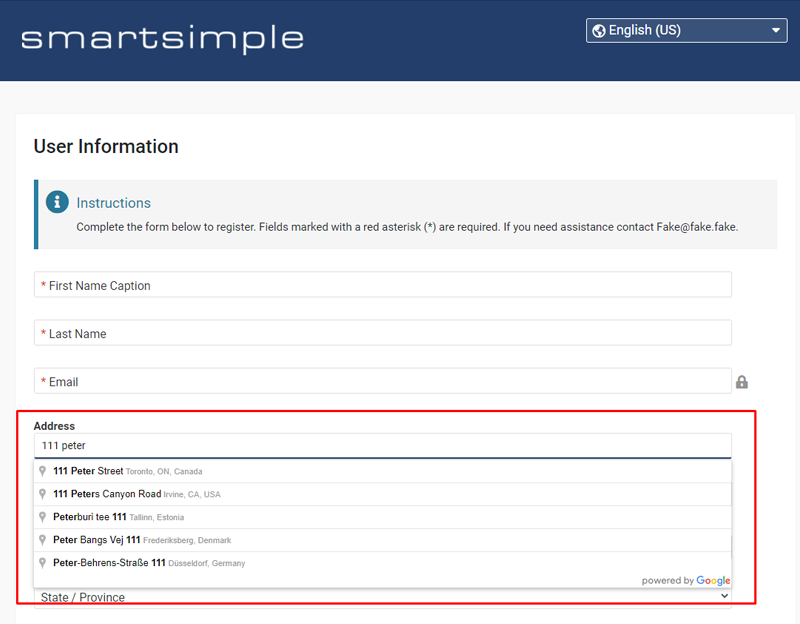
Typing into the address standard field will now provide the user with a list of verified address options. Upon selecting a verified address option, the other address standard fields (like country) will be auto-populated, saving the user time and helping to ensure addresses entered are accurate. This functionality will now appear on signup pages as well as user and organization profiles.
New Setting to Control the Display of Portal Pages as Links in the Header
Added the ability to suppress portal pages from appearing in the top header bar. If your system was configured using the Deny permissions on Portal Pages (formerly called “Main Menu” items) and your intent was to hide items from the main menu bar but link to those pages via a shortcut, you will need to remove the deny permission on those pages and possibly allow access and then turn off the new setting called Display As Menu on Portal Header. This must be done after this upgrade. To hide a portal page from the header, go to Menu Icon > Global Settings > Users tab > Portals > Edit the desired portal > Edit the desired Portal Page and toggle off Display As Menu on Portal Header located under the Name.
Updated Interface for Note Entry Mode
Improved the look of the Note Entry Mode on records, in a list view, and on exports. To configure, navigate to a Text Box – Text Multiple Lines custom field and toggle ON Enable Note Entry Mode. When users enter text into the input and save, the text will be time stamped and display below the field.
Enhanced List View Searching with New Search Options
Advanced Search for list views have been updated with multiple search options for single conditions as well support for phonetic searches. You can now use Advanced Search in list views and search for multiple exact value matches in a single condition. For example, you could search for multiple contacts by email address. To do that, go to Menu Icon > People > Advanced Search > Select Email for the standard field > Select the Multiple option and enter email addresses delimited by a semi colon ( ; ). Additionally, you can also make phonetic searches using Soundex in the Advanced Search. Soundex helps English language speakers find records that have a minor difference in spelling. For example, if the user searches the keyword "strokes" it will return records with values equal to "stroke", "strokes", "stroka", "stroko", etc. but it will NOT return values that contain these words as part of a bigger string (e.g. "strokes test"). To use this new feature, navigate to a list view, click into the Advanced Search, select a text-based field and select the new option Soundex from the operator dropdown.
Note: When using the Multiple search option, it is an OR search between values and the values must be an exact match. This functionality is available for fields like Application Name but not available for fields with pre-defined options like a select one or date fields. For phonetic searches, numeric and date fields are not supported and neither are fields with predefined options. For more information on Soundex, view the documentation guide.
Added Confirmation Dialog for List View Exports that Trigger Status Changes or Workflows
Added a confirmation dialog when users export a list view that is configured to run workflows after export. This is for list views utilizing the settings to Update Status After Export or Trigger Workflow After Export found under the Export tab of the list view builder.
Added an E-signature Queue
Added an E-signature Queue where you can see and remove pending e-signature requests from the queue. To see the new queue, navigate to Menu Icon > Global Settings > Integrations tab.
Minor Updates
Added Role Sharing Permissions for SmartCards
Added the ability to control which user roles have permission to share SmartCards by role. The new settings are located under Menu Icon > System tab > SmartCard > Sharing Permission tab.
Updated Registration Forms to Pre-Populate with Invitation Data
When a new user registers after accepting an invitation, the information in the invitation will now auto populate the signup page to save the user time. Specifically, the standard fields for Prefix, First Name, Last Name, and Email. The invitations feature can be configured by going to the desired UTA > Configuration Settings > Level 1 > Invitations Template.
Added Custom Field Permission Data to System Design Summary Reports
Added additional information to system design summary reports when custom fields are included. Specifically Custom Field Role Permissions, Status and Type Permissions have been added to the report. Navigate to Global Settings > System Design Summary and toggle ON the option to include Custom Fields for the desired UTA and click Generate Summary.
Added Additional Fields to Third-Party IRS Verification
Added additional fields for IRS third party verification mapping. New fields include: Tax Period, Revenue Amount (Form 990), Asset Amount and Income Amount. You can see the new field mapping options by going to Menu Icon > Global Settings > Transactions > Types > Edit a type set to Company with Use third party verification service toggled ON > Third Party Verification Mapping.
Improved Searchability of System Email Templates
To make it easier to find workflow emails in the System Email Templates, additional information was added to the Name column. You can now search workflow emails on Task ID, Workflow ID, Task Number, and Task Description. Go to Menu Icon > Global Settings > Communications tab > System Email Templates.
Added User Group Option to Linked Record List
If you are using the Linked Record List custom field to associate contacts inline on a record, you now have the option to associate user groups. This makes it easier to associate a predefined group of users to a record such as "Sales Group". To configure User Groups, go to Menu Icon > Global Settings > Users tab > User Groups.
Added Transaction Counts to Level 1, Level 2, User, and Organization Records
Added a transaction count on Level 1, Level 2, User, and Organization records.
Note: The count shows the number of transaction records from the type tabs that are visible to the user.
Added a List View Selector to Contact and Organization Lookups
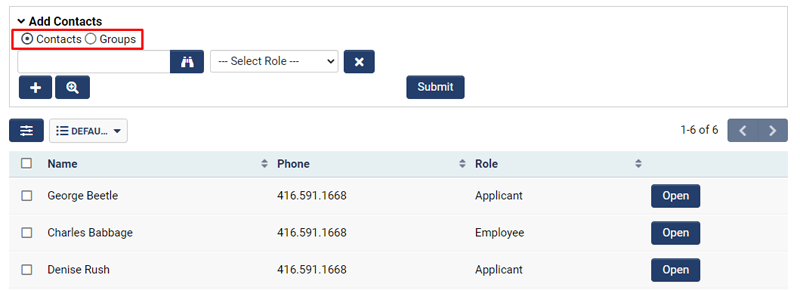
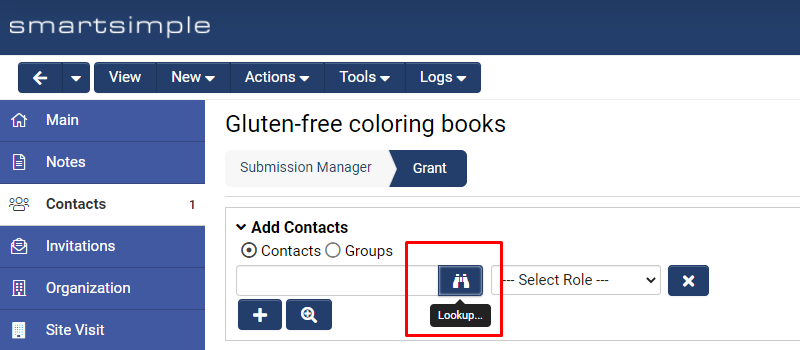
Added the list view selector to the single contact lookup button when you are associating contacts or organizations to a Level 1 record such as a grant. This gives your users more flexibility and choice over what data they want to see when they lookup users and organizations. For example, if you are associating reviewers through the lookup, you might want to see different information than if you are associating a co-applicant. You can see the list view picker if you navigate to a Level 1 record and go to a Linked Record List, Contacts tab, or Organization tab and click on the Lookup button.
Enhanced Accessibility Styling for Keyboard Focus
Enhanced the styling of buttons for improved accessibility. This can be seen by using the tab key to focus on a button. For example, dark colored buttons will have a light-colored outline and vice versa. For an optimal accessibility experience go to Menu Icon > Global Settings > Branding tab > Toggle ON Enable Accessibility Mode.
Added Options to Portal Preview Configuration Mode
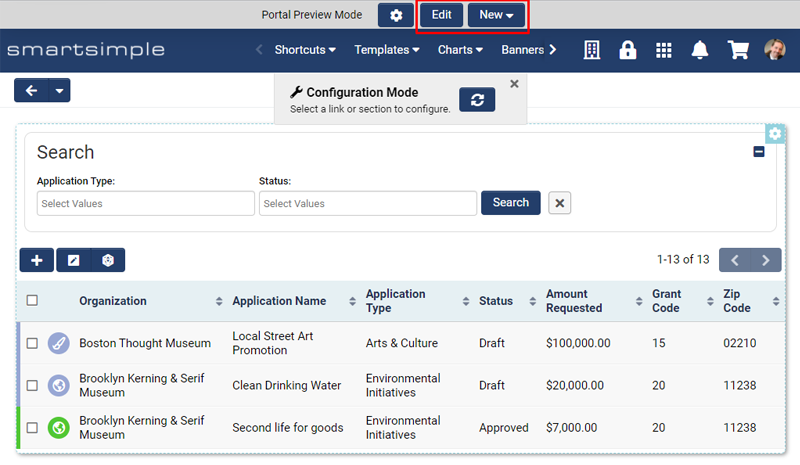
Added two new buttons to Configuration Mode of portal previews to make portals easier to configure. An Edit button enables top level editing of the portal and a New button that makes it easier to create new user menu links and new portal pages from within configuration mode. To see these new buttons, navigate to Menu Icon > Global Settings > Users tab > Portals > Edit the desired portal > Preview > Configuration Mode (gear icon button).
Enhanced Advanced Data Table Headings
Modified the section title inputs on the Advanced Data Table custom field to render as headers for improved experience for users with assistive technology.
Added Metadata to Email Templates
Added Created By, Created Date, Last Updated By and Last Updated Date to email templates and surfaced in the email templates list view. To see the new fields, navigate to Menu Icon > Email > Templates.
Note: Some data may not be available for older records but new records will show the added fields going forward.
Enhanced Autoloader List View
Enhanced the autoloader list view to include Schedule, Workflows, Reports, and Sequential Loader to make it easier to see what has been configured without going into each record. To see the new columns, navigate to Menu Icon > Autoloaders.
Added Level 1 fields to Level 3 List Views
Added the ability to surface Level 1 fields such as the status or the amount requested of the grant on a Level 3 sub activity list view. You can add Level 1 fields to a Level 3 list view by going to the desired Level 3 list view, navigating to the Columns tab in the list view builder and selecting desired level in the field entity dropdown.
On-Demand System Upgrades
The following features are available immediately with the application of the upgrade, but must first be enabled or configured by a Global Administrator:
Major Updates
Enhanced Shopping Cart Feature for Matching Gift programs
The Shopping Cart feature has been enhanced to support matching gift programs. For example, users can now easily utilize the shopping cart to donate to a charity and earn a matching gift based on your specified criteria and logic. The new matching gift feature can be configured by navigating to Menu Icon > Global Settings > Shopping Cart Item Types > Edit a type > Toggle ON Donation Management Feature Set > Toggle ON Enable Matching Gifts Feature Set.
New Ability to Import Custom Lookup Tables
Added ability to easily import large data sets for use as options within a select-type custom field. This can be used to provide large selection sets for your users, such as item inventory codes, code dictionaries, or geographic lookups. You can also easily setup dynamic sub-filtering conditions across multiple fields. For example, you could set up parent and child fields for selecting the country, university, faculty, and courses where the available options for each subsequent field is dependent upon the value of a previous field. This new functionality is advantageous since you don't need any of the data to exist as records in your system (as with the current Enable Dynamic Content option within a custom field) and it will be easier to update the options by importing them rather than editing large amounts of text in the custom field Edit screen. To import a dataset, go to Global Settings > Custom Lookup Options. To configure, go to any custom field of the type Select One – Dropdown, Select One - Radio button, or Lookup - Autocomplete Options and toggle on Enable Dynamic Content. This should reveal a secondary toggle called Use Custom Lookup Options.
The Custom Lookup Options were introduced as an alternative to using an API, custom script, or storing large amounts of data in the UTA level 1/2/3, as the data for the custom lookup options is stored in a separate table.
Minor Updates
Added Option to Auto-Open Records in Annotation Mode
Added option to open records of a particular status in Annotation Mode by default. If you have a status such as "Revisions Requested” where you have to send the record back to the user for annotations or to respond to annotations, you can now force the record into annotation mode and save the user a click. To configure this, go to the desired UTA > Configuration Settings > Pick the desired level (1, 2 or 3) > Statuses > Edit the desired status > Permissions & Availability tab > Open Record in Annotation Mode.
Added Interface Options for List Views and Portals
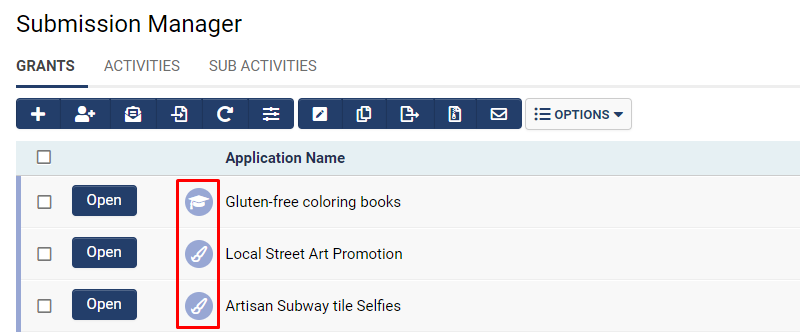
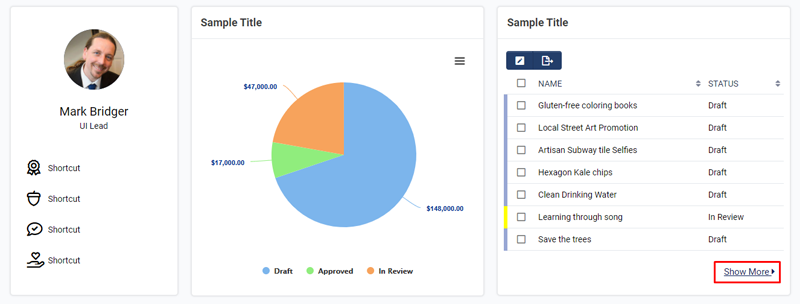
New settings have been added to list views and portals to give you more control over how list views render. For example, you can now choose to hide the type/status icon on list views. In portal list view sections, you can choose to display just a few records with an option to view more. These new options will be of particular interest to people using narrow or short portal sections. To constrain the number of records displayed in a list view in a portal section, navigate to that section under the portal settings and enter a number into the new Record Limit field.
Enhancement to Special Chart Custom Field to support Line Charts
Added a Line chart option to the Special - Chart custom field that is available to charts with the Data Type of Records related to an object.
Note: there is no drill down functionality for this specific chart type.
Extended Custom Batch Update Buttons on Level 2 to allow modification of Provider roles
Added option to the Custom Batch Update Buttons on a Level 2 list view so you can now Add or Remove UTA provider roles in batch to save time. To see this option, the UTA needs to be configured as a Consumer for Level 2 providers and the Level 2 standard field UTA Providers must be enabled. Navigate to the desired UTA > Edit the Level 2 list view > Batch Update Buttons tab > Edit the desired batch update button > Select UTA Provider in the Option dropdown.
Enhanced Templates for Countdown Timer Custom Field
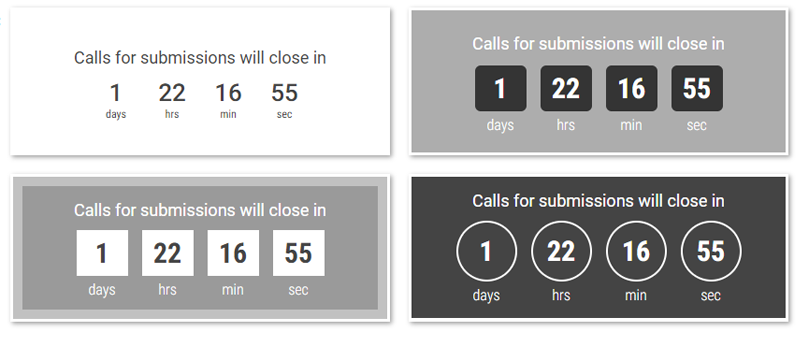
Added template and color options to the custom field Display - Countdown Timer. This field is typically used to highlight approaching deadlines and these enhancements give you the option of making this deadline messaging more noticeable and visually appealing.
Added Option to Include Audit Report for Adobe Sign
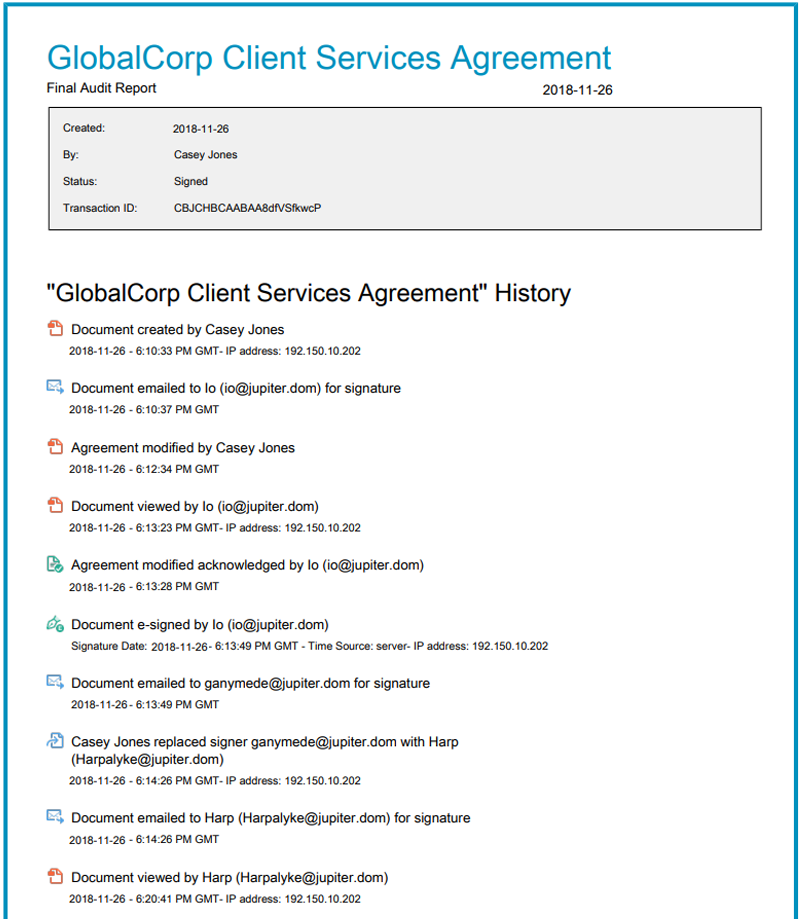
Added an option to include the audit report for Adobe Sign integration when the document is returned to SmartSimple from Adobe. If enabled, the audit report will be auto generated by Adobe and appended to the document. To enable this setting, navigate to Global Settings > Integrations tab > Integration Key Management > Edit the key with the type Adobe Sign to see the new toggle Include Audit Report. Learn more about adobe audit reports at Adobe's help website.
Added Ability to Optionally Display a Different Logo for Each Language
Added ability to display a different logo based on the language of the user. Go to Menu Icon > Global Settings > Global Translation Settings button.
Added Option to Disable File Serving
Added a new option to disable file serving for any uploaded files throughout the system including SmartFolders. If the setting Disable Option to Serve Uploaded Files is toggled ON and if an uploaded file is referenced via the link, it will force the file to download instead of opening it in the browser. To see this setting navigate to Menu Icon > Global Settings > Security tab.
Added Option to Ignore Comment Lines
A new toggle was added to the autoloader called Ignore comment lines denoted by pound symbol ( # ). When this setting is toggled ON, rows starting with a pound symbol ( # ) will be treated as comments and skipped during processing. You can still process data with pound symbols with this setting ON if you wrap the entry with the pound symbol in quotes (Example: John, Smith,"#123 Peter Street"). If the new setting is OFF, you can have a pound sign in your data (Example: John, Smith,#123 Peter Street) and it will still be processed as data. To see the new setting, navigate to Menu Icon > Global Settings > Autoloaders > Edit the desired autoloader > File Layout tab.
Note: Import wizards do not have this toggle and as such all pound signs are treated as data.
Added Support for Data Policies to Invitations
Added the ability to set data policies for invitations. For example, you could setup a Data Retention policy to delete the values of users who were sent an invitation but either did not respond of declined the invitation. To see the new option, go to Menu Icon > Global Settings > Security tab > Data Policies > Edit a policy of the type called Retention and under the Entity dropdown select Invitations. The Date Field to Compare dropdown will contain the following options specific to invitations: Last Updated, Invite Time, and Response Time.
Beta Previews
(Beta) New Grants.Gov Integration
New beta feature that integrates with Grants.gov for State agencies. A state agency can now search the list of opportunities found on Grants.gov from within a UTA. You can view the details of an opportunity and import the opportunity as a Level 1. Once an opportunity has been imported, you can track and manage your internal application process around the opportunity as well as track funds and report results. To configure this beta feature, go to the desired UTA > Configuration Settings > Connectivity tab > Grants.Gov Integration.
Notes for Admins
Added New Variable for Status Group Name
Added the ability to call the status group name value on all UTA levels using two new variables. This will make it easier to display the status group name to internal users who would not have otherwise seen this value. The new variables can be referenced by @statusgroupname@ (which will display the status group name) and @statusgroupname_lang@ (which will display the translation of the status group name). If no translation is configured, the English caption will be displayed.
Extended 'Save As' Option to Save & Submit Buttons
The Save As button is now available in the Save & Submit Button settings. Save time by using Save As to create a copy of the existing Submit button to make minor changes instead of creating buttons from scratch.
Added Option to Use Configuration Folders for Portal Logos
Within the portal builder we have added support for selecting and display logos from Configuration Folders. To see this setting go to Menu Icon > Global Settings > Users tab > Portals > Edit a portal.
Added Task Types to Company and User Workflows
Added Company Association task type on user workflows as well as the People Association task type on company workflows to make it easier to add, update and remove associations. For example, you could use these new workflow options to synchronize organization associations based on an external source.
