Difference between revisions of "How to create a website themed portal page"
Mark Bridger (talk | contribs) (→Create a Shortcut section and add aggregate shortcuts) |
Mark Bridger (talk | contribs) (→Creating a section type of chart) |
||
| Line 227: | Line 227: | ||
===Creating a section type of chart=== | ===Creating a section type of chart=== | ||
| − | |||
If you have users that are working with multiple applications in multiple statuses you may want to consider using a chart to visualization the status of their applications. You can add a chart by doing the following: | If you have users that are working with multiple applications in multiple statuses you may want to consider using a chart to visualization the status of their applications. You can add a chart by doing the following: | ||
| − | # In the Common Role select Draft Portal in the left navigation. | + | # In the '''Common''' Role select '''Draft Portal''' in the left navigation. |
| − | # Under the Main Menu title bar click the Edit button for Home. | + | # Under the '''Main Menu''' title bar click the '''Edit''' button for '''Home'''. |
| − | # Under the Sections title bar click the Add Section button. | + | # Under the '''Sections''' title bar click the '''Add Section''' button. |
| − | # For Name enter Chart. | + | # For '''Name''' enter '''Chart'''. |
| − | # For Type select Chart. | + | # For '''Type''' select '''Chart'''. |
| − | # For Chart List View select your desired list view. It must have a column with the status and a column with the amount requested. | + | # For '''Chart List View''' select your desired list view. It must have a column with the status and a column with the amount requested. |
| − | # For Chart Title enter My Applications by Status. | + | # For '''Chart Title''' enter '''My Applications by Status'''. |
| − | # Leave Chart Type set to Bar. | + | # Leave '''Chart Type''' set to '''Bar'''. |
| − | # For X-Axis choose the Status. | + | # For '''X-Axis''' choose the '''Status'''. |
| − | # For X-Axis Label enter Status. | + | # For '''X-Axis Label''' enter '''Status'''. |
| − | # For Y-Axis choose the amount requested. | + | # For '''Y-Axis''' choose the amount requested. |
| − | # For Y-Axis Label | + | # For '''Y-Axis Label''' enter '''Amount Requested'''. |
| − | # Leave Aggregation set to Sum. | + | # Leave '''Aggregation''' set to '''Sum'''. |
| − | # Click the Save button. | + | # Click the '''Save''' button. |
| − | # To preview the portal click on Draft Portal - Common in the hierarchical Navigation. | + | # To preview the portal click on '''Draft Portal - Common''' in the hierarchical Navigation. |
| − | # Click the Preview button at the bottom of the page. | + | # Click the '''Preview''' button at the bottom of the page. |
| − | # Click the Main Menu link called Home in the header. | + | # Click the Main Menu link called '''Home''' in the header. |
Congratulations you have now created a sample Main menu link using the website theme and other features. | Congratulations you have now created a sample Main menu link using the website theme and other features. | ||
Revision as of 15:41, 4 October 2019
Contents
- 1 Overview
- 1.1 Website theme portal samples
- 1.2 Configuration – Essentials
- 1.2.1 Before you create a main menu link using website theme
- 1.2.2 Go to the Draft Portal of the Common Role
- 1.2.3 Download Sample Image Files
- 1.2.4 Creating a main menu link on the common role draft portal
- 1.2.5 Creating a text section inside the section container
- 1.2.6 Creating a section container
- 1.2.7 Creating an image shortcuts to the user’s profile
- 1.2.8 Creating an Image shortcuts to a list view
- 1.2.9 Creating a shortcut section inside the section container
- 1.2.10 Creating an aggregate style shortcut using count
- 1.2.11 Creating an aggregate style shortcut using sum
- 1.2.12 Create a Shortcut section and add aggregate shortcuts
- 1.2.13 Creating a section type of chart
Overview
When a user logs into the system they are presented with an interface based on their permissions and what has been configured. The interface the user sees is referred to as a Portal.
Inside the portal you can create Main Menu links, these are text links that appear in the header. When a user clicks on a Main Menu Link, content you have configured for this link will display. Each Main Menu Link can have a different Theme. The Theme setting, changes the look of content within the portal Sections under a Main Menu link.
This article is about the portal theme called Website which is typically used for low usage or non-core staff users, such as applicants, employees, board members, etc . This theme is designed to have imagery such as graphical banners and image shortcuts.
In this article we will show you some examples of website themed portals and we will walk you through how to setup a sample portal that uses the website theme. You will need Global Administrator privileges to create and modify portals and to do the exercises in this wiki article.
Website theme portal samples
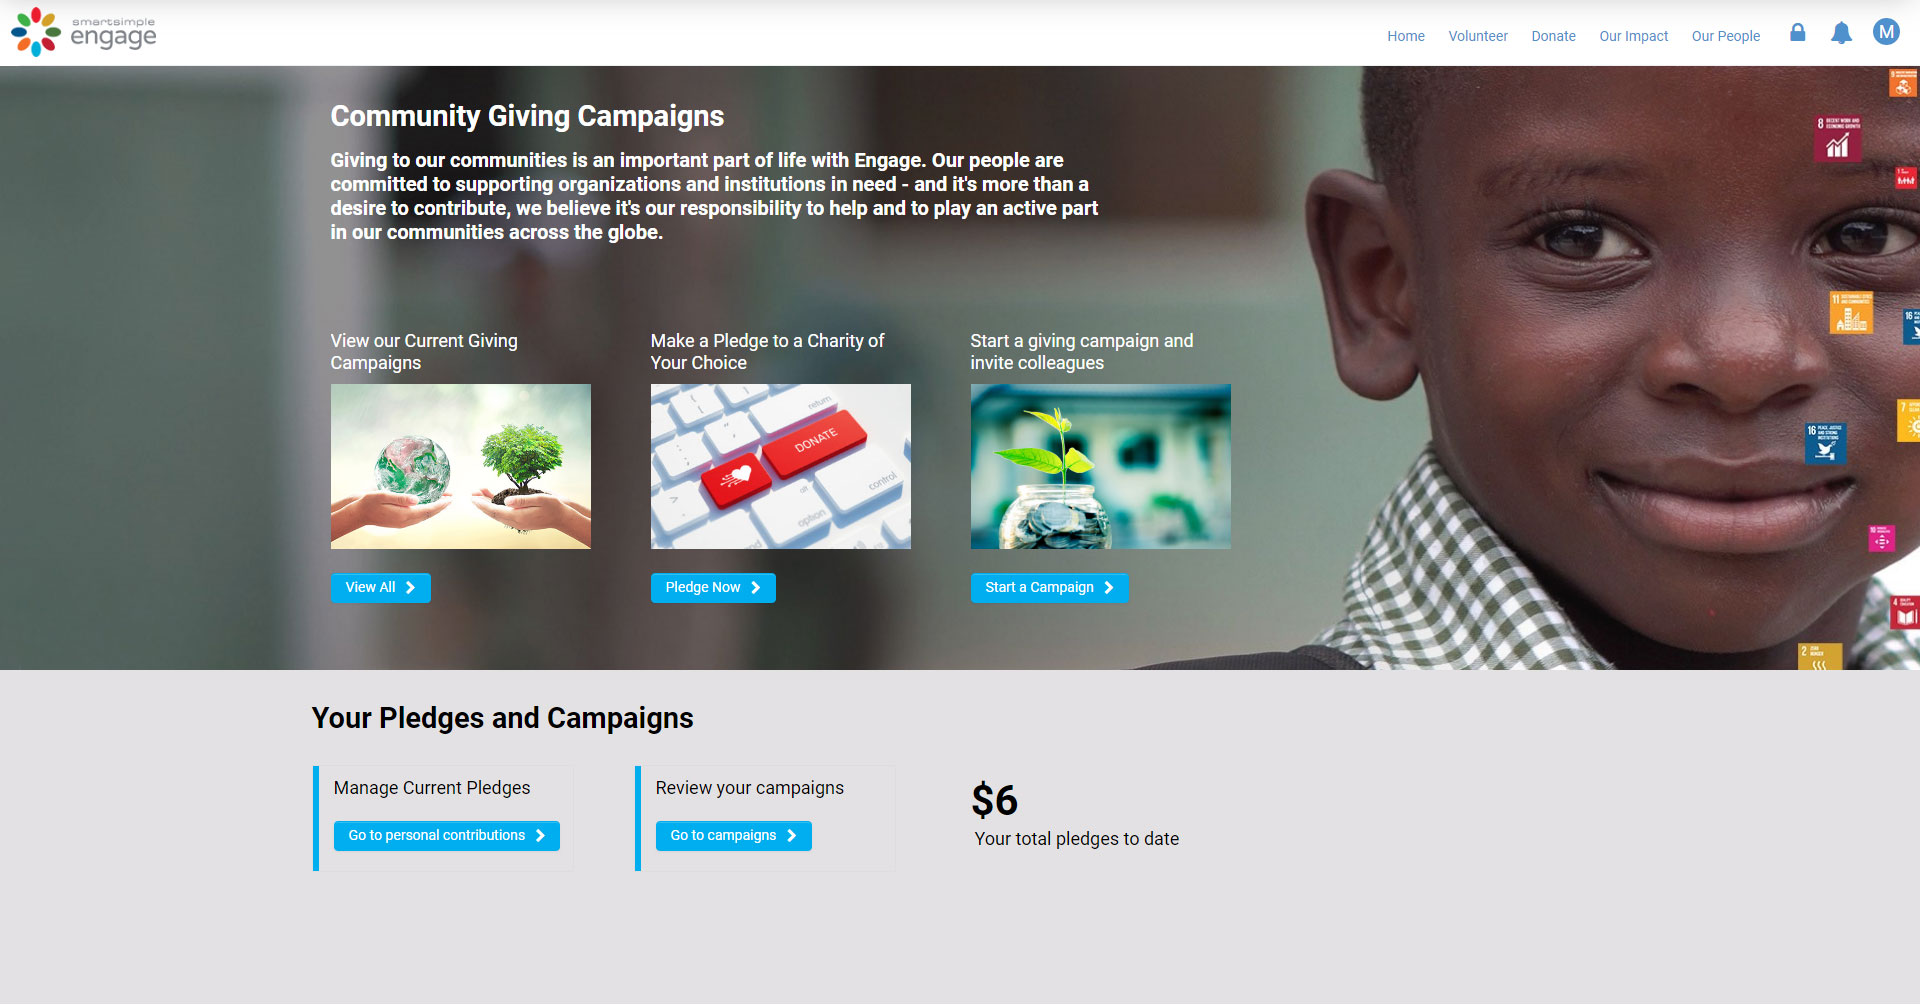
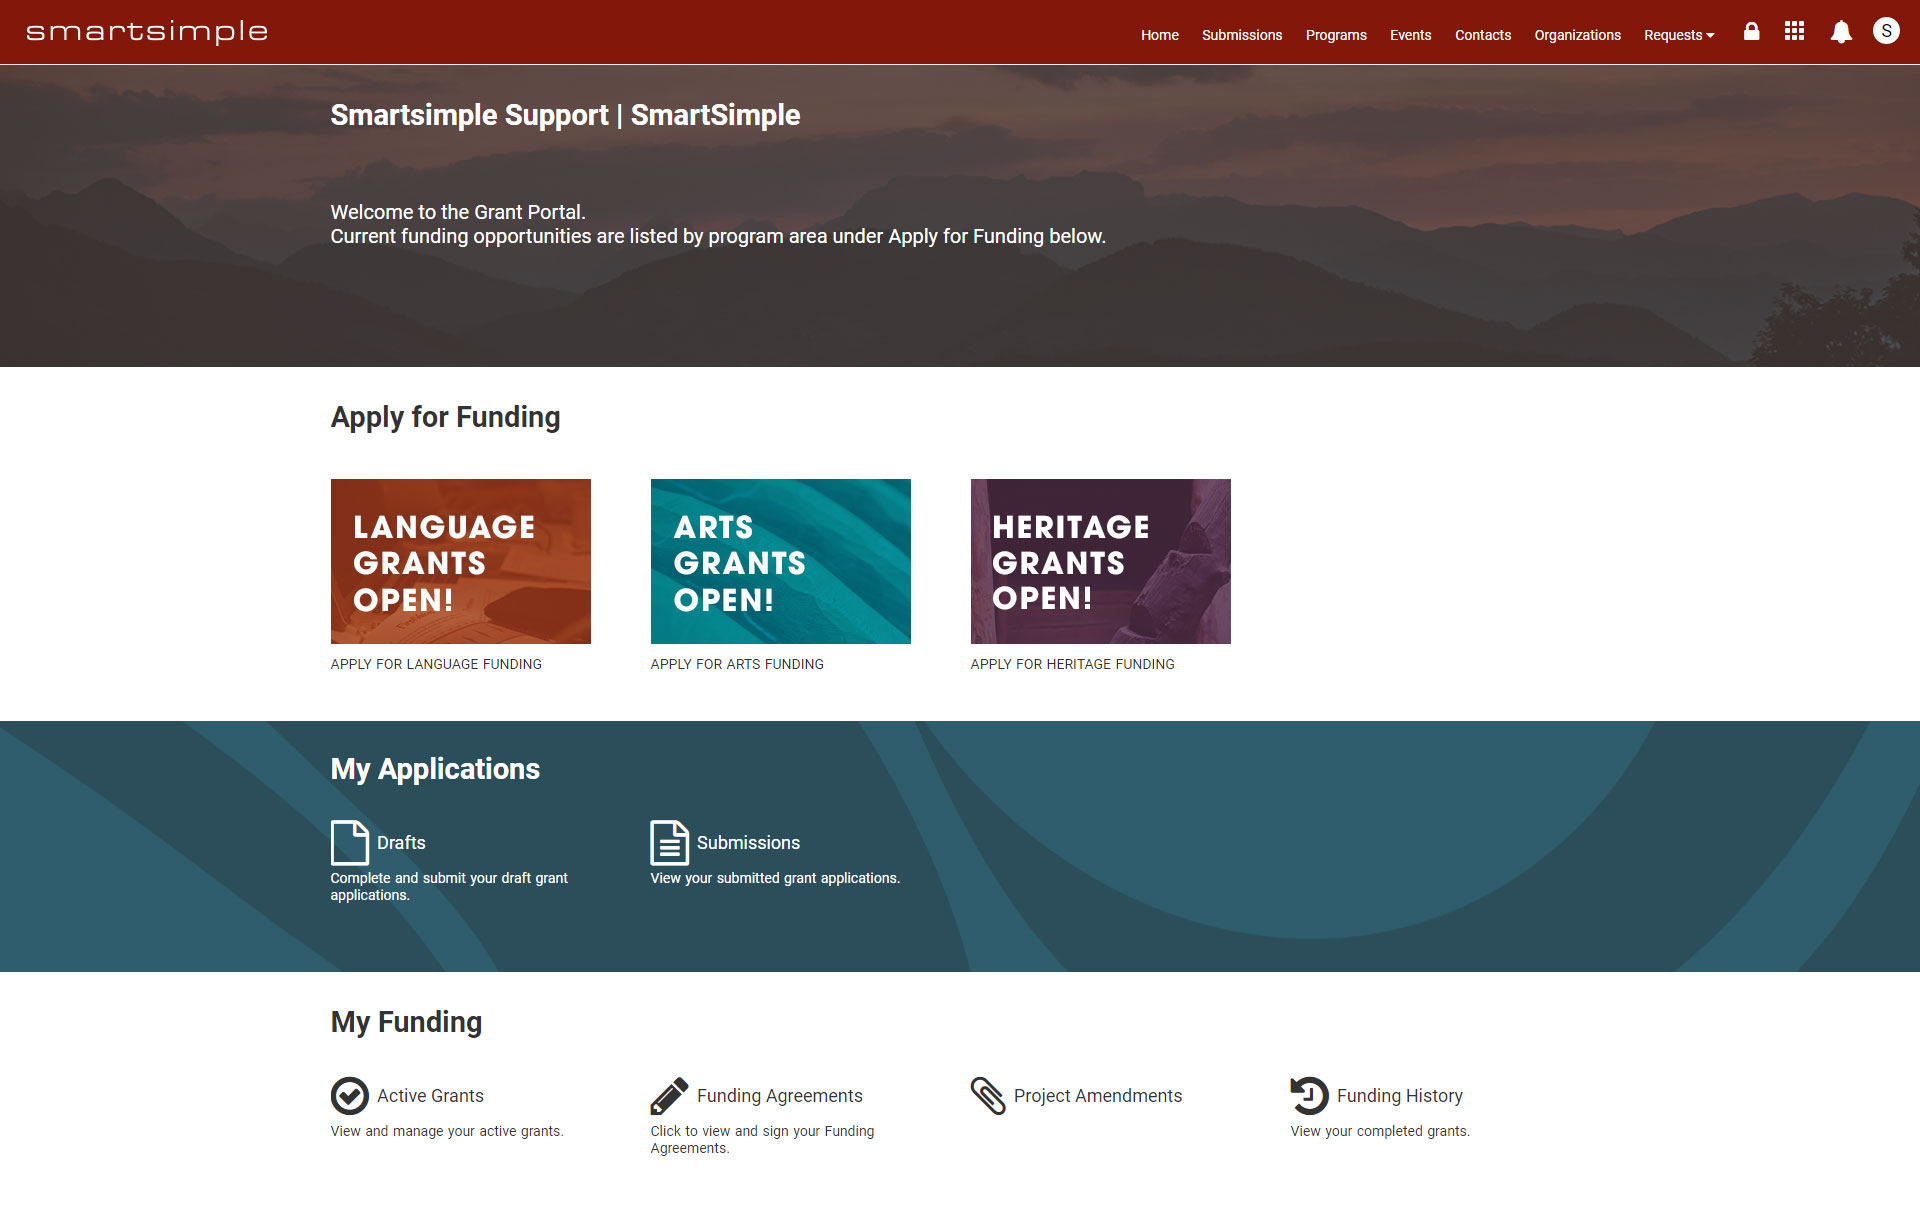
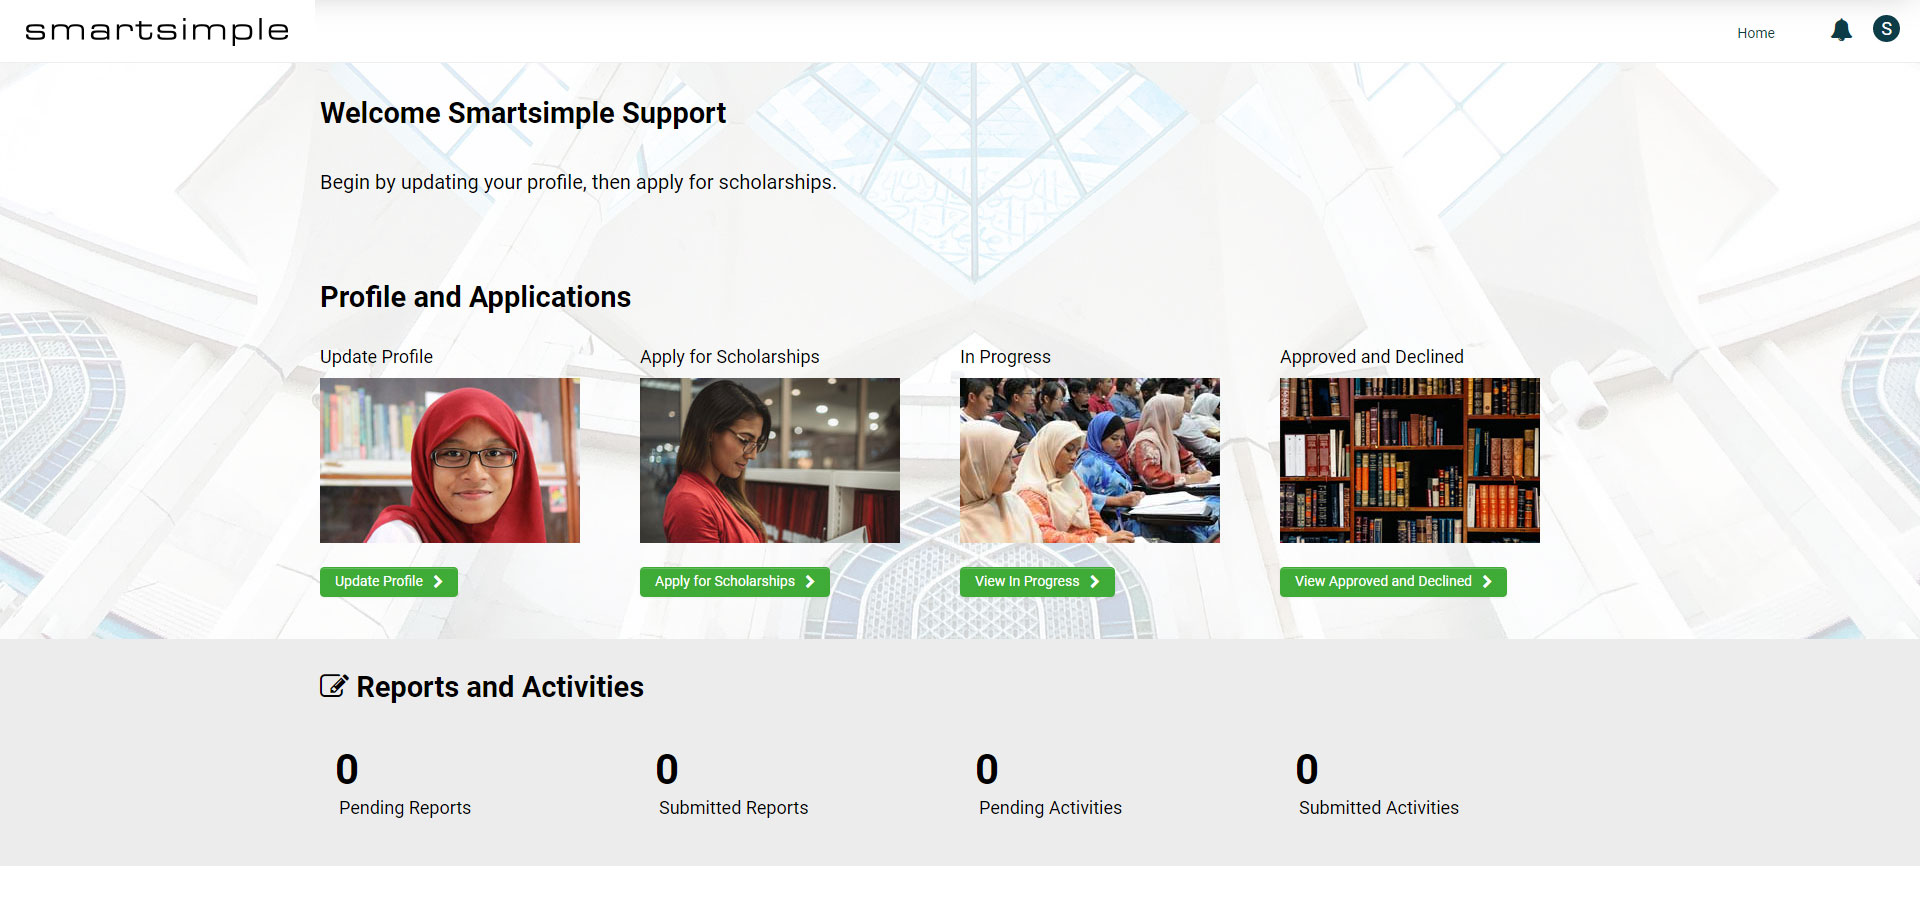
Here are some samples of portals using website themed sections:
Configuration – Essentials
Follow the steps below to create a sample portal with a Main Menu link that uses the Website theme.
You must have Global Administrator privileges to create and modify portals. You will also need to have a Universal Tracking Application (UTA) configured within your system and you need to have a list views configured in that UTA.
We suggest you do the exercises in this article in the Portal Draft Mode of the Common role in your system. Assets created in the Draft Mode will not be overwritten daily, so you can work on these exercises over multiple days. Anything built in the draft mode, will not affect live users as long as you don’t deploy the changes. In addition assets created on the Common role can be easily shared amongst multiple roles so you don’t have to create and maintain the same content on multiple roles. Lastly when desired you can refresh the draft portal by overwriting everything on the draft portal with what is currently configured on the live portal.
Go to the Draft Portal of the Common Role
Do the following to get to the common role and enable draft portal:
- Go to the Menu Icon and select Roles & Security.
- Click the User Roles Link.
- Click the Edit button for the Common role.
- If you don’t see a tab called Draft Portal in the left navigation, click the button in the action bar below the header called Portal Draft Mode.
- Now click the tab called Draft Portal in the left navigation.
- Click the Refresh button. This will populate the draft portal with everything that is currently in the active portal.
- Click Save.
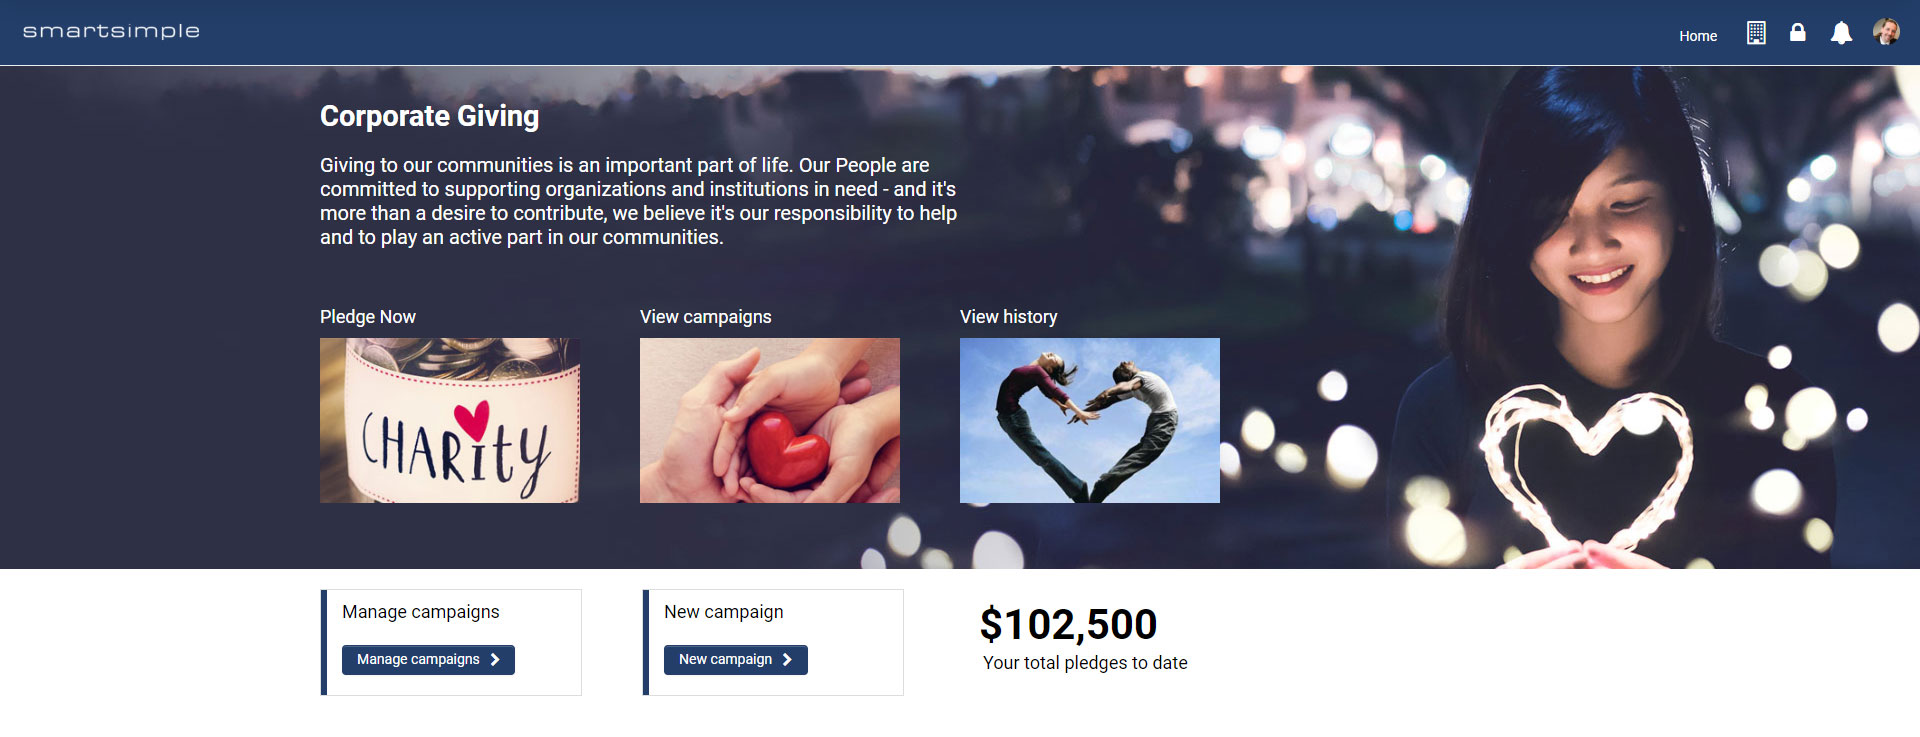
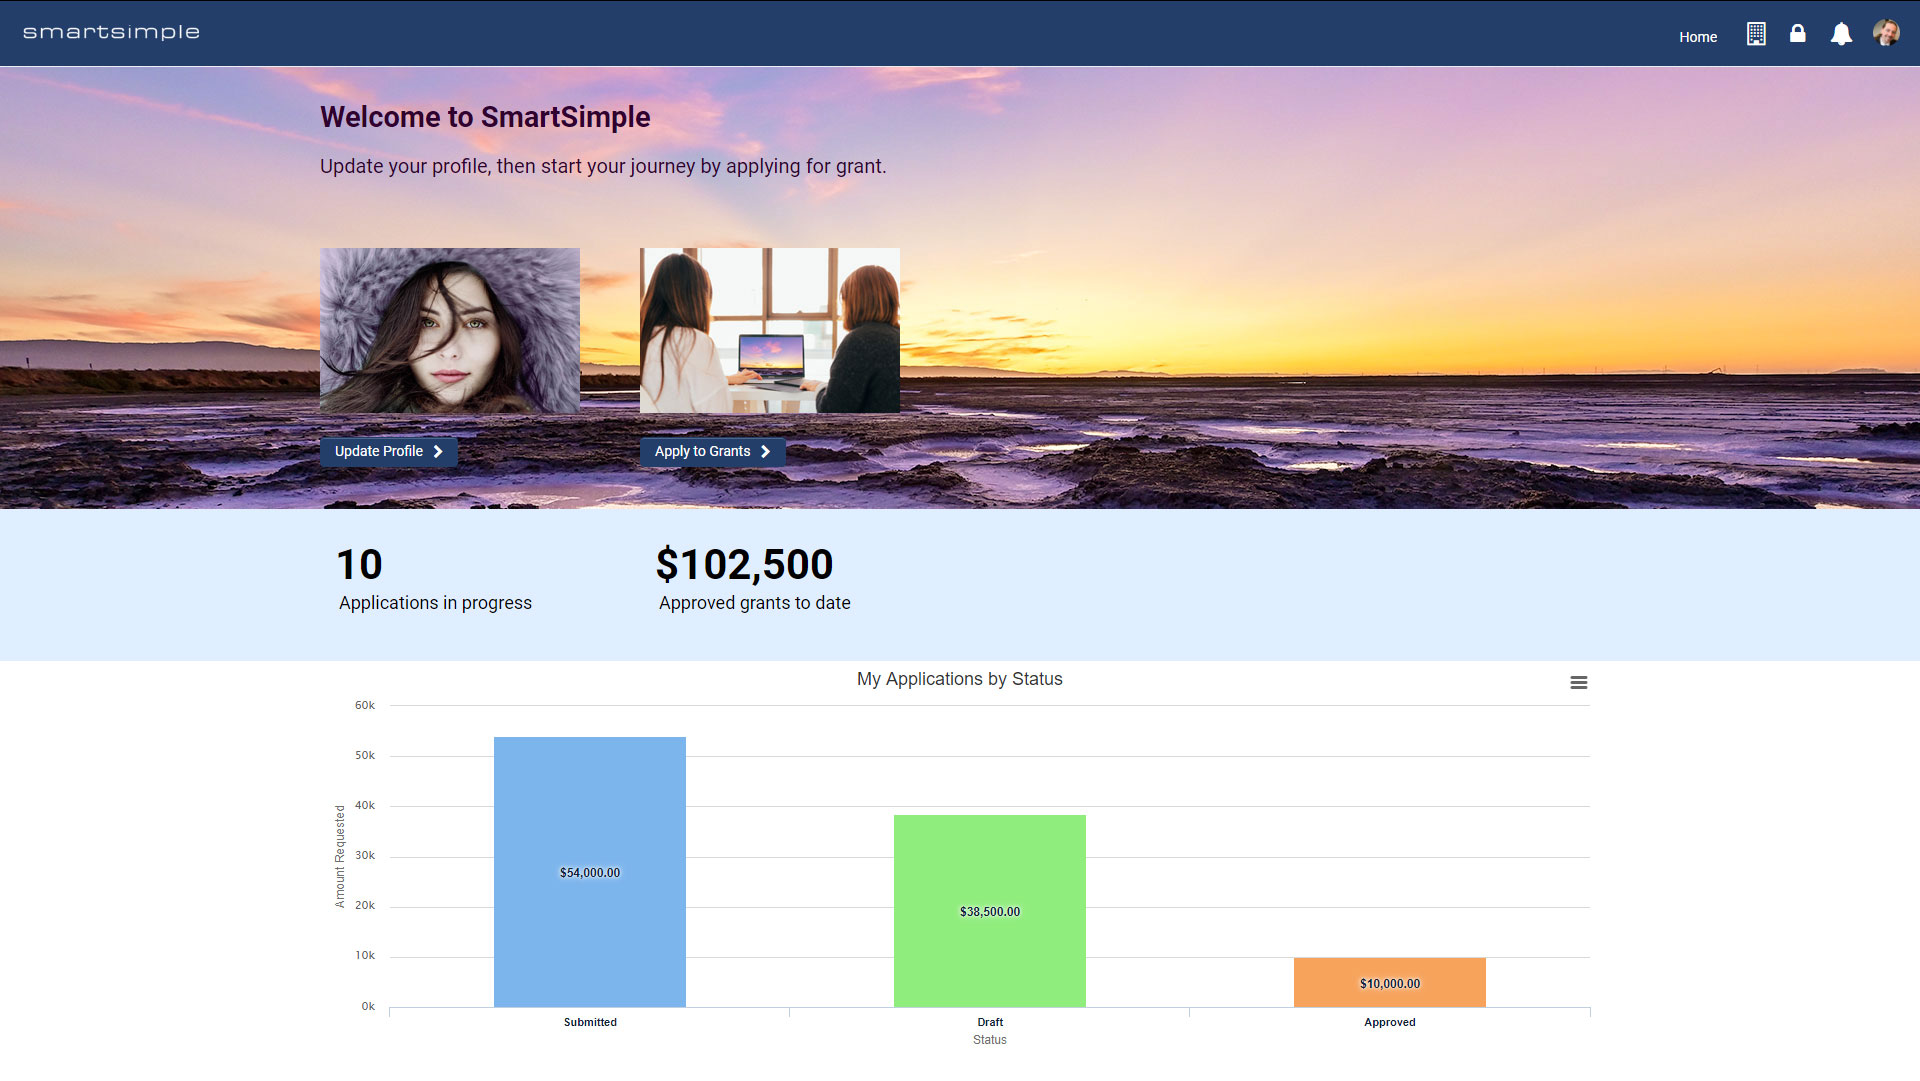
At the end of this tutorial you will have created a sample main menu link using the website theme on the common portal and it will look like this:
Download Sample Image Files
- Download the File:Website-portal-sample-images.zip used to create the image shortcuts and graphical banner .
- Extract the images from the zip file onto your computer. On a PC this is typically done by right clicking the file and choosing Extract all. Then you select a location to extract the files to. Extracting files to the desktop will make the files easy to find. Your files will now appear in the location you chose.
Later in the tutorial we will upload the files you extracted in this step into your SmartSimple system.
First we will create a Main Menu link on the Draft Portal of the Common role. Setup a main menu link by doing the following:
- Go to the Menu Icon and select Roles and Security.
- Click on the User Roles link.
- Click the Edit button for the Common Role.
- Click the Draft Portal tab on the left navigation.
- Under Main Menu title bar click the Add Main Menu button looks like a plus sign.
- For Caption enter Home.
- For Content Type select Sections.
- Click Save.
- Change the Theme to Website.
- Click Save.
- In the Hierarchical Navigation near the top of the page click on Draft Portal - Common.
- Click Preview in the submit bar at the bottom of the screen (a window will open showing you a preview of the common portal with your Main Menu Link titled Home).
- Click on the Home Main Menu link in the header that we just created (the area under the header is white because we have not defined any sections inside our main menu link.)
Now we have created a Main Menu link in the draft portal for users, next we will add sections and content to our Main Menu link called Home.
Creating a text section inside the section container
- On the General Tab of the Section Container we created above.
- Click the Add Subsection button which looks like a plus sign under the title bar called Subsections.
- For Name enter Welcome Text.
- For Type leave it as Text Template.
- For Title enter Welcome @firstname@ (this variable will display the users first name).
- For Instruction enter Update your profile, then start your journey by applying for grant.
- Click Save.
- Click Draft Portal - Common in the Hierarchical Navigation Bar near the top of the page.
Now we have a graphical image banner with a text section inside it. Next we will create image shortcuts.
Creating a section container
The first section we are going to create is called a Section Container. We will use this to create a graphical banner and it will contain other sections. Think of the section container as an empty box.
- Close the Preview window with the X in the top right of the window.
- Click the Edit button (looks like a pencil) for the Main Menu section we created earlier called Home.
- Click the Add Section button looks like a plus button and is found under the Sections title bar.
- For Name enter Graphical Banner.
- For Type choose Section Container.
- Leave the other fields blank.
- Click Save.
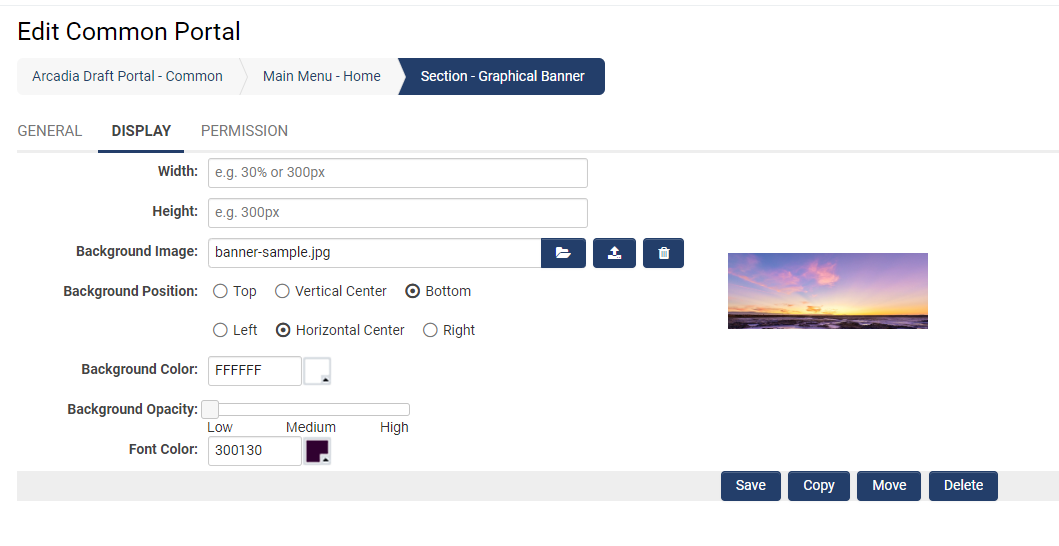
- Click on the tab called Display.
- Click Save so you will be able to upload a background image.
- On the Display tab again, for Background Image click the Browse button that looks like an open folder.
- Select the image called banner-sample.jpg and click Open (these images have been provided above. See the instructions in the section above called Download Sample Image Files) .
- Click the Upload button beside the Browse button (A preview of the image will appear).
- For Background Position choose Bottom and Horizontal Center.
- For Background Opacity move the slider all the way to the left where it says Low.
- For Font Color enter these 6 digits 300130 (this will make the font color purple).
- Click Save.
The display tab should look like this at this point:
We have now created a Section Container with an image background and we have specified the text inside should be a dark purple. Next we will add a text section inside the section container.
Creating an image shortcuts to the user’s profile
In this step we will create Image shortcuts on the common role. Please note if you have existing shortcut sections in the common role and you have not selected which shortcuts you want to appear in that section, then all the shortcuts on the role will show up in that section. If this scenario applies to you any new shortcuts you create will show up in your existing section. To fix this open the desired shortcut section and select the shortcuts you only want to display in that section. Once that is done new shortcuts you create will no longer automatically appear in that section which is recommended.
Create an image shortcut on the common role which will bring users to their profile by doing the following:
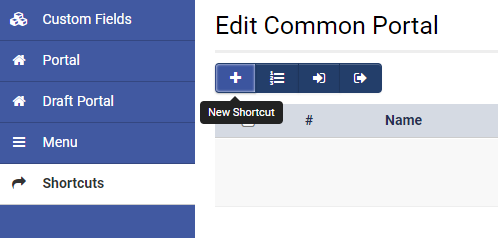
- On the Common role click the Shortcuts tab in the left navigation menu.
- Click the New Shortcut button in the action bar it looks like a plus sign.
- For Name enter Profile.
- For Style select Image.
- For Action Type select URL.
- For URL click the URL Lookup which looks like binoculars (a modal window will open).
- For Select Object Type choose People.
- For Select Action choose Edit My Profile.
- Click Apply (the modal window will close and the URL will be populated with the correct link).
- Click Save.
- For Image click the Browse button (looks like an open folder, if you do not see the image browse button check that Image is selected for Style and then click Save.).
- Select the image called shortcut-profile-sample.jpg (these images are provided. See the instructions in the section above called Download Sample Image Files) .
- Click Ok.
- Click the Upload button beside the Browse button (you will see an image thumbnail appear once the image is uploaded).
- For Button Label enter Update Profile.
- Click Save.
You now have an image shortcut that will enable the user to see and edit their profile. Next we will create an image shortcut that will take the user to a list view.
Creating an Image shortcuts to a list view
Create an image shortcut to a List view so the user can select a program to apply to, by doing the following:
- In the Common Role, click on Shortcuts in the left navigation.
- Click the New Shortcut button.
- For Name enter Apply.
- For Style select Image.
- For Action Type select System List View.
- For System List View select an existing List View from the list.
- For Button Label enter Apply to Grants.
- Click Save.
- For Image click the Browse button.
- Select the image called shortcut-apply-sample.jpg (these images are provided. See the instructions in the section above called Download Sample Image Files).
- Click Open.
- Click the Upload button located beside the Browse button (the image preview will appear).
- Click Save at the bottom of the page.
Now we have created two shortcuts for our portal, next we create a Shortcut section inside our Section container.
Creating a shortcut section inside the section container
When you create a shortcut section, we suggest you should always select the shortcuts you want to display in that section. If you select no shortcuts, all shortcuts will display. We will create a shortcut section inside our section container to hold the two image shortcuts we just created by doing the following:
- In the Common role click on the Draft Portal tab in the left navigation.
- Under the Main Menu title bar click the Edit button for the Main Menu link called Home.
- Under the title bar called Sections click the Edit button for Graphical Banner.
- Under the title bar called Subsections click the Add Subsection button.
- For Name enter Banner Shortcuts.
- For Type select Shortcuts.
- Leave the other fields blank.
- At the bottom of the page for Selected Shortcuts click the Lookup (if you do not select shortcuts using this lookup all shortcuts will appear).
- Check the shortcuts with the name Apply and Profile that we created earlier then click the Ok button.
- Click Save.
- Click Draft Portal - Common in the Hierarchical Navigation at the top of the page.
- Click the Preview button in the submit bar at the bottom of the page.
- Click the Main Menu link called Home in the header to see how our portal looks now.
Your portal should look like the below at this stage.
Now that we have added a shortcut section to our graphical banner, next we will add two aggregate style shortcuts in a new section below.
Creating an aggregate style shortcut using count
The aggregate style shortcuts are linked to a list view and are designed to show the Count, Sum or Average. Set these up by doing the following:
- In the Common role click on the Shortcuts tab in the left navigation.
- Click the New Shortcut button.
- For Name and Title enter Applications in progress.
- For Style select Aggregate.
- Select an existing System List View.
- Select an Aggregation Column (you could select something like name).
- For Aggregation Type select Count.
- Toggle on Link to List view. This way when the shortcut is clicked it will take you to the list view so users can apply.
- Click Save.
Creating an aggregate style shortcut using sum
The Sum aggregation type is typically used to show a total of funding dollars, people helped or other totals. Set this up by doing the following:
- In the Common role click on the Shortcuts tab in the left navigation.
- Click the New Shortcut Button.
- For Name and Title enter Approved grants to date.
- For Style select Aggregate.
- For System List View select an existing list view.
- For Aggregation Column select something with a dollar value such as amount requested.
- For Aggregation Type select Sum.
- For Number Format select Currency.
- Toggle on Link to List View so the user can go to the list view.
- Click the Save button at the bottom of the page.
Now you have two aggregate type shortcuts. Next we will add them to a new section in our portal.
Create a Shortcut section and add aggregate shortcuts
We will now create a second shortcut section outside the section container which will contain only aggregate shortcuts.When you have more than a few shortcuts we recommend adding multiple shortcut sections. For example you might want to have one section for all your image type shortcuts and a second section for all your aggregate type shortcuts. Create the new shortcut section with aggregate shortcuts by doing the following:
- In the Common role select Draft Portal in the left navigation.
- Under the Main Menu title bar click the Edit button for Home.
- Under the Sections title bar click the Add Section button that looks like a plus sign.
- For Name enter Secondary Shortcuts.
- Change the Type to Shortcuts.
- Under the Shortcut Settings title bar click the Lookup button (looks like binoculars) for Selected Shortcuts.
- Select the two aggregate shortcuts we created earlier named Applications in progress and Approved grants to date.
- Click OK.
- Click Save.
- Click on the Display tab and for Background Color enter E0EEFF this will change the background of this section to a light blue.
- Click Save.
- Click the Draft Portal - Common in the Hierarchical Navigation bar at the top.
- Click the Preview button in the submit bar at the bottom of the page.
- Click the Main Menu link called Home.
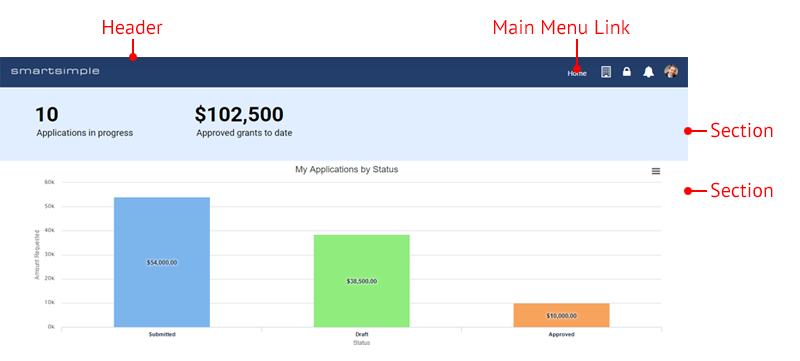
Now you can see aggregate shortcuts displaying the amount of applications in progress and the dollar value of those applications. Next we are going to add a chart that will show applications by status.
Creating a section type of chart
If you have users that are working with multiple applications in multiple statuses you may want to consider using a chart to visualization the status of their applications. You can add a chart by doing the following:
- In the Common Role select Draft Portal in the left navigation.
- Under the Main Menu title bar click the Edit button for Home.
- Under the Sections title bar click the Add Section button.
- For Name enter Chart.
- For Type select Chart.
- For Chart List View select your desired list view. It must have a column with the status and a column with the amount requested.
- For Chart Title enter My Applications by Status.
- Leave Chart Type set to Bar.
- For X-Axis choose the Status.
- For X-Axis Label enter Status.
- For Y-Axis choose the amount requested.
- For Y-Axis Label enter Amount Requested.
- Leave Aggregation set to Sum.
- Click the Save button.
- To preview the portal click on Draft Portal - Common in the hierarchical Navigation.
- Click the Preview button at the bottom of the page.
- Click the Main Menu link called Home in the header.
Congratulations you have now created a sample Main menu link using the website theme and other features.
