Difference between revisions of "Defining Lead Statuses"
| Line 1: | Line 1: | ||
| − | + | Lead statuses are a simple filtering method that you create to allow individuals to see selected groups of leads. Typical statuses are: | |
| − | |||
* '''New''' – indicating a new lead. | * '''New''' – indicating a new lead. | ||
* '''Dead''' – indicating a lead that is not workable. | * '''Dead''' – indicating a lead that is not workable. | ||
| Line 7: | Line 6: | ||
* '''Deferred''' – indicating that you may wish to work on this lead in the future. | * '''Deferred''' – indicating that you may wish to work on this lead in the future. | ||
| − | Only managers can delete leads. | + | Only managers can delete leads. This feature provides for campaign-level reporting, where you wish to know how many leads for each type were generated from any given campaign. |
You should indicate a lead is dead or some similar status when you no longer believe it is workable. | You should indicate a lead is dead or some similar status when you no longer believe it is workable. | ||
| Line 16: | Line 15: | ||
[[Image:Leads.png]] | [[Image:Leads.png]] | ||
| − | + | ||
The new '''Lead''' tab is there for every [[User|user]]. | The new '''Lead''' tab is there for every [[User|user]]. | ||
| Line 22: | Line 21: | ||
[[Image:Leads2.png]] | [[Image:Leads2.png]] | ||
| − | + | ||
The '''Settings''' page is displayed. | The '''Settings''' page is displayed. | ||
[[Image:Leads3.png]] | [[Image:Leads3.png]] | ||
| − | + | ||
Under '''Lead Settings''', click '''Statuses'''. | Under '''Lead Settings''', click '''Statuses'''. | ||
| Line 32: | Line 31: | ||
[[Image:Leads4.png]] | [[Image:Leads4.png]] | ||
| − | + | ||
Each '''Status''' is entered in the right. | Each '''Status''' is entered in the right. | ||
| + | |||
* The '''Display''' order determines which order you wish to see the statuses displayed. | * The '''Display''' order determines which order you wish to see the statuses displayed. | ||
* The '''Color''' code is not required. | * The '''Color''' code is not required. | ||
| Line 41: | Line 41: | ||
[[Image:Leads5.png]] | [[Image:Leads5.png]] | ||
| − | + | ||
4. Click the '''Save''' button. | 4. Click the '''Save''' button. | ||
[[Image:Leads6.png]] | [[Image:Leads6.png]] | ||
| − | + | ||
The '''Lead''' status is added. | The '''Lead''' status is added. | ||
[[Image:Leads7.png]] | [[Image:Leads7.png]] | ||
| − | + | ||
5. Click the '''New Lead Status''' to clear the '''Edit Status''' fields. | 5. Click the '''New Lead Status''' to clear the '''Edit Status''' fields. | ||
| Line 55: | Line 55: | ||
[[Image:Leads8.png]] | [[Image:Leads8.png]] | ||
| − | + | ||
| − | Whenever entering any status, it is a good idea to use increments of ten. | + | Whenever entering any status, it is a good idea to use increments of ten. Consequently, should you need to insert an additional status at a later date; you don’t have to re-number any of the existing statuses. |
Latest revision as of 15:10, 4 June 2019
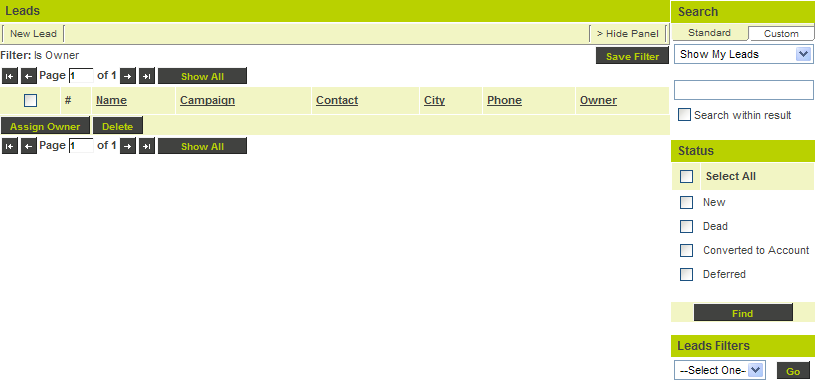
Lead statuses are a simple filtering method that you create to allow individuals to see selected groups of leads. Typical statuses are:
- New – indicating a new lead.
- Dead – indicating a lead that is not workable.
- Converted to Company – indicating that the lead is now a company.
- Deferred – indicating that you may wish to work on this lead in the future.
Only managers can delete leads. This feature provides for campaign-level reporting, where you wish to know how many leads for each type were generated from any given campaign.
You should indicate a lead is dead or some similar status when you no longer believe it is workable.
Lead statuses are set using the Lead tab.
1. Click the My Leads tab.
The new Lead tab is there for every user.
2. Click the Settings tab.
The Settings page is displayed.
Under Lead Settings, click Statuses.
The Lead Status page is displayed.
Each Status is entered in the right.
- The Display order determines which order you wish to see the statuses displayed.
- The Color code is not required.
- The name is set to the name of the status.
3. Create the following Lead Status:
4. Click the Save button.
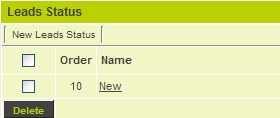
The Lead status is added.
5. Click the New Lead Status to clear the Edit Status fields.
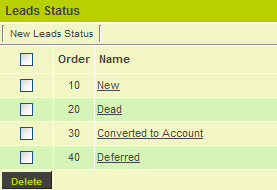
6. Add the following additional statuses:
Whenever entering any status, it is a good idea to use increments of ten. Consequently, should you need to insert an additional status at a later date; you don’t have to re-number any of the existing statuses.


