Difference between revisions of "Exporting Companies and Contacts"
(deprecating) |
|||
| Line 1: | Line 1: | ||
| + | {{Deprecated}} | ||
| + | |||
| + | |||
You can also export the companies and contacts associated with the UTA item when exporting the item. Using this technique these companies and contacts will be recreated within the receiving [[Instance|instance]] if they don’t already exist. | You can also export the companies and contacts associated with the UTA item when exporting the item. Using this technique these companies and contacts will be recreated within the receiving [[Instance|instance]] if they don’t already exist. | ||
| Line 85: | Line 88: | ||
{{PrevNextMid}} [[UTA Data Exchange]] | {{PrevNextMid}} [[UTA Data Exchange]] | ||
{{PrevNextEnd}} | {{PrevNextEnd}} | ||
| − | [[Category:ObjectSync | + | [[Category:ObjectSync]] |
Latest revision as of 16:32, 19 October 2017
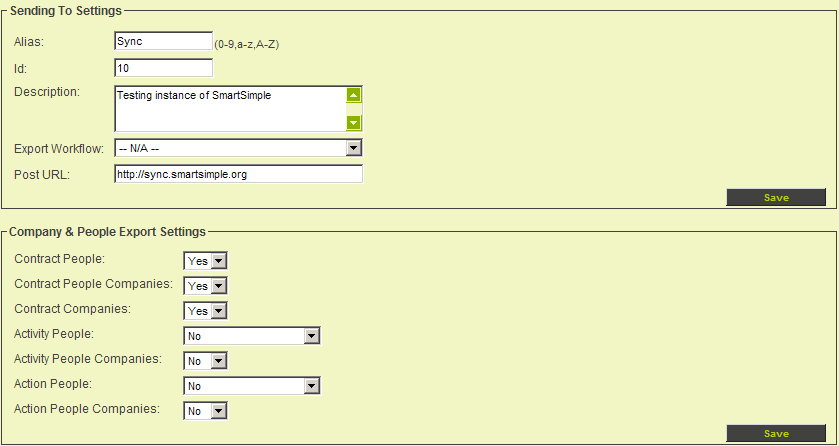
You can also export the companies and contacts associated with the UTA item when exporting the item. Using this technique these companies and contacts will be recreated within the receiving instance if they don’t already exist.
| Export Level 1, 2, 3 People | Transfer the users/contacts associated with the Level 1, 2, 3 items and recreate these contacts in the receiving instance. |
| Export Level 1, 2, 3 People Companies | Transfer the users/contacts associated with companies associated with the Level 1, 2, 3 items and recreate these contacts in the receiving instance. |
| Export Level 1, 2, 3 Companies | Transfer the companies associated with the Level 1, 2, 3 items and recreate these companies in the receiving instance. |
1. Enter the following Sending to information.
2. Click the Save button.
Generating an Encryption Key
Next you will generate the encryption that will be used to encrypt the information before sending, and decrypt after receiving in the other instance.
- Generate a New Key - Select check box to generate a new security key (click Save).
- Acceptance Key - Combination of Id and Alias (System applied).
- Decryption Key - Key code generated by system.
- Key Version - Version number of generated decryption key code.
1. Click the Generate a New Key check box.
2. Click the Save button.
The New Key is generated.
Later you will copy and paste this key into the receiving instance.
Configuring Fields to Export
The Level 1, Level 2, Level 3, company and contacts fields that need to be exported must be selected. By default, NO FIELDS are selected.
1. Scroll below the Key Settings Section of the page.
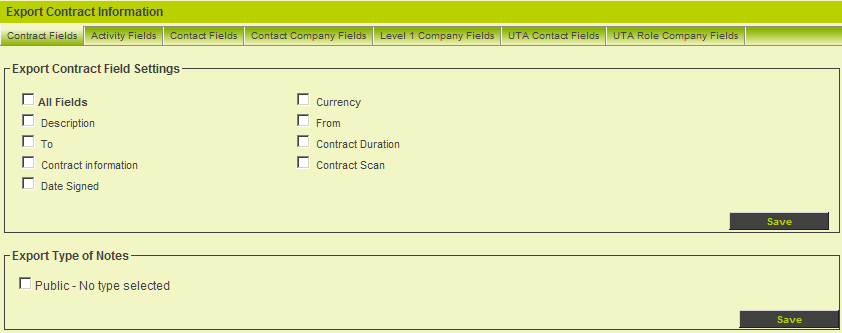
A series of tabs are used to display the fields for each entity that you may wish to export. These consist of:
- Contract Fields – the standard and custom fields associated with the Level 1 items.
- Activity Fields – the standard and custom fields associated with the Level 2 and Level 3 items.
- Contact Fields – the standard and custom fields associated with contacts associated with Level 1, 2 or 3. For contact fields the first name, last name and email address are always selected, as these fields are used to search for an existing contact in the receiving instance.
- Contact Company Fields – the standard and custom fields associated with contacts.
- Level 1 Company Fields – the standard and custom fields associated with companies associated with Level 1 items.
- UTA Contact Fields – custom fields associated with contacts associated with the Level 1 item through their UTA role.
- UTA Role Company Fields – custom fields associated with companies through the Level 1 item though their company UTA role.
For contact company and company fields the name and address fields are always selected as these fields are used to search for an existing company in the receiving instance.
2. Select the All Fields check box in the Contract Fields tab.
3. Click the Save button.
4. Repeat this process for all the tabs, with the exception of the UTA Contact Fields and UTA Role Company Fields as there are no fields established for these entities.
5. You must click the Save button for each tab in turn.
Exporting Note Types
You can also export specific note types to the receiving copy. This feature allows you to exchange data, but control which types of notes can be transferred.
1. Scroll below Contract Fields list.
The Export Type of Notes section is displayed.
2. Select the Public – No Type selected to be displayed.
3. Click the Save button.


