Difference between revisions of "Split Screen"
| Line 38: | Line 38: | ||
| − | [[Image:SplitScreen 2.png| | + | [[Image:SplitScreen 2.png|1050px|border]] |
[[Category:UTA Settings]][[Category:Universal Tracking Application]][[Category:Security]] | [[Category:UTA Settings]][[Category:Universal Tracking Application]][[Category:Security]] | ||
Revision as of 12:36, 10 October 2017
The Split Screen feature is available against certain list views within the System, including the list views that display Custom Fields.
The Split Screen feature is also available within individual level 2 and 3 UTA records when the user has appropriate role based permissions.
List Views
The Split Screen feature available against list views within the System is switched on by default.
There will be a small icon along the top of the page, above the list view.
If you click this icon then the screen splits in 2, with the list view still displayed on the left side of the screen.
If you click on any of the records listed on the left then that record will be displayed on the right hand side of the screen.
The icon along the top of the screen also changes to reflect the fact it will now hide Split Screen mode.
Level 2 and 3 UTA records
The Split Screen feature available within individual level 2 and 3 UTA records is controlled by the Enable View Parent permission available within the UTA Feature and Function Permissions.
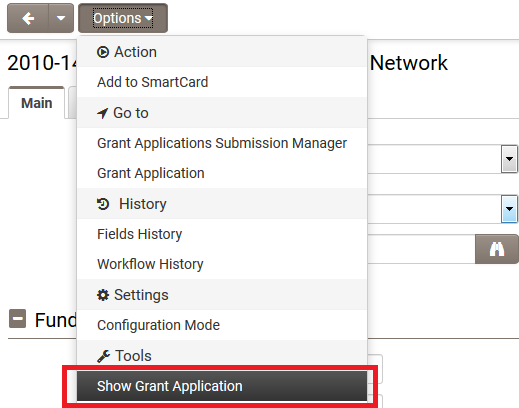
If your role has the permission set against a UTA then when you access a level 2 or 3 record and click on the Options menu you will see an entry under Tools that allows you to show the Parent record.
If you click this icon then the screen splits in 2, with a read-only version of the parent record exposed on the left side of the screen and the child record on the right of the screen. The Options menu you will see an entry under Tools that allows you to hide the Parent record.


