Difference between revisions of "Creating a Basic Report"
Julia Decker (talk | contribs) |
Julia Decker (talk | contribs) |
||
| Line 47: | Line 47: | ||
It will not be possible to preview this report, as you have not selected any table(s) nor selected any fields from the tables in the '''Report Builder'''. | It will not be possible to preview this report, as you have not selected any table(s) nor selected any fields from the tables in the '''Report Builder'''. | ||
| + | =Report Tabs= | ||
| + | |||
| + | In addition to the '''Delete''' and '''Preview''' buttons, a new set of tabs are displayed at the top of the report window. | ||
| + | |||
| + | [[Image:Reps4.png]] | ||
| + | |||
| + | * '''Report Builder''' – displays the window used to construct the report. | ||
| + | * '''Assign roles''' – used to set the [[Role|role]] permissions that will allow other [[User|users]] to access the completed reports. | ||
| + | * '''Set Sub-Reports''' – used to build a “nested” report. | ||
| + | * '''Report Template''' – used to control the layout and formatting of the report. | ||
| + | * '''Charts''' – used to create one or more charts to be associated with the report. | ||
| + | * '''Advance Export Setting''' – used to create a specific export format for the report. | ||
[[Category:System Management]][[Category:View It]][[Category:Reports]] | [[Category:System Management]][[Category:View It]][[Category:Reports]] | ||
Revision as of 13:19, 28 November 2007
In this article, you will build a report that lists all your contacts displaying their first name, last name, and title.
1. Click the Communications, View Reports window.
The Reports window is displayed.
2. Click the New Report tab.
The New Report window is displayed.
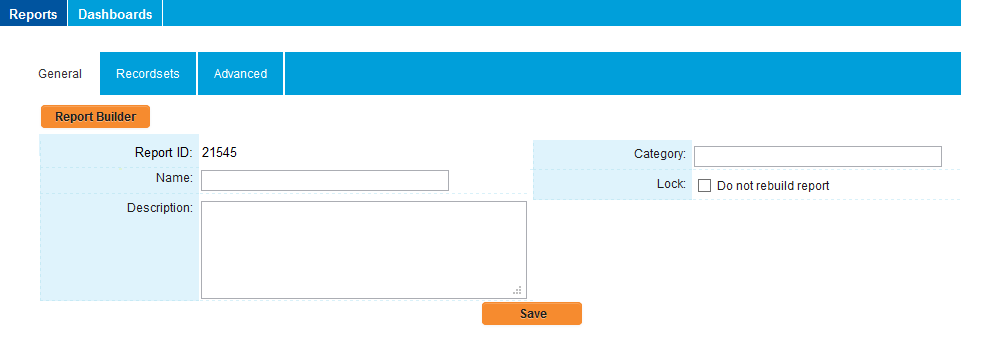
This window contains the following settings:
Report Name - The name of the report will be displayed to users accessing the report. Tab Name - The tab you wish to associate with this report. Entering a unique tab name will create a new entry in the Report Type combo box. Entering an existing tab name will display this report in the existing tab. View - Determines if the report should show the information in a list – List View, or one record at a time – Single Record View. Internet Enabled - Displays a URL that allows the report to be displayed accessed over the internet without the need for a user to log into the system. This type of report is useful for creating public reports. Report Description - Narrative description of the purpose of the report. Criteria Description - Text used to prompt the user when they are required to enter some criteria values. Report Tables- This section is used to select which tables are required in the report, the relationships between the tables, and the primary table. The primary table determines how data will be joined when multiple tables are selected.
3. Set the Name to Contact List.
4. Set the Tab to Training Reports.
This will create a new entry in the Report Combo Box – Training Reports.
5. Set the Description to List Contacts - All.
6. Click the Save button.
The report is saved and the Delete and Preview buttons are displayed.
It will not be possible to preview this report, as you have not selected any table(s) nor selected any fields from the tables in the Report Builder.
Report Tabs
In addition to the Delete and Preview buttons, a new set of tabs are displayed at the top of the report window.
- Report Builder – displays the window used to construct the report.
- Assign roles – used to set the role permissions that will allow other users to access the completed reports.
- Set Sub-Reports – used to build a “nested” report.
- Report Template – used to control the layout and formatting of the report.
- Charts – used to create one or more charts to be associated with the report.
- Advance Export Setting – used to create a specific export format for the report.
