Positioning Exported List View Results in your Excel Spreadsheet
From SmartWiki
 Click here to watch a video on creating and editing List Views.
When exporting to Excel has been enabled for your list view, you can also tell the system where in the resultant Excel file to position your results.
- Go to the list view configuration page.
- Click into the list view for which you wish to enable exporting.
- Click on the "Export" tab.
- In the "Start Location" and "Query String Location" fields, enter the numeric value corresponding to the worksheet, column and row your list view results should be exported to.
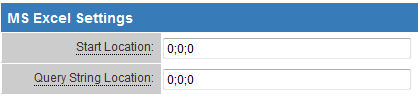
- The "Start Location" field determines the starting position of your list view results (the "data").
- The "Query String Location" field determines the starting position of the search criteria currently selected to filter your list view results (the "metadata"). If your list view is not filtered, the Query String will be blank.
- The default setting is 0;0;0 for both fields. This means that your list view results will be exported, with the topmost, leftmost value appearing in the first worksheet, in cell A1.
Note: The syntax for both the "Start Location" and "Query String Location" fields is worksheet;column;row
The numbering begins at zero, so the first worksheet, first column or first row would be referenced with a 0, as opposed to 1.
Therefore, if you wanted either the list view results or the metadata to be placed in the
 third worksheet of your Excel file, starting in cell B4, you would enter 2;1;3
The syntax for the first worksheet, cell A1 would be 0;0;0</pre>
Note: If the worksheet designated as the export location does not exist, the Excel file will not be created.
In other words, if a three-tabbed worksheet is selected as the export template,
 and 4;0;0 is selected in either the "Start Location" or "Query String Location" fields, the Excel file will not be created.
See Also
- List View Overview
- Accessing the List View Configuration Page
- Configuring List Views
- Setting the Sort Order on a List View
- Exporting List View Results to Microsoft Excel
- Exporting List View Results to Microsoft Word
- Download files from List View
- Preparing Existing Word Template for List View Export
- Quick Edit
- Historic List View
- Configuring Interactive List View Charts
- Using an Excel Template for List View Export Results