Difference between revisions of "Dynamic Field Visibility Control"
(→Define the branching) |
|||
| Line 65: | Line 65: | ||
| − | Once the Primary field is selected then the next step is to define the path through which other fields | + | Once the Primary field is selected then the next step is to define the path through which other fields will be displayed. The first step here is to create branches based on the options available against the Primary field. |
* Click on the plus sign, inside the green circle, adjacent to the Primary field. This exposes the Add New Branch screen. | * Click on the plus sign, inside the green circle, adjacent to the Primary field. This exposes the Add New Branch screen. | ||
| Line 77: | Line 77: | ||
* Click on the Apply button. You will be taken back to the Dynamic Field Visibility Control screen, which will show all branches created under the Primary field. The screen shot below shows 2 branches, one for the English option associated with the ''Available in'' field, and one for the French option associated with the ''Available in'' field. | * Click on the Apply button. You will be taken back to the Dynamic Field Visibility Control screen, which will show all branches created under the Primary field. The screen shot below shows 2 branches, one for the English option associated with the ''Available in'' field, and one for the French option associated with the ''Available in'' field. | ||
[[Image:Dynamic Field Visibility 8.png]] | [[Image:Dynamic Field Visibility 8.png]] | ||
| − | |||
| − | |||
| − | |||
===Define the branch dependent custom field=== | ===Define the branch dependent custom field=== | ||
Revision as of 09:57, 28 September 2016
The Dynamic Field Visibility Control feature is used to create sets of fields that are displayed or hidden dependent on the value selected from another custom field.
The feature is similar to the functionality currently offered by the Display Only – Web Page View, but is designed for scenarios where the required logic is more complex than the dynamic control field allows. This includes . . .
- Multiple levels of field branching logic
- Dependent fields that are not displayed directly under the controlling field
Contents
Configuration
The feature uses tree settings to add fields and branches. The actual steps for configuring the Dynamic Field Visibility Control feature are summarised below:
- Create new Dynamic Field Visibility Control
- Define the Primary field
- Define the branching
- Define the branch dependent custom field
Create new Dynamic Field Visibility Control
The Dynamic Field Visibility Control feature can be created against level 1s, level 2s, level 3s, users and Organizations.
- Click on the Dynamic Field Visibility Control link for the entity that you wish to create the feature against.
- A list view of previously configured logic is displayed. Click on the New Dynamic Field Visibility Control button.
- The New Dynamic Field Visibility Control is displayed. Populate the Name and, if necessary, the description field and click Save.
- When the page refreshes the user will be able to define the Primary field.
Define the Primary field
The Primary field, and indeed all controlling custom fields, must be either a Select Many – Check Box or a Select One – Combo Box.
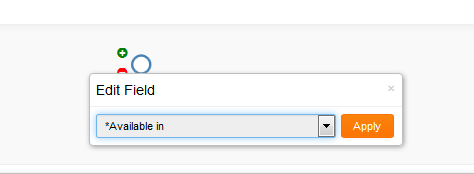
- Click on the Primary field icon. This exposed the Edit Field option, which includes a drop-down showing all Check Box and Combo Box custom fields available for the current entity.
- Select the relevant custom field and click on the Apply button. The field name will now appear instead of the Primary Field text.
Define the branching
Once the Primary field is selected then the next step is to define the path through which other fields will be displayed. The first step here is to create branches based on the options available against the Primary field.
- Click on the plus sign, inside the green circle, adjacent to the Primary field. This exposes the Add New Branch screen.
- Click on the text field within the Add New Branch screen to expose and select one of the Primary field options.
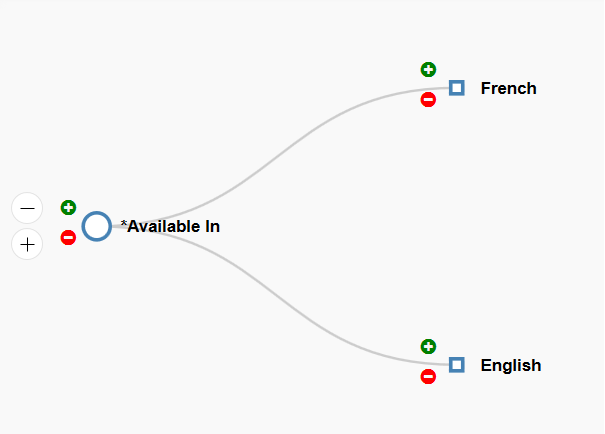
- Click on the Apply button. You will be taken back to the Dynamic Field Visibility Control screen, which will show all branches created under the Primary field. The screen shot below shows 2 branches, one for the English option associated with the Available in field, and one for the French option associated with the Available in field.
Define the branch dependent custom field
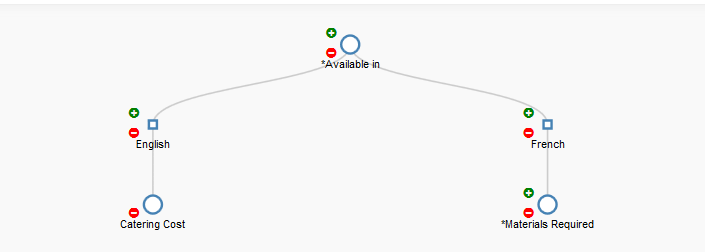
The final step in the process is to define the fields that should be exposed based on the branches created. You can have multiple fields dependent on the one branch, but each field must be added individually using the steps below.
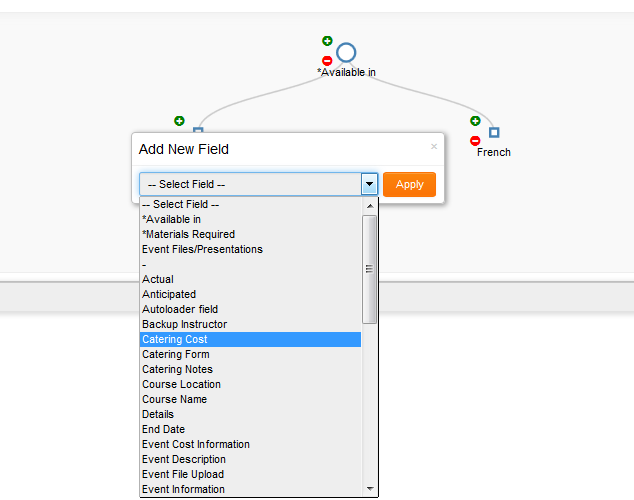
- Click on the plus sign, inside the green circle, adjacent to the appropriate branch. This exposes the Add New Field screen.
- Click on the text field within the Add New Field screen to expose and select a custom field. All available custom field types will be listed, not just the combo and check box options.
- Click on the Apply button. You will be taken back to the Dynamic Field Visibility Control screen, which will show the branches created under the Primary field as well as the custom filed under the relevant branch.
NOTE: If you select a Select Many – Check Box or a Select One – Combo Box field as the branch dependent custom field then you can add a second level of field branching logic. If the field is not one of these 2 types then no further branching is permitted.


