Creating a Portal Interface
Contents
Creating a Role Based Portal
You can create a simplified interface for a role by using the Portal interface.

Comparison between Menu and Portal Interfaces
The following table outlines the key differences between the two interfaces.
| Feature | Administration | Portal |
| Navigation | Left Panel contains menu items | Icons displayed in main panel and also optionally displayed in the left panel. Left panel icons can be suppressed. |
| Interface Title | Not applicable | Portal Title associated with the role is displayed next to the uploaded company image. |
| Home Button | Left navigation below uploaded company image | Top right of the window. Home button takes user back to Portal icons. |
| Logout button | Left navigation below uploaded company image | Top right of the window |
| Personal Settings Link | Above uploaded company image | Below uploaded company image |
Creating a Portal Interface
In this exercise you will create an employee portal.
1. Click the Configuration, Roles and Security Settings link.
2. Click on the hyperlink for "User Roles."
3. Click on the Edit option for the "Employees" role.
4. Click the "Shortcut" tab.
New Shortcuts are added using the right panel of the window, and are listed on the left side of the window once created.
The following tabs are displayed at the top of the Portal window:
- New Shortcut – clears the shortcut displayed in the top of the window, and starts a new shortcut.
- Portal Design – displays the advanced portal settings that control overall look and feel.
- Import – imports the shortcuts from a portal you have previously created.
- Export – exports the shortcuts so you can create another portal for a different role.
- View Roles – returns to the Role List.
If you wish to edit an existing shortcut, click on the name and it will be displayed in the top panel.
The following controls are displayed in the top panel.
- Shortcut – displays the list of SmartSimple Shortcuts.
- Name – the name you want to display to the right of the shortcut icon.
- Description – the description you want to display below the shortcut icon.
- URL – the link to the item. See also Determining the URL of a report.
- Order – the display order of the icons in the portal. Icons are displayed left to right and top to bottom.
- Icon Type – the type of icons you wish to use. Click on the Show button to choose the icon from a selection page.
- Icon – the specific icon taken from the icon type.
- Condition - allows you to use conditional logic to determine whether or not this icon is visible
- See Visibility Condition for examples
There are three buttons displayed in the top pane:
- Save – save the shortcut.
- Clear – clear the current shortcut from the top panel.
- Preview – display the portal. In preview mode the portal shortcuts will not function.
Make sure you click the Clear button or New Shortcut tab when adding shortcuts; otherwise you may overwrite the same shortcut on the list.
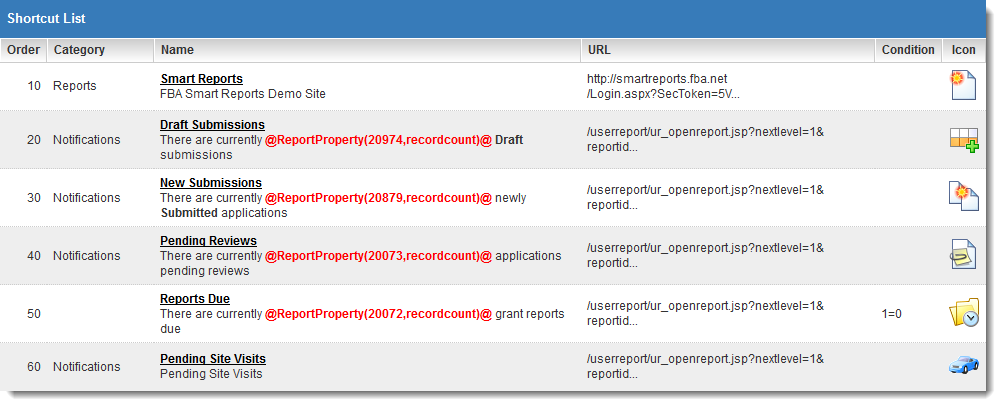
3. Add the following Shortcuts:
4. Click the Preview button.
The Portal Preview is displayed.

The selected shortcuts are displayed in the main pane of the window and also displayed as icons in the left navigation pane.
5. Close the Preview window.
Testing the Portal
1. Switch to the other browser.
2. Click the Browser’s Refresh button.
The portal is displayed.
3. Test the Portal functionality.