Creating a Role Based Portal
From SmartWiki
Revision as of 16:27, 6 September 2007 by Julia Decker (talk | contribs)
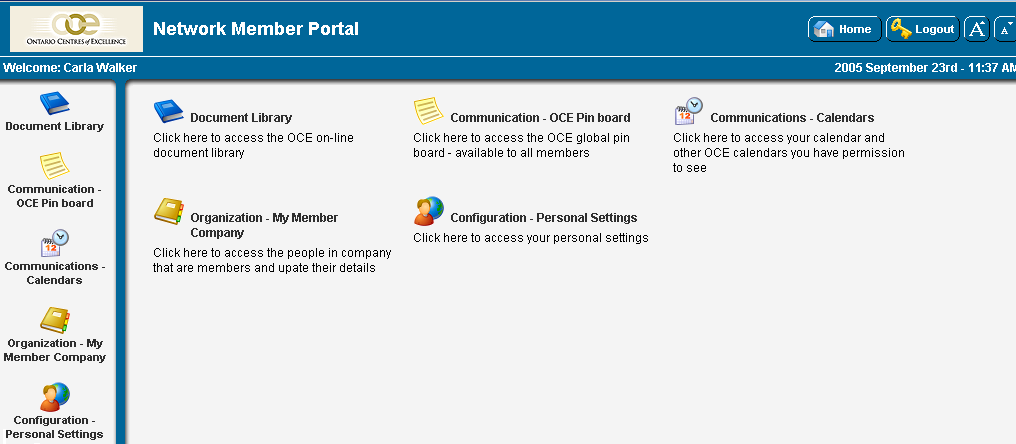
You can create a simplified interface for a role by using the Portal interface.
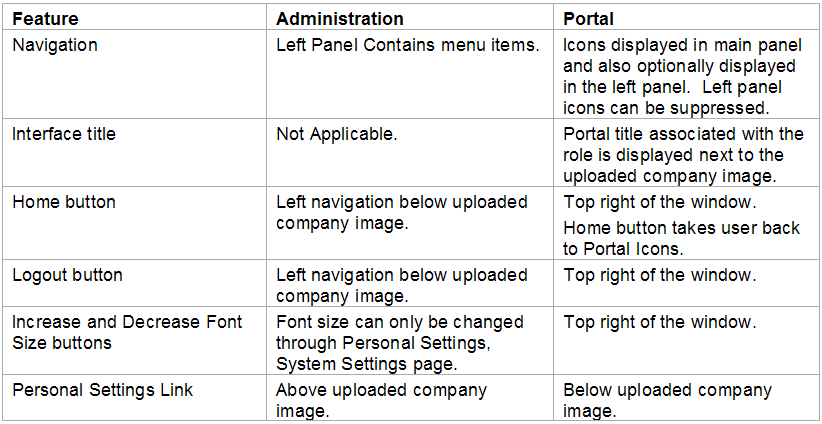
Comparison between Menu and Portal Interfaces
The following table outlines the key differences between the two interfaces.
Steps to Create a Portal
A Portal interface is created using the following steps:
- Click the Portal button in the Roles list for the required role.
- Add each icon and narrative text required.
- Most SmartSimple functions are selectable through the Shortcut List within the Portal screen, but other links can be manually added and associated with an icon and narrative text.
- A small wrench symbol is displayed to the left of the Portal button in the Role List view once a portal has been established for that role.
- The Portal interface is automatically displayed to users in the associated role, and the administration interface will no longer be displayed.
- If the user is in multiple roles with associated portals, then a combined portal will be displayed. Duplicate icons from each role are not displayed.
- The Portal interface is never displayed to Global or Local Administrators. If a user is an administrator and has other roles with associated portals, these are accessed through the Applications, My Portal menu.
- You must enable an associated menu item for the associated Portal Shortcut to function. If you do not, the system message – function not available please contact system administrator – will be displayed to the user.
If you want the portal user to see the people on-line feature, you must enable the People on-line menu for the role. There is no portal icon that represents this feature.

