Integrating Email with the UTA
Contents
Setting up Email within a UTA
If you are working with a with email correspondence that is important to track, then you should consider integrating email messages within your application.
You can configure Level 2 and Level 3 records to be tracked as emails which are attached to their relevant parent record.
Instructions on how to configure Level 2 types as emails are as follows. For example, if you are working with “cases” (Level 1 Entity), it may be important to have a complete audit trail of all email transactions around the case.
When you review the case you could see all emails both sent and received, plus you can create an email directly within the case.
To use this feature you will need to perform the following steps:
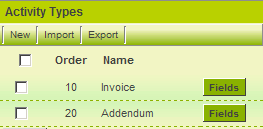
- Create a Level 2 item that will function as the transaction type to store the email. Emails can be stored as Level 2 items.
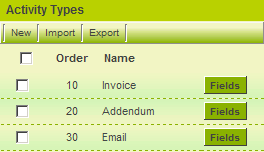
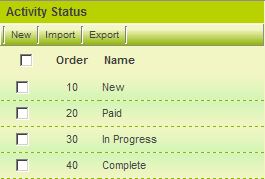
- Generally, you will name the item type “email” and have some statuses within the Level 2 statuses to reflect email items (Sent and Received).
- Enable the email tab within the application so the user can click this tab when they wish to send an email.
- Once enabled, you can send an email from within the UTA or from any email address that you click on in the system. When you are not in the UTA and send an email, you are prompted to select the UTA and the Level 1 item that the email should be associated with.
- In order to set this up properly you will need to establish each user’s email account setting within your instance of SmartSimple to ensure that the email is sent from your email server. If you don’t perform this step the email will be sent though the built-in email server within SmartSimple, but as the sender will not match the domain it may be flagged as spam by the recipient’s system.
In the following exercise, you will use the original Contract Tracker application:
First you will create the Level 2 type to store the email messages.
1. Choose Applications, Contract Tracker menu.
2. Click the Settings tab.
3. Scroll to the Activity Setting and click the Types link.
4. Click the New tab.
5. Create the following type:
6. Click the Save button.
Creating an Email Status
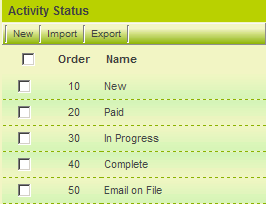
Though you could use an existing status for email such as new, it is better to create a specific status.
1. Click the Settings tab.
2. Scroll to the Activity Settings and click the Statuses link.
3. Click the New tab.
4. Create the following status:
5. Click the Save button.
Linking the Email Type and Status to the UTA
Now you can configure the application to indicate that all email will be of the Level 2 type: Email with the status Email on File.
1. Click the Settings tab.
2. Scroll to the Contract Settings section.
3. Disable the Hide Email Tab check box.
This will enable the display of the email tab in each Level 1 item.
4. Scroll to the Email Activity section of the page.
This section is used to define the relationship between an email message and a Level 2 type and status.
- Default Activity Type is set to the Level 2 type that you wish to use to store the email message.
- Default Activity Status is set to the Level 2 status that you wish to set the item status.
- Display Contracts with the Selected Status is used to restrict the Level 1 items displayed when you are sending the email from some other area of SmartSimple. For example, if there are thousands of cases you may not want to show the cases with a closed status.
5. Configure these settings as shown below:
6. Click any Save button.
These settings indicate that all emails sent or received will be of the type “email” with the status “Email on File” and that when you send an email from some other part of SmartSimple, only Level 1 items with the status Negotiation or Under Review will be displayed.
Specifying which Level 1 Template can send Email
Before you can use the new email you need to indicate which Level 1 templates are “allowed’ to send email messages.
1. Scroll to the Contract Settings section.
2. Click the Templates link.
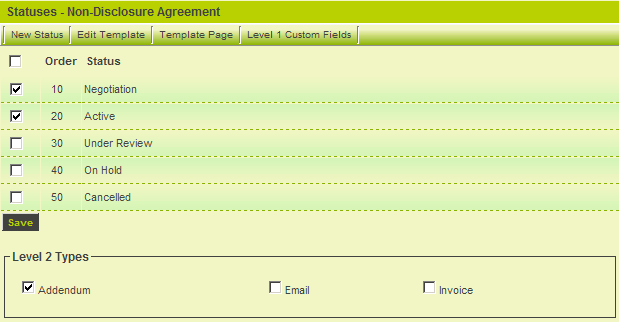
3. Click on the first template – Non-Disclosure Agreement.
The supported Level 2 types are displayed at the bottom right of the page.
4. Click the Email check box.
5. Click the Save button.
6. Repeat this process for each template.
Sending an Email Message
1. Click the Contracts tab.
2. Click into either of the contracts that you previously created.
The contract record is displayed.
The New Email tab is displayed at the top of the contract window.
3. Click the New Email tab.
The Email Message Centre is displayed.
4. Click the Compose button.
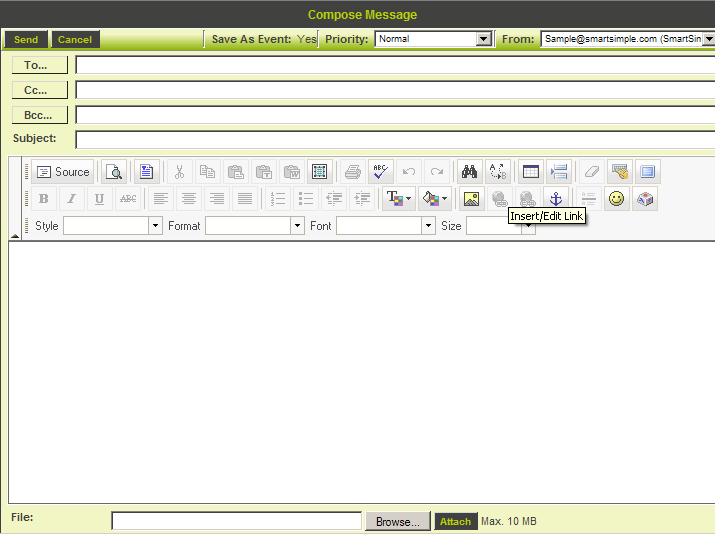
The email window is displayed.
5. Click the To… button and select a contact.
6. Set the Subject and Body to some sample text.
7. Click the Send button.
The email is sent and the Level 2 item created from the email.
8. Review the Level 2 activities at the bottom on the Level 1 item.
The email has been added to the activity list.
9. Click into the Item.
The email is displayed.
The original email can be displayed through the View Email tab.
10. Click the View Email tab.
The original message is displayed and can be forwarded or replied.
11. Close the View Email window.
Configuring Level 3 Types as Emails
