Difference between revisions of "UTA Standard Field Settings"
From SmartWiki
| Line 1: | Line 1: | ||
=UTA Standard Fields= | =UTA Standard Fields= | ||
| − | The following describes the settings for the [[Standard Field]]s found on the UTA Level 1, Level 2 and Level 3. These can be configured via the | + | The following describes the settings for the [[Standard Field]]s found on the UTA Level 1, Level 2 and Level 3. These can be configured via the [[UTA Settings - Entity|Entity tab]] of the [[UTA Settings Page]]. |
| − | [[ | + | |
| + | *On the [[UTA Settings - Entity|Entity tab]], click on the link for "Standard Fields" in the section Level 1, Level 2 or Level 3 sections. | ||
| + | *The following page will be displayed ''(example shown is Level 1 standard fields)'': | ||
| + | {{StandardFieldEditPage}} | ||
===Adding a field=== | ===Adding a field=== | ||
| − | * | + | * In the left hand list of standard fields, click on the name of the standard field you wish to add. |
| − | * | + | * In the right hand standard field detail frame, enter text into the "Caption" field. |
| − | * | + | * Scroll to the bottom of the right hand frame and click the Save button. |
| + | * The standard field will now be displayed in your UTA, using the nomenclature you have defined. | ||
===Removing a field=== | ===Removing a field=== | ||
| − | * | + | * In the left hand list of standard fields, click on the name of the standard field you wish to delete. |
| − | + | * Scroll to the bottom of the right hand frame and click the Delete button. | |
| − | + | * You will be prompted with "Are you sure to delete the current field settings?" Click "Yes" if you are sure. | |
| − | |||
| − | |||
| − | * | ||
| − | |||
| − | |||
| − | |||
| − | |||
| − | * | ||
| − | |||
| − | |||
| − | |||
| − | |||
| − | |||
| − | === | + | ==Settings== |
| − | |||
| − | + | The following settings are available for each standard field. | |
| − | |||
| − | |||
| − | + | {{StandardFieldSettings}} | |
| − | |||
| − | |||
| − | === | + | ===[[Status Field Permissions|Status - Field Permissions]]=== |
| − | + | These [[Status Field Permissions|settings]] allow you to control by the [[Status]] of the record whether or not the field can be viewed and/or modified. | |
| − | |||
| − | |||
| − | |||
| − | |||
| − | |||
==See Also== | ==See Also== | ||
* [[Visibility Condition]] | * [[Visibility Condition]] | ||
* [[Edit Condition]] | * [[Edit Condition]] | ||
| + | * [[UTA Settings - Entity]] | ||
| + | |||
| + | {{PrevNextStart}}[[Standard Level 1 Field List]] | ||
| + | {{PrevNextMid}}[[Status Field Permissions]] | ||
| + | {{PrevNextEnd}} | ||
| − | [[Category:Universal Tracking Application]] | + | [[Category:Universal Tracking Application]][[Category:UTA Settings]] |
Revision as of 14:11, 15 July 2013
UTA Standard Fields
The following describes the settings for the Standard Fields found on the UTA Level 1, Level 2 and Level 3. These can be configured via the Entity tab of the UTA Settings Page.
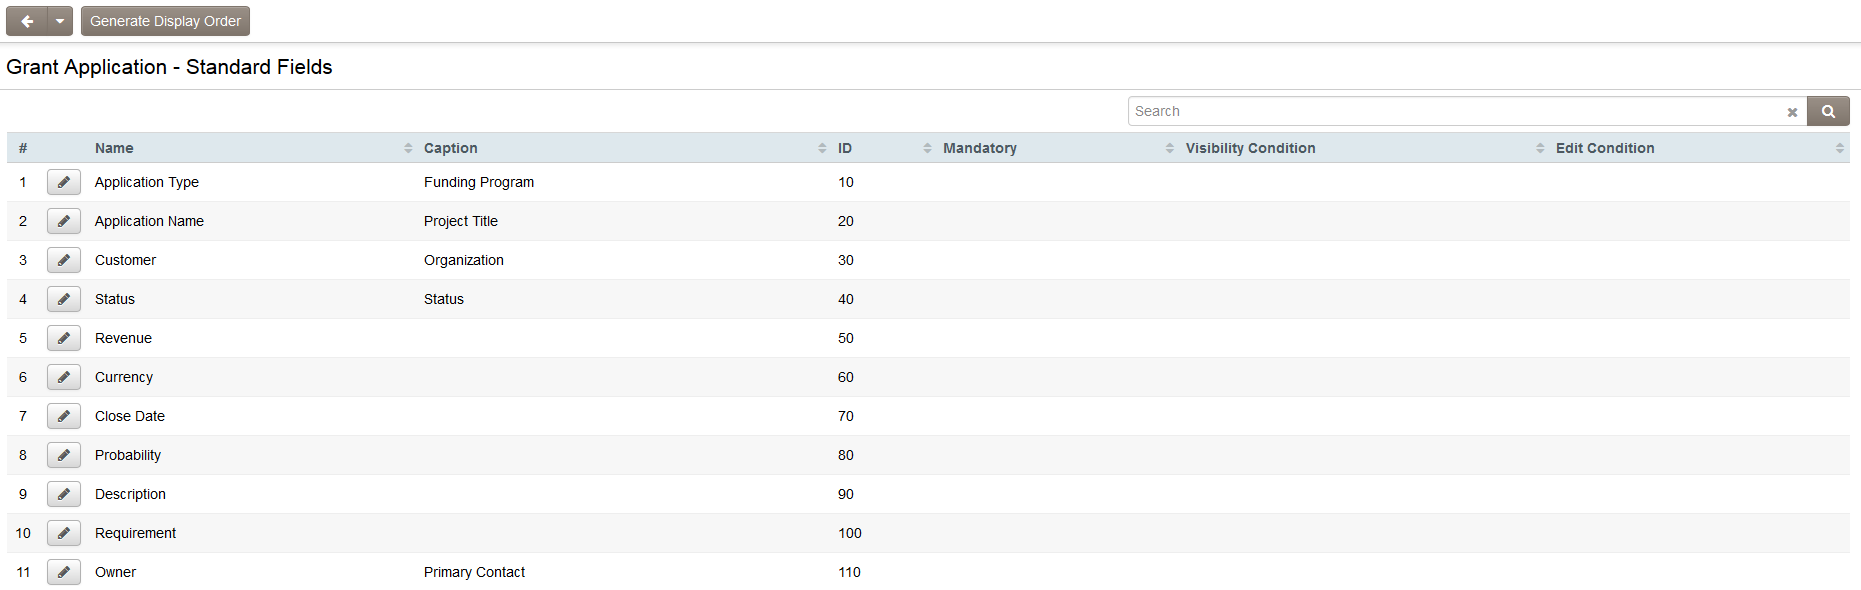
- On the Entity tab, click on the link for "Standard Fields" in the section Level 1, Level 2 or Level 3 sections.
- The following page will be displayed (example shown is Level 1 standard fields):
Adding a field
- In the left hand list of standard fields, click on the name of the standard field you wish to add.
- In the right hand standard field detail frame, enter text into the "Caption" field.
- Scroll to the bottom of the right hand frame and click the Save button.
- The standard field will now be displayed in your UTA, using the nomenclature you have defined.
Removing a field
- In the left hand list of standard fields, click on the name of the standard field you wish to delete.
- Scroll to the bottom of the right hand frame and click the Delete button.
- You will be prompted with "Are you sure to delete the current field settings?" Click "Yes" if you are sure.
Settings
The following settings are available for each standard field.
Language
When a new language is selected, you will have the option to enter new values for the Caption, Tool Tip and Validation Messages.
- See Also: Custom Field Language Settings.
https://wiki.smartsimple.com/index.php?title=Template:StandardFieldSettings&action=edit
Caption
- All fields with a name in this field have been enabled.
Mandatory
- The Mandatory option will ensure that a value has been input into the field before the record can be saved.
- This validation is not performed when if the Save Draft button (if enabled) is used to save the record.
- See Statuses for details.
Read Only
- The Read Only option prevents the value in the field from being changed by the user.
- The field can still be updated programmatically through the use of Template / Type Formulas or Browser Scripts.
Track Changes
- The Track Changes option enables tracking of any changes made to the standard field.
- Fields that have "Track Changes" enabled will be displayed with an icon to indicate this.
- Users that have been given the relevant Manager Permission will be able to view the field history.
Server Validation
- The Server option will enable Server-Side Validation for the Standard field.
Tool Tip
- Allows you to define "mouse-over" help text.
- When the user hovers their mouse pointer over the caption, the text in the Tool Tip section will appear.
- See Tool Tip for additional detail.
Validation
- Allows you to define custom validation for the page, based on the values entered into this field. See JavaScript Validation for detailed instructions.
Validation Message
- This box is used to control the message that is displayed when the user does not complete a Mandatory field and attempts to save the record.
- See Validation Message for more information.
Phone Number Format
- Available for the Phone and Fax standard fields.
- These settings determine how numbers entered into this field will be formatted.
- See Phone Number Format for details.
Enable Status Duration Log
- Available for the 'Status' standard field. This selector will appear if "Track Changes" is enabled. When the "Enable Status Duration Log" is enabled, each status change will update the Duration field on the current log record. The Duration (in days) can be exported using a report from the system.
- The options to "Populate Historical Data" and "Status for Daily Increment of Duration Log" will appear if "Enable Status Duration Log" is enabled. Clicking "Populate Historical Data" will complete a batch update status change history log of all existing records on the UTA to populate the Duration field. The "Status for Daily Increment of Duration Log" can select specific statuses where the daily increments of the Duration field applies.
Status - Field Permissions
These settings allow you to control by the Status of the record whether or not the field can be viewed and/or modified.
See Also