Difference between revisions of "UTA Standard Field Settings"
From SmartWiki
(→UTA Standard Fields) |
|||
| Line 1: | Line 1: | ||
=UTA Standard Fields= | =UTA Standard Fields= | ||
The following describes the settings for the [[Standard Field]]s found on the UTA Level 1, Level 2 and Level 3. These can be configured via the [[UTA Settings - Entity|Entity tab]] of the [[UTA Settings Page]]. | The following describes the settings for the [[Standard Field]]s found on the UTA Level 1, Level 2 and Level 3. These can be configured via the [[UTA Settings - Entity|Entity tab]] of the [[UTA Settings Page]]. | ||
| + | |||
| + | On the [[UTA Settings - Entity|Entity tab]], click on the link for "Standard Fields" in the section Level 1, Level 2 or Level 3 sections. | ||
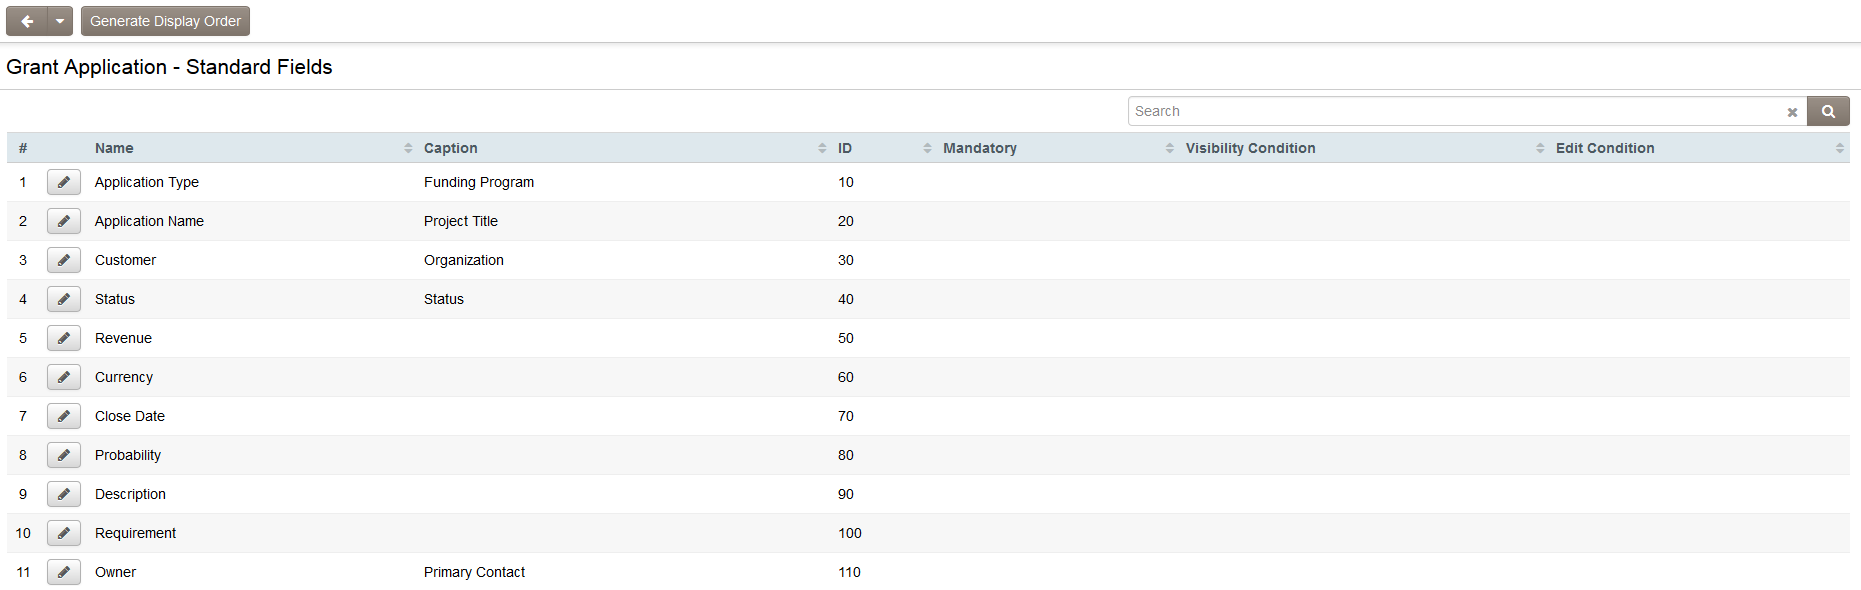
| + | The following page will be displayed ''(example shown is Level 1 standard fields)'': | ||
{{StandardFieldEditPage}} | {{StandardFieldEditPage}} | ||
Revision as of 09:40, 28 June 2013
Contents
UTA Standard Fields
The following describes the settings for the Standard Fields found on the UTA Level 1, Level 2 and Level 3. These can be configured via the Entity tab of the UTA Settings Page.
On the Entity tab, click on the link for "Standard Fields" in the section Level 1, Level 2 or Level 3 sections.
The following page will be displayed (example shown is Level 1 standard fields):
Adding a field
- Click the right arrow next to the field name and the field name will be copied to the Label box.
- You can also type directly into the Label field and provide any field name you wish.
- All fields that have a name in the Label field have been added.
Removing a field
- Click the left arrow next to the field name, or select and delete the field name from the label box.
- Any fields that do not have a name in the Label section will not be used.
Mandatory
- The Mandatory check box will ensure that a value has been input into the field before the record can be saved.
- This validation is not performed when if the Save Draft button (if enabled) is used to save the record.
- See Statuses for details.
Read Only
- The Read Only check box prevents the value in the field from being changed by the user.
- The field can still be updated programmatically through the use of Template / Type Formula or Browser Scripts
Track Changes
- The Track Changes check box enables tracking of any changes made to the standard field.
- Fields that have "Track Changes" enabled will be displayed with a sundial next to the field name.
- Users that have been given the relevant Manager Permission will be able to view the field history.
Label
- All fields with a name in this field have been enabled.
Instruction
- Entry into this text box is used to provide mouse over help on a field.
- Type the help in the instruction box to the right of the label box. When completing a form if the user hovers their mouse of the field the instruction will be displayed.
Validation Message
- This box is used to control the message that is displayed when the user does not complete a Mandatory field and attempts to save the record.
- See Validation Message for more information.
Visibility Condition
- Whether or not the Standard Field is visible can be controlled using conditional statements in this box.
- See Visibility Condition for more information.
Edit Condition
- Whether or not the Standard Field is shown as read-only or not can be controlled using conditional statements in this box.
- See Edit Condition for more information.
See Also